If you’re looking for a guide on how to convert M4A to MP3, you are in the right place. iTunes and Apple Music users are familiar with the M4A file format.
M4A was created as a successor to the MP3 format and has a higher quality in sound at the expense of file size, but MP3s are more popular.
Many audio devices will only recognize songs in the MP3 format. To enjoy your M4A files on every media player, you need to learn how to convert M4A to MP3 with/without iTunes. Read the guides here and follow the steps carefully.
Part 1. How To Convert M4A To Mp3 With iTunes
We cannot discuss how to convert M4A to MP3 on Windows/Mac without showing you how to do it with iTunes. iTunes is the official program for interfacing your iOS device with your computer.
For this method of converting M4A to MP3, you only need a computer with iTunes installed. Follow the steps below:

Step 1: Open iTunes
From your PC or MacBook, locate and open the iTunes application. Mac computers come with iTunes pre-installed. If you’re using a Windows system without iTunes, visit the iTunes website to download it for your Windows PC.
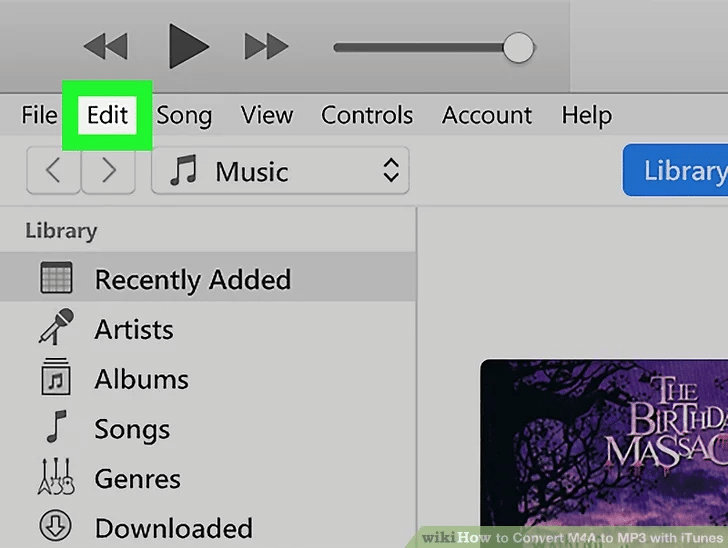
Step 2: Open the Edit Menu
The next step is to reveal the dropdown menu. For Mac users, click the “iTunes” button, while for Windows users, click the “Edit” button. You can find these buttons at the top menu bar of your computer.
From the drop-down menu, scroll down and click on “Preferences.”
Step 3: Set preferences for the import
In the “General” section of the Preferences window, locate and click on “Import Settings.” iTunes now shows you an import customization window. Click on the pull-down menu and select “Mp3 Encoder.”
The higher the quality settings you choose, the better the quality and the bigger the MP3 size. Click “Ok” to confirm your import settings. Hit the “Ok” button again in the “Preferences” window to save and close it.

Step 4: Convert the song to MP3
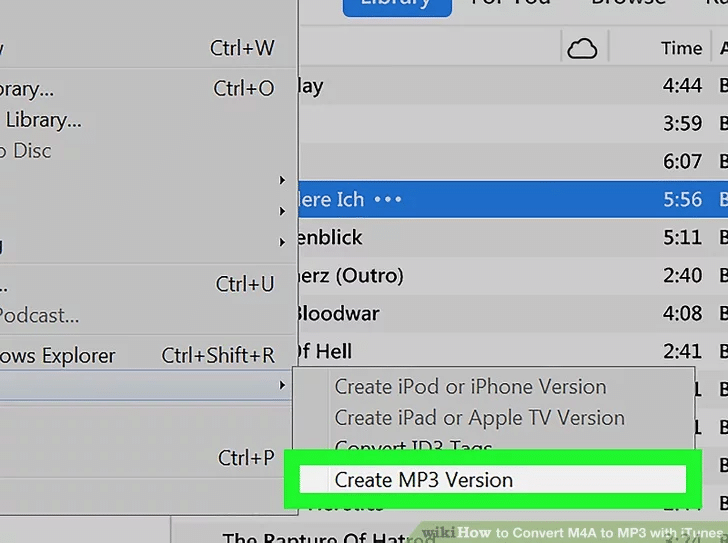
Go back to your music library and select the M4A file to convert. With the CTRL or Command key, you can select multiple audio files. Next, click “File” from the top left corner to show the dropdown menu. From here, scroll down and select “Convert” at the bottom of the menu.
This shows a slide-out menu. Select “Create Mp3 Version.” A duplicate song appears in your iTunes in the Mp3 format. To display the song in your local storage, right-click and select “Show In Windows Explorer” (PC) or “Show In Finder” (Mac).
Part 2: How To Convert M4A To MP3 Without iTunes (Windows/Mac)
If you don’t have iTunes available, you may wonder how to turn M4A into MP3. Although the iTunes method is the official way, that doesn’t make it the most recommended.
In this section, I will let you in on the amazing Apple music converter known as DRmare Audio converter. It has Windows and Mac editions. Learn how to convert M4A to MP3 without iTunes by following the guide below.
Step 1: Open DRmare Audio Converter
Visit DRmare official website and download the DRmare setup file, then run the installation. After installing, simply click the DRmare icon to launch it. iTunes will open when you launch DRmare Audio Converter.
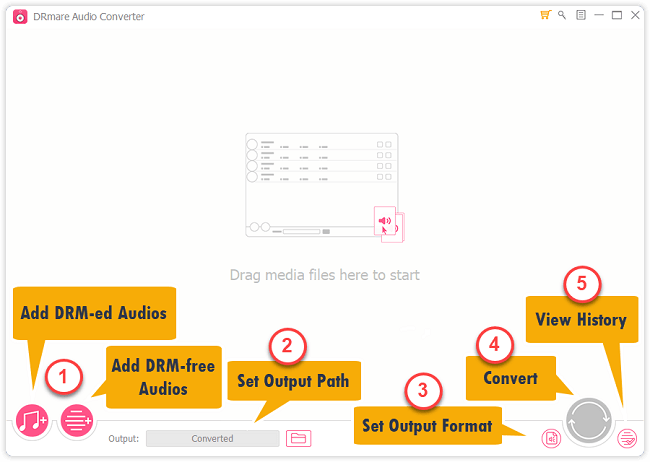
Step 2: Import Audio File into DRmare Audio Converter
The next phase is to import the music you want to convert into DRmare Audio Converter. On the application, you will find two “Add” buttons.
The first “Add” button is located at the bottom left area of the screen. Click on it to import protected audio files like Apple Music, iTunes audios, etc.
Alternatively, click on the second “Add” button if you wish to import normal audio files. If you’re not sure which “Add” button to use, simply drag and drop your audio file into the DRmare interface
Step 3: Modify the settings for converted audio
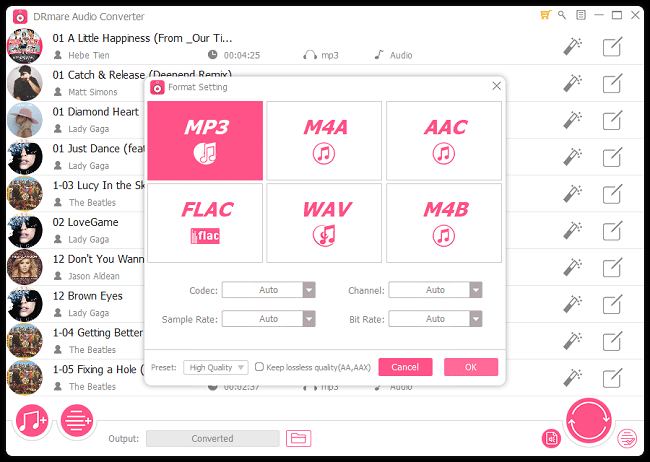
Click on the “Format” tab at the bottom left of the main window. A window pops up, allowing you to select your desired result format. Since we are learning to convert M4A to MP3 without iTunes, choose the “MP3” option here.
From this pop-up window, you can customize other audio file attributes, such as the bit rate, ID3 tag information, audio codec, etc. When you are done with these settings, click on the “OK” button.
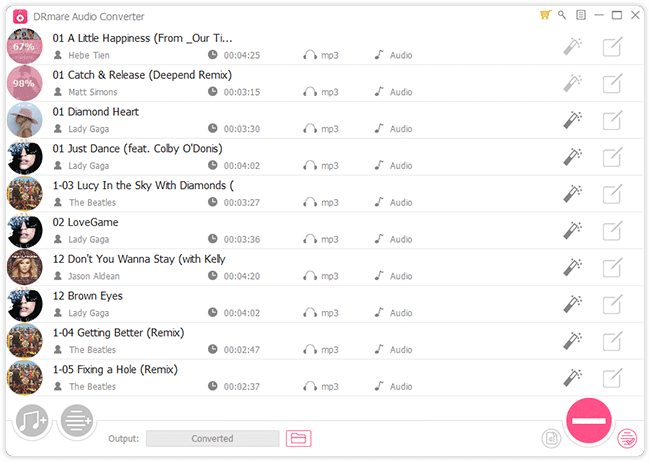
Step 4: Convert the audio to MP3
When you are satisfied with your settings and close the popup window, click the “Convert” button to start converting. DRmare is quite fast. Nevertheless, the number of audio files may affect its speed.
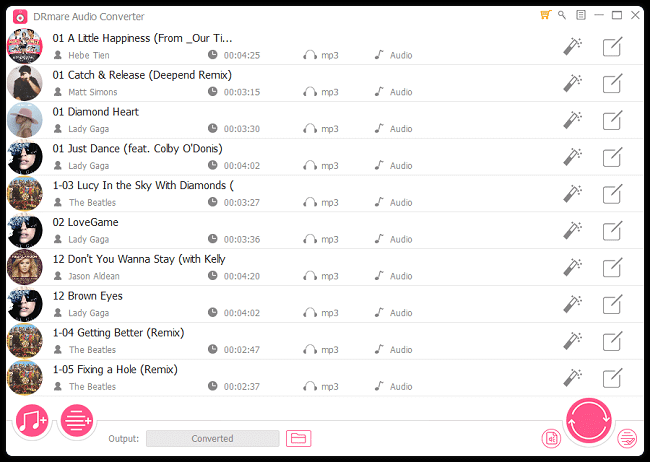
Step 5: Access Your Converted File
Once the conversion is done, locate the converted audio files from the destination folder. These converted songs will be free from every limitation, and you can enjoy them on your favorite media players or devices, such as iPods, MP3 players, Zune, car radio players, etc.
Part 3: How To Convert M4A To MP3 In Windows Media Player
While DRmare Audio Converter is recommended in this guide, you may be surprised to know that all this while, you had a program that could convert M4A to MP3 on your Windows machine.
Windows Media Player can also help you accomplish this task. Continue reading this section to learn how to convert M4A to MP3 using Windows Media Player.
Step 1: First, navigate to the folder in which the M4A audio file is saved. Next, right-click on the file, click “Open With,” and choose “Windows Media Player.” Alternatively, drag and drop the M4A file onto the Windows Media Player interface.
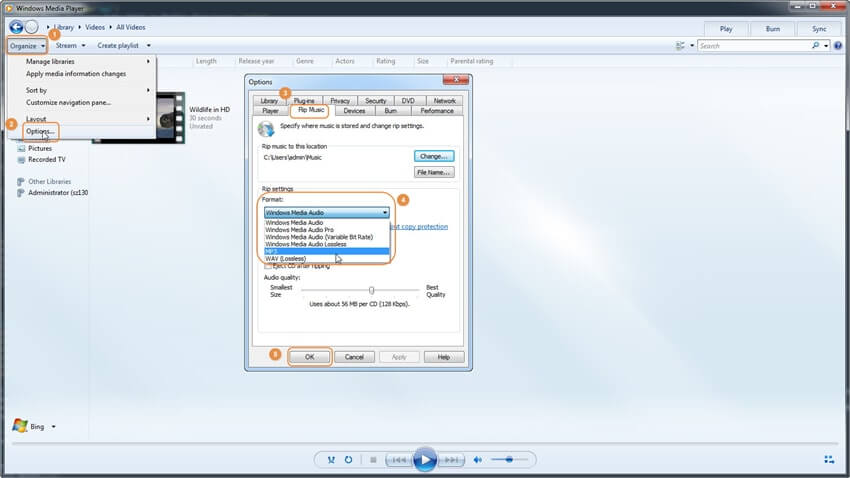
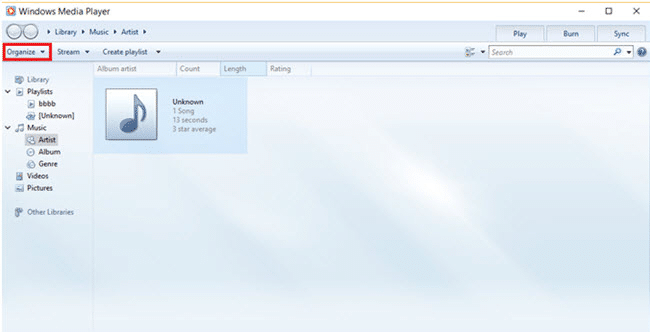
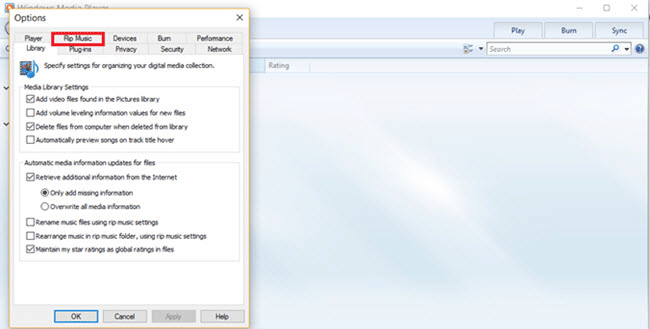
Step 2: Next, in Windows Media Player, select “Organize” from the top left corner of the screen, and from the resulting drop-down menu, click on “Options.” After that, choose “Rip Music.”
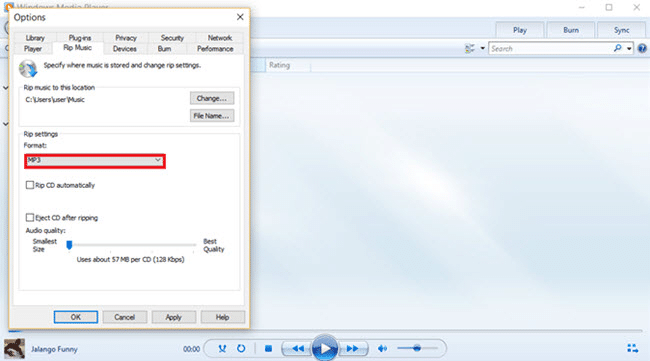
Step 3: From the new window that pops up, select the “Rip Music” tab. Now, look for the “Change” button and click on it. Now, choose the folder in which you want Windows Media Player to save the converted audio files.
Step 4: We now have to select the desired format for the output files. Go to the “Format” button, click on the pull-down menu, and pick “Mp3.” Here, you can edit the bit rate of the audio file if you want. When you are done, click “Ok” to start conversion.
Part 4: How To Convert M4A To Mp3 With Online Free Converter
The methods above all require an app or program to go about it. All the programs here can be used on computers only.
This final method takes a different approach and keeps the entire process online. This means you don’t need to download or install any application on your system. It is also useful in situations where you need to make the conversion via your mobile device. Working online is the only way around this.
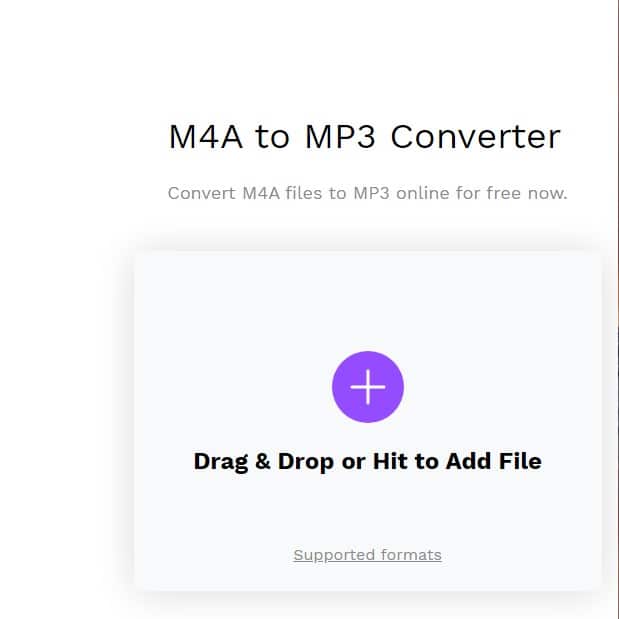
Step 1: First, on your internet browser, visit media.io to convert your M4A files into MP3. On the homepage of this site is where you begin the audio format conversion.
Step 2: Locate and click the Upload button. Then from your file manager or file explorer, locate and select the M4A file then click it to upload it to the online tool. An easier way of importing the audio files is to drag and drop them onto the media.io interface.
Step 3: Choose the format for your result; in this case, it will be MP3. Next, click on the “Convert” button to start. When the tool completes the m4a to mp3 format conversion, hit the download button to save a new file in your local storage.
Conclusion
This article has shown you how to convert M4A to MP3; this is relevant notably when your media player doesn’t support M4A files. You could do it directly from iTunes. This method has a little relapse; we then introduced DRmare, the perfect tool to easily and quickly convert protected and unprotected audio files.
Down the line, we introduced a method on how to convert M4A to MP3 on Windows with a PC default app. You also saw online tools to make things easier for non-computer users.