Do you ever find yourself needing to edit an Excel document and being unable to do so? If your answer is yes, your problem could be the Protected View setting that prevents any editing from taking place. But don’t worry; we are here to help!
In this blog post, I will tell you what Protected View is in Excel, why it is enabled by default, and how to turn it off so you can edit your document.
Why Does My Excel File Open in Protected View?
Microsoft Excel has a feature called “Protected View” that stops files that could be harmful from hurting your computer.
When you open an Excel file, Protected View blocks any content that could be unsafe and can show a warning prompt.
This ensures the safety of your data by limiting what you can do with the file and preventing it from running macros or scripts. Here are some scenarios why your Excel file may open in protected view:
- This file was accessed from an online source.
- Your computer settings have identified the sender as a potential threat.
- The file was opened from an unsecured location.
- File Block has blocked the file.
- The file you did not pass validation.
- You have manually opened the file in Protected View.
- The document was accessed from another person’s OneDrive storage account.
Directly Enable Editing from Protected View in Excel
First, you must ensure that the file you are trying to open is from a trusted source. If the file is safe, click the Enable Editing button from the yellow bar to turn off the protected view and start editing.

Disable Protected View to Enable Editing in Excel
If you turn off Protected View in the settings, you won’t have to turn on editing by hand every time you open a file. To do this, follow these steps:
Step 1. Go to File > Options.

Step 2. Press Trust Center, then choose Trust Center Settings.

Step 3. In the left pane, choose Protected View. Uncheck all three options under “Protected View” and hit OK. You can now open your Excel files and start editing without manually enabling editing every time.

Bonus Tips: Enable Editing on Excel from Read Only
Case 1. Excel File is Marked as Final
Most users use the “Mark as Final” feature to protect the document from being accidentally edited.
This is especially true when you are working on a shared document and want to ensure that no one changes the content. Here is how to disable it:
Step 1. Go to File > Info.

Step 2. Press the Protect Document drop-down arrow and select Mark as Final.

Case 2. Excel File is Recommended as Read Only
When the Excel file is recommended as read-only, you will not be able to do any editing until you uncheck the “Read-only Recommended” option. To do this, follow these steps:
Step 1. Go to File > Save As, then choose any location to save it.

Step 2. Hit the Tools drop-down arrow and choose General Options.

Step 3. Uncheck the Read-only Recommended box, then hit OK.

Now you can open and edit the Excel file without any issue.
Case 3. Excel File is Protected with Modifying Password
When the Excel file is protected with a “password for modifying,” you will be asked to enter a password to open it. If you don’t have this password, you can simply press the read-only button and it will open in the “read-only” mode.
All you have to do then is click CTRL+A to select all the content, then press CTRL+C to copy it. After that, you can open a new Excel file and paste the data by pressing CTRL+V.
Case 4. Excel File is Protected with Opening Password
Unlike the modifying password, the opening password cannot be removed by any means. You will not be able to open and edit such an Excel file unless you know the password.
In this case, you need a third-party Excel password recovery tool to unlock the file. PassFab for Excel is the perfect tool for this purpose. It can help you quickly remove passwords from Excel files so you can open and edit them without losing data. Here is how to use it:
Step 1. Download and install PassFab for Excel on your computer.
>> Get PassFab for Excel Coupon (30% OFF) <<
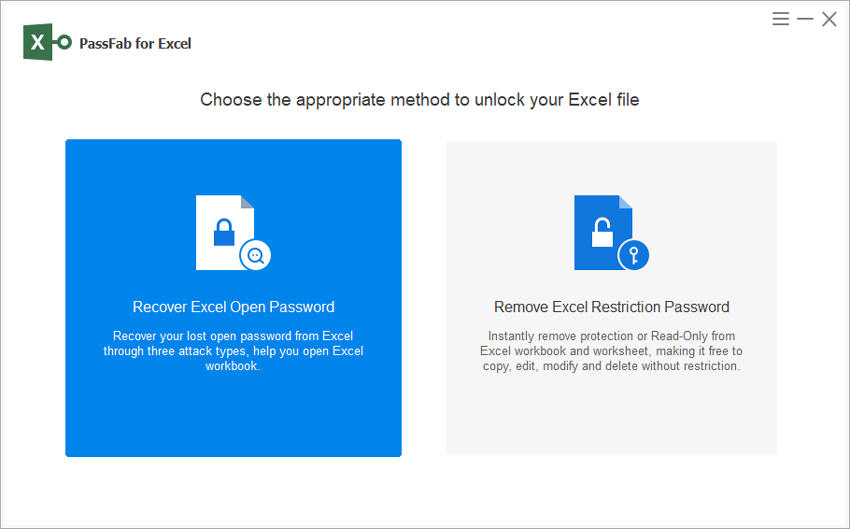
Step 2. Open the program and click Recover Excel Open Password.
Step 3. Import your password-protected Excel file.
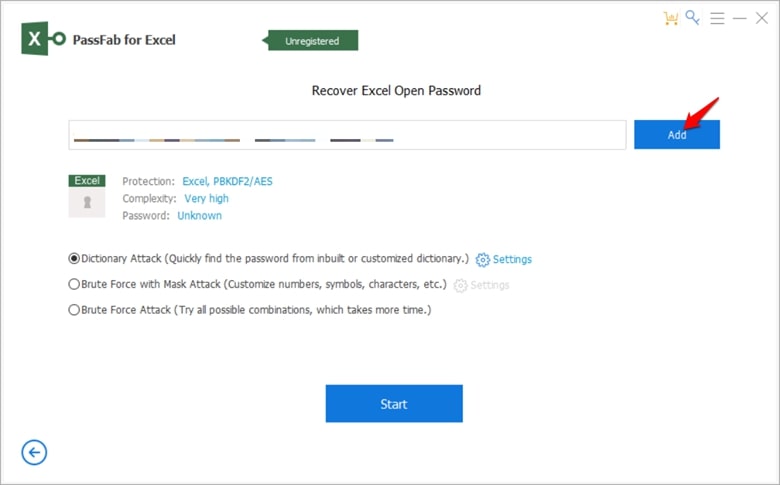
Step 4. Select one of the three attack types and hit Recover.

When the password is found, copy it and use it to open your Excel file.
Frequently Asked Questions About Protected View in Excel
How do I enable editing in Excel?
To allow editing in Excel, you can either click the Enable Editing button in the yellow bar or turn off Protected View in the settings.
What should I do if the Excel file is protected with a password?
If the Excel file is protected with a password, you can either use PassFab for Excel to unlock it or copy the content from the “read-only” mode (if the file is only protected with a modifying password).
Can I stop Excel from opening files in protected view?
Yes, you can turn off the “Protected View” in the settings to stop Excel from opening files in the protected view. Go to File > Options and disable all options under “Protected View” in the Trust Center settings.
Can I edit an Excel file marked as “final”?
No, when a file is marked as final, you cannot edit it. Go to File > Info and uncheck the “Mark as Final” box to turn this feature off.
Conclusion
Now you know how to turn off Protected View and enable editing in Excel.
With the help of these methods, you can easily open, edit, and copy protected Excel files without any issues.
I hope this article has been helpful. Thanks for reading.