Moving all the photos stored on your iPhone to your PC with iTunes can sometimes be a tedious process and take longer than it’s supposed to. Moreover, several iPhone users don’t have iTunes installed on their computers these days due to services like iCloud that allows you to wirelessly back up and sync your data online. This encourages people to look for other easier ways to transfer photos from an iOS device to a computer.
The good news is that there’s more than one way to transfer images and videos between your iPhone and your computer without needing iTunes. Some of the methods require a wired connection, whereas the others can be done wirelessly. It all just comes down to your personal preference and what you find to be the easiest method. So, let’s take a closer look at the various methods you can use to transfer photos from iPhone to PC without iTunes.
If you are using iPod, find out how to copy iPod pictures to computer without iTunes here.
Method 1. Transfer Photos from iPhone to PC with Windows File Explorer
If you’re OK with connecting your iPhone to your computer, this might be the easiest way to transfer all the photos that are stored on your iPhone without iTunes. We say this because you don’t need to have any additional software installed or be connected to the internet. Let’s see what you need to do:
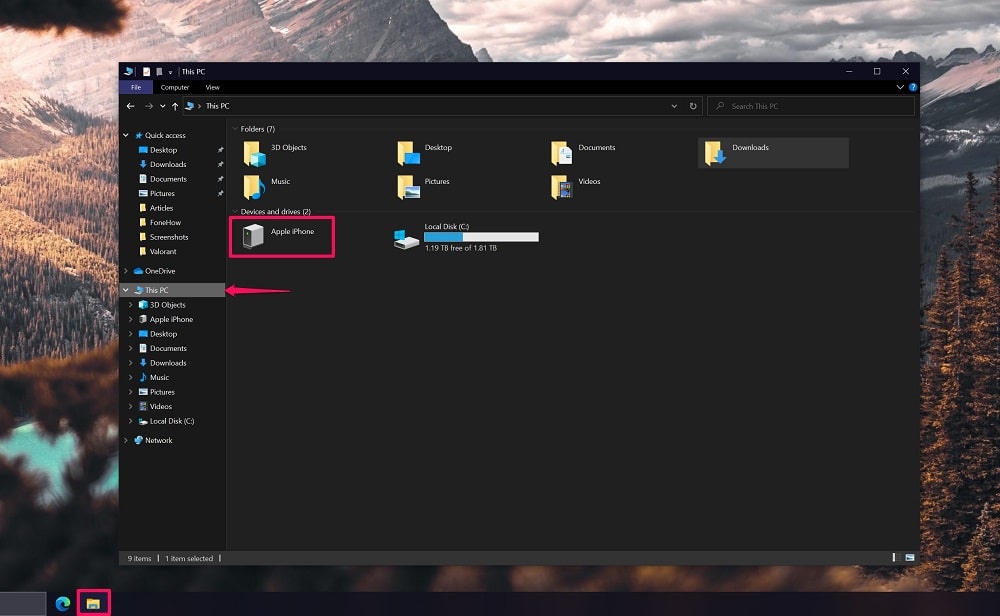
Step 1. Connect your iPhone to the computer using the included Lightning to USB cable and click on the File Explorer icon from the taskbar. Once the window opens, go to ‘This PC’ and click on ‘Apple iPhone’ located under Devices and drives.
Step 2. Clicking on Apple iPhone using the File Explorer will give you limited access to the internal storage, which includes photos and videos. Click on ‘Internal Storage’ to proceed.

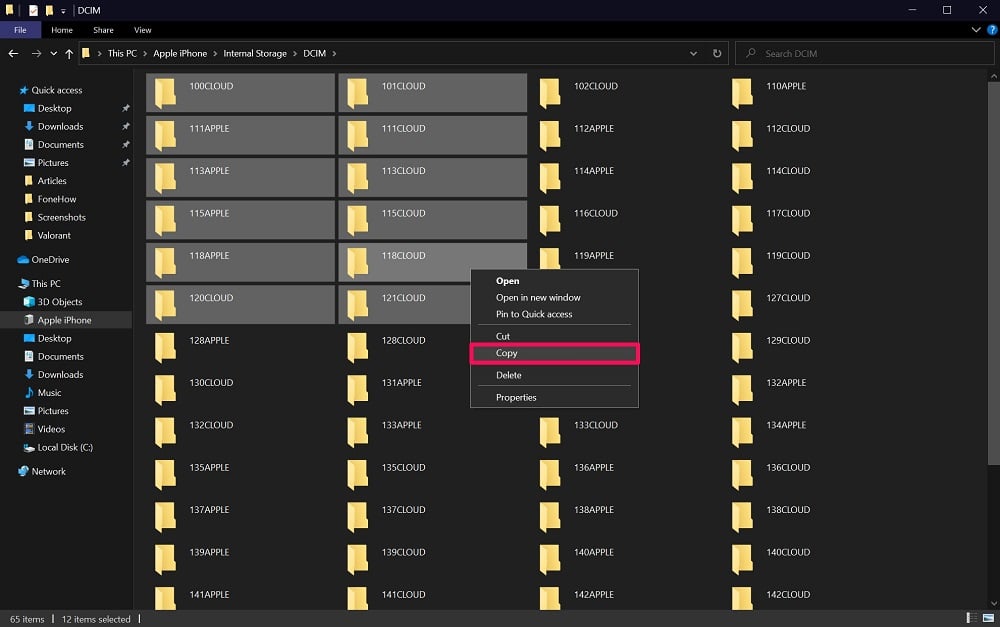
Step 3. You’ll now see the DCIM folder under which all the image and video files are stored. Click on ‘DCIM’ to continue.

Step 4. You’ll see a bunch of different folders. Click on these folders individually to see what photos are stored in them. Drag the cursor over the folders or the photos stored in the folders to select them and right-click to access the context menu. Now, simply choose ‘Copy.’
Step 5. Now, head over to the destination folder or location where you want to store your photos. Right-click on an empty area and choose ‘Paste.’ All the photos you copied will now be moved to this location.

You can repeat these steps to selectively import other photos and videos stored on your iPhone.
Method 2. Transfer Photos from iPhone to PC with iCloud
This method can be used by iPhone users who’re paying for an iCloud subscription. As long as you have access to a relatively fast and reliable internet connection, transferring iPhone photos using iCloud should be a breeze. One key advantage of this method is that you don’t have to connect your iPhone to the computer.
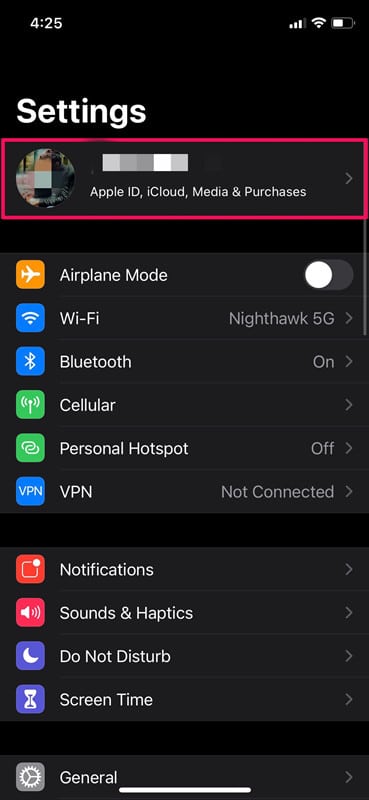
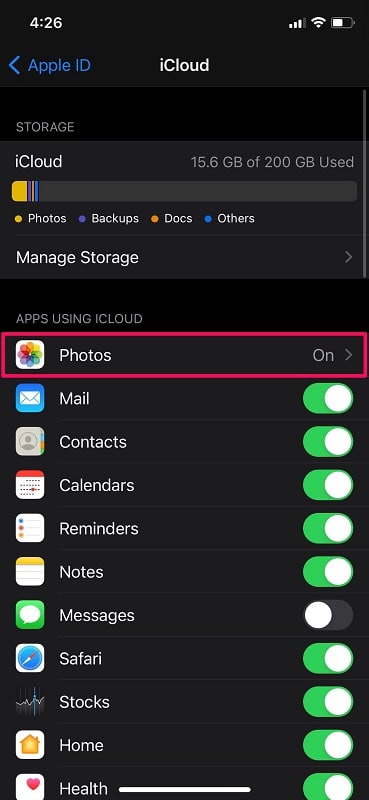
Step 1. First, you need to make sure iCloud Photos is enabled. To do this, open the Settings app on your iPhone and tap on your Apple ID name at the top.
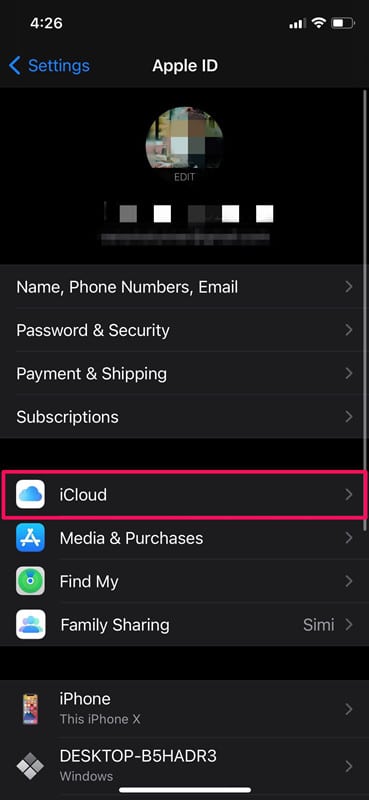
Step 2. This will take you to the Apple ID settings menu. Here, tap on ‘iCloud’ to continue.
Step 3. In the iCloud menu, you’ll see Photos as the first option below your storage details. Make sure Photos is set to ‘On’ before you proceed to the next step.
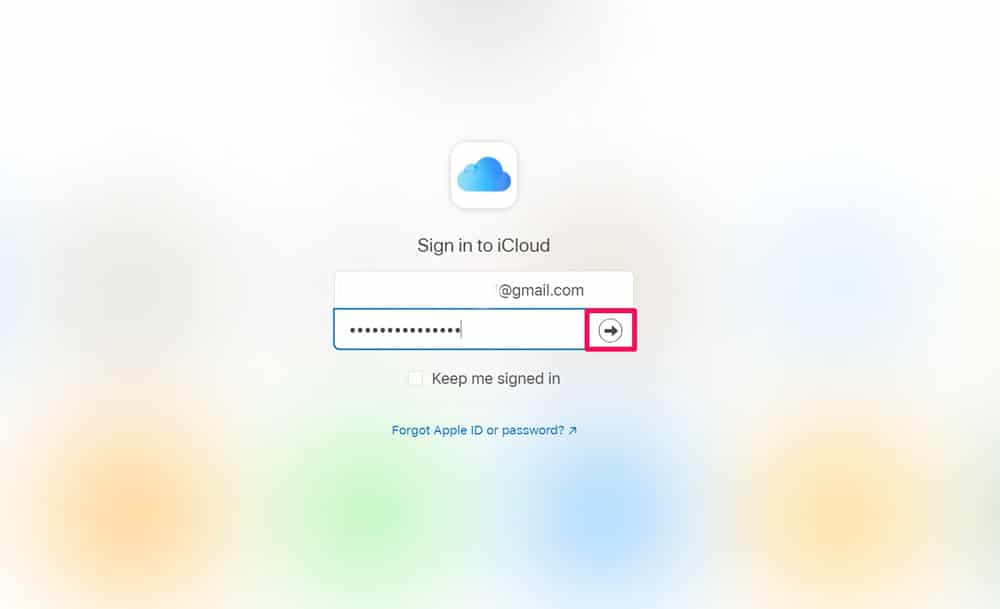
Step 4. Now, head over to iCloud.com on your computer with any web browser. Type in your Apple ID login details and click on the arrow icon to sign in.
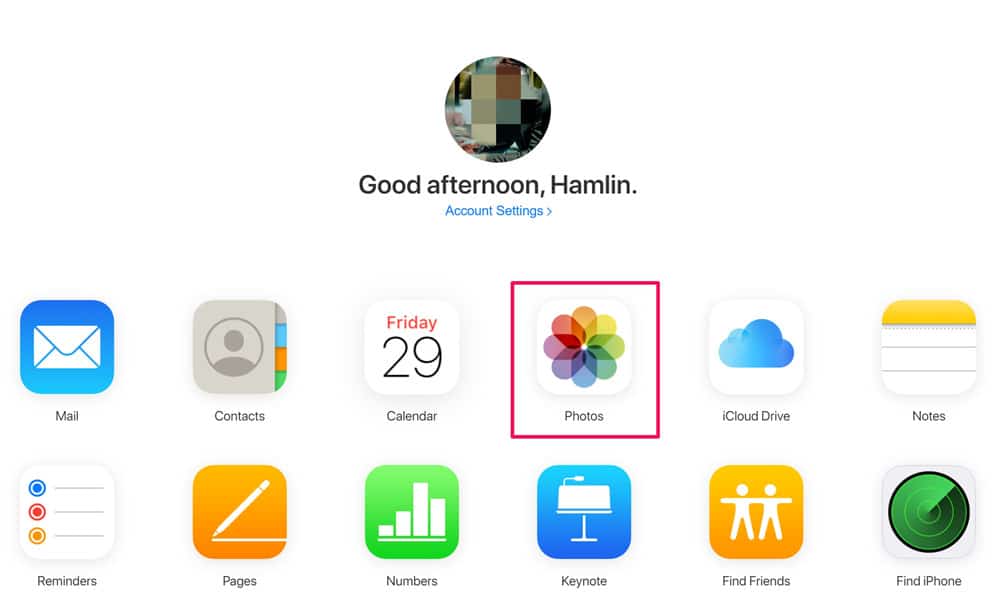
Step 5. Once you’re in the iCloud homepage, click on the Photos app to view all the images and videos stored in iCloud.
Step 6. Now, you’ll be able to find photos by their albums. Locate the photos you want to transfer and drag the cursor to select as many photos as you like. Once you’re done with the selection, click on the download icon located at the top-right corner of the page, as shown below.

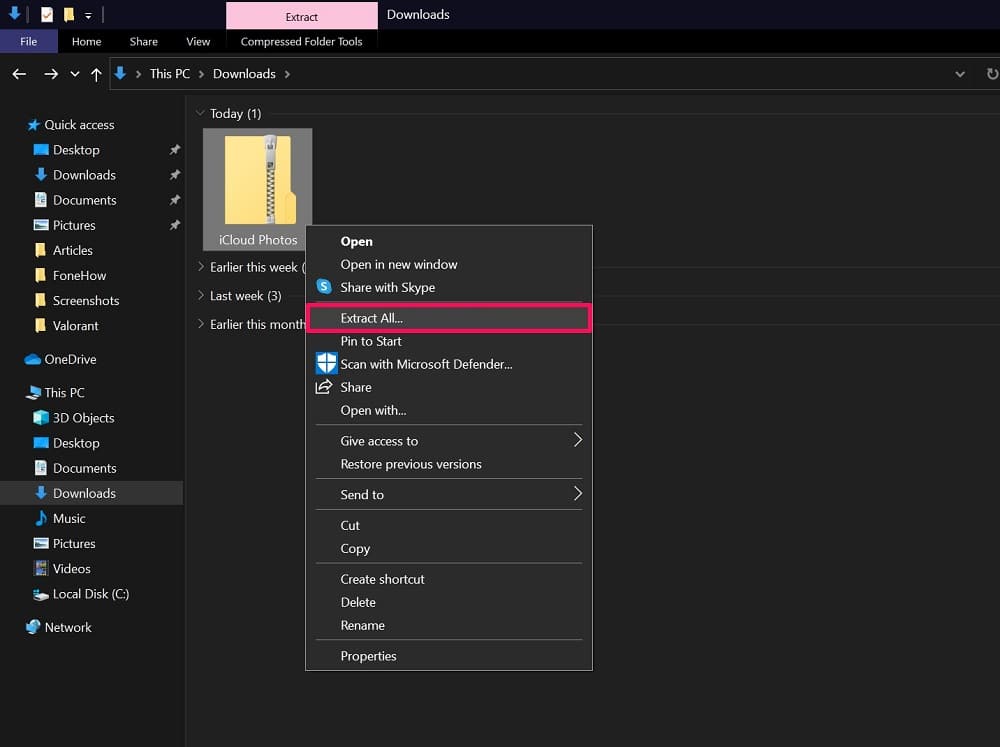
Step 7. All the photos you selected will now be downloaded to your computer as a ZIP file. You can right-click on this file and choose ‘Extract All’ to view the photos stored in it.
That’s one way to get your iPhone photos on to your PC without iTunes. Note that if you don’t have an iCloud subscription, you won’t be able to fully utilize this method.
Method 3. Transfer Photos from iPhone to PC with an iPhone Manager
In this method, we’ll be making use of a popular third-party software called Tenorshare iCareFone to transfer your iPhone photos without iTunes. In some cases, importing photos using this iPhone manager software can be faster than the first method we discussed.
>> Get Tenorshare iCareFone Coupon (30% OFF) <<
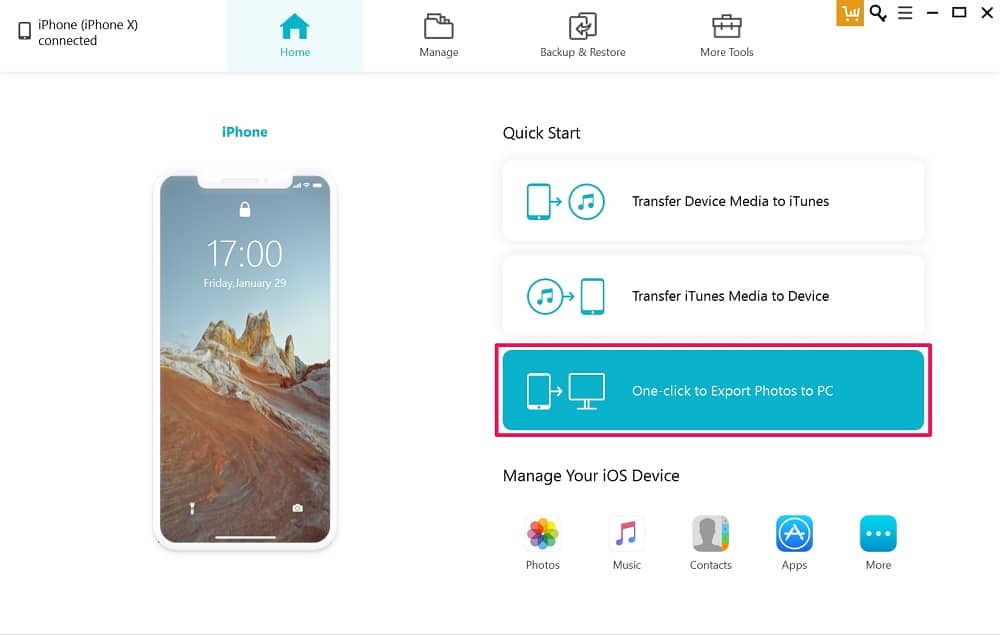
Step 1. First of all, download and install Tenorshare iCareFone on your computer. Launch the app, connect your iPhone to the computer using the included Lightning to USB cable, and select ‘One-click to Export Photos to PC.’
Step 2. Once the software finishes the export, it will automatically launch the File Explorer showing the CameraRoll folder. Take a note of the directory where the folder is stored.

Step 3. If the software doesn’t automatically launch the output folder for some reason, you will still get a dialog box showing that the export is successful. Click on ‘Open Folder’ from this dialog box to view the photos.
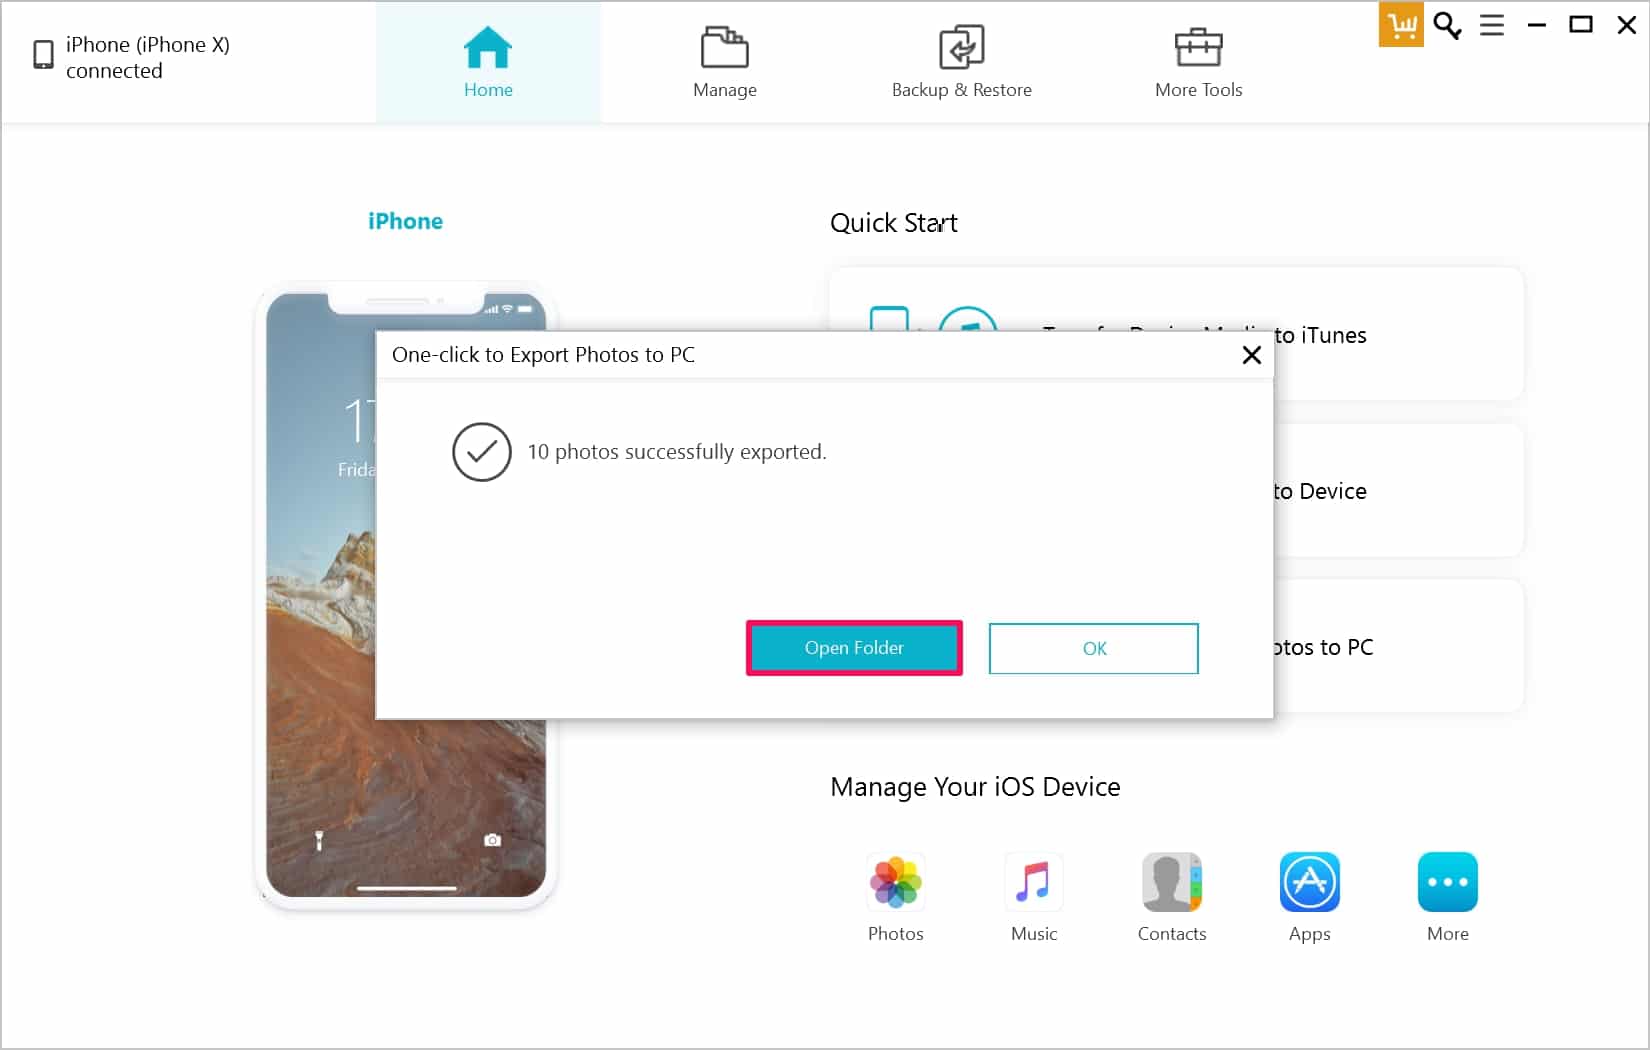
That’s it. The one-click export feature seems very convenient and straightforward, doesn’t it? By default, the software stores the exported photos in the iCareFone folder under Local Disk (C:). But, you can move the CameraRoll folder to your desired location if necessary. Read our Tenorshare iCareFone Review here.
Method 4. Transfer Photos from iPhone to PC Using Dropbox
This method is similar to the iCloud technique, but slightly more complicated since you’ll need to install the Dropbox app on both your iPhone and your computer. Regardless, this method can be used by people who aren’t paying for iCloud. Dropbox is a really popular cloud storage service that gives 2 GB of free unlimited storage and offers a 14-day trial with access to 2 TB of data.
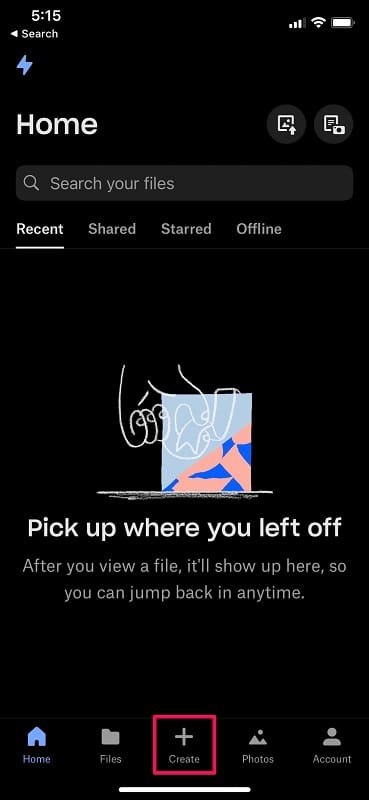
Step 1. Install Dropbox from the App Store onto your iPhone. Launch the app, sign in with your account, and tap on ‘Create’ from the bottom menu.
Step 2. Now, choose ‘Upload Photos’ from the pop-up menu.

Step 3. Next, you’ll be able to select the photos in your library that you want to upload and transfer to your PC. Once selected, tap on ‘Next.’
Alt: Select the photos from iPhone to Dropbox
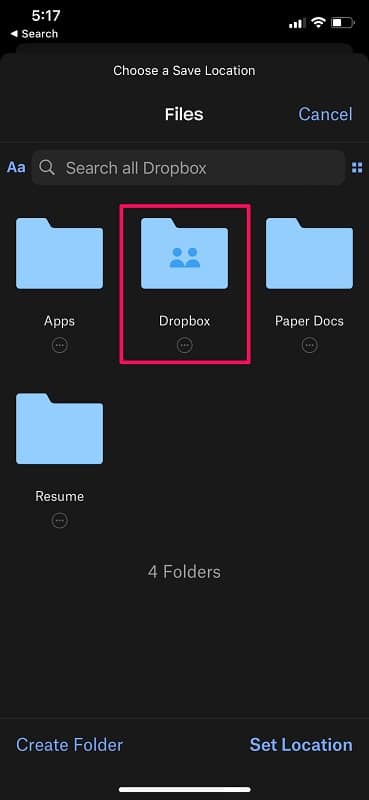
Step 4. In this menu, tap on ‘Choose a Folder’ to continue.

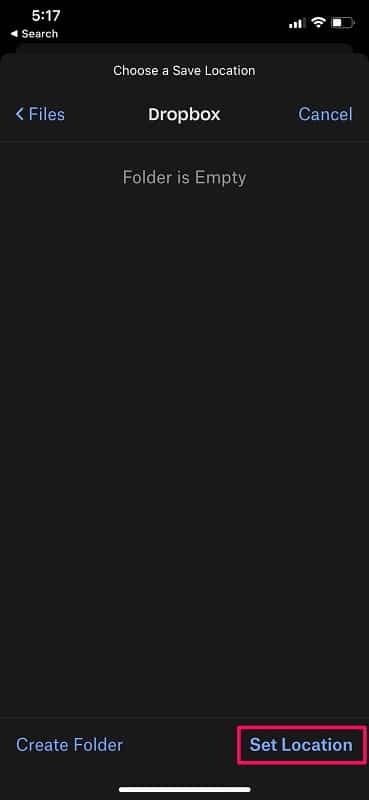
Step 5. Now, simply select the folder where you want to store all the photos that you’re trying to upload.
Step 6. Once selected, tap on ‘Set Location’ located at the bottom-right corner as shown below.
Step 7. At this point, you’re just one click away from uploading your photos to Dropbox. Tap on ‘Upload’ to initiate the photo transfer to the cloud.

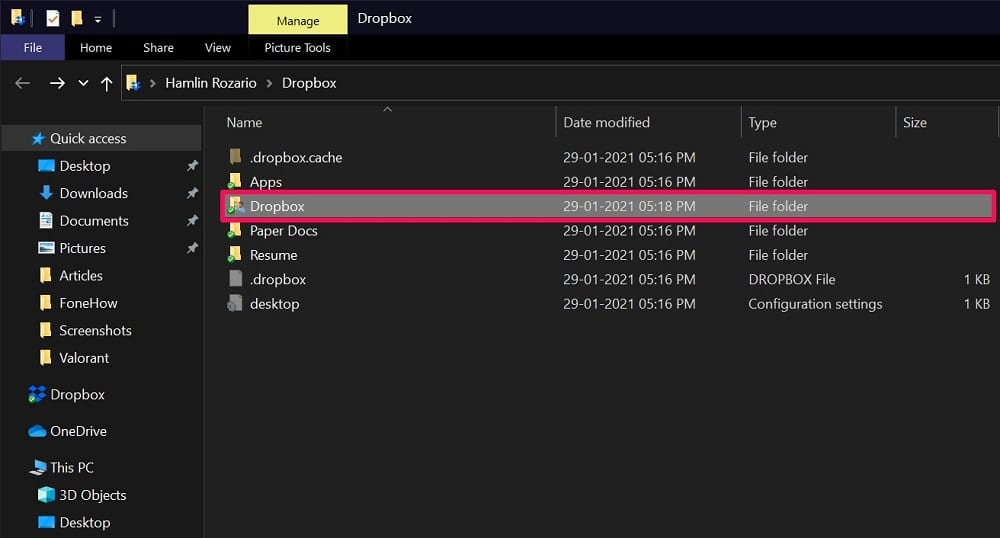
Step 8. While you wait for the photos to upload, download and install Dropbox on your PC. Once installed and logged in, click on the Dropbox app to list all your Dropbox folders in the File Explorer. Select the folder where you uploaded the files from your iPhone.
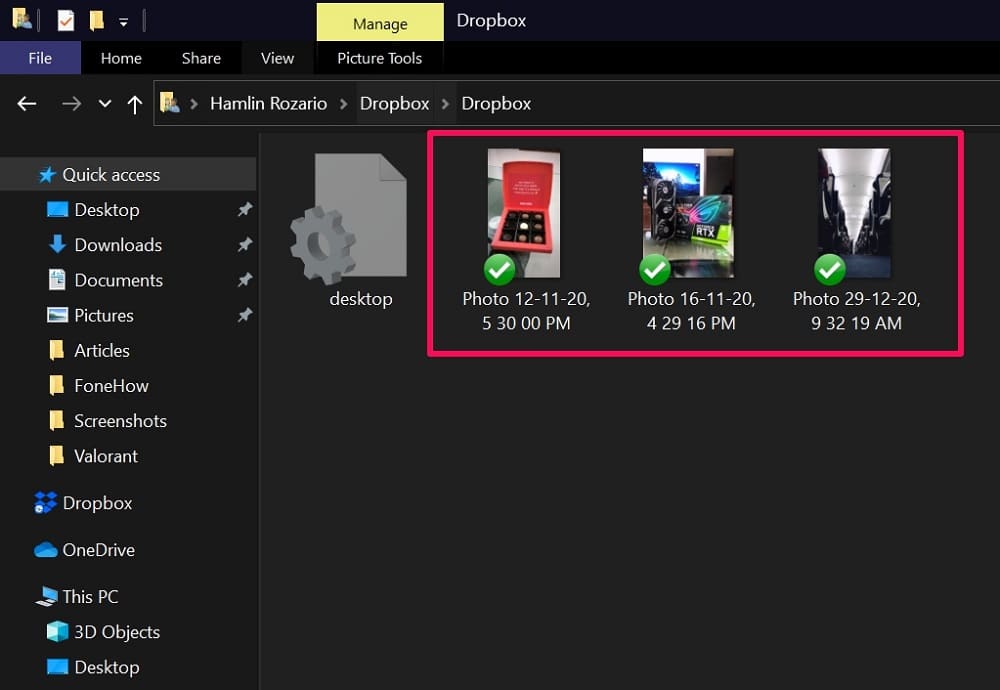
Step 9. Now, you’ll be able to view all the files that you uploaded directly on your computer. You can copy and paste these files anywhere else on your computer, according to your preference.
This method can come in handy for transferring photos selectively from your iPhone to PC without using iTunes. However, it isn’t exactly ideal for a bulk transfer compared to the other methods we discussed above. Likewise, you can use other third-party cloud storage services like Google Drive or Microsoft OneDrive to upload and transfer photos from your iPhone to PC wirelessly.
Method 5. Transfer Photos from iPhone to PC Using Email
Last but not least, we have the email method to transfer iPhone photos to PC without iTunes. This might be the easiest way to quickly transfer a few images to your computer wirelessly without having to install any additional app or software. So, let’s check out the necessary steps:
Step 1. Launch the stock Mail app on your iPhone and tap on the compose icon at the bottom-right to start composing a new email.
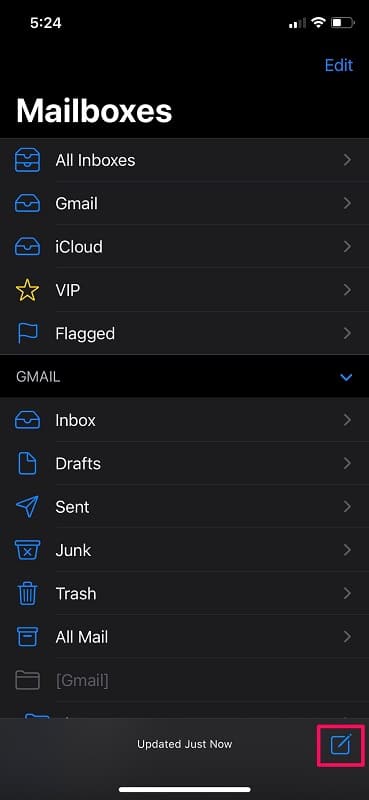
Step 2. Now, you can use your own email address to send attachments to yourself. Once you’ve typed in the recipient’s email address, tap on the photo icon above the keyboard to attach image files.
![]()
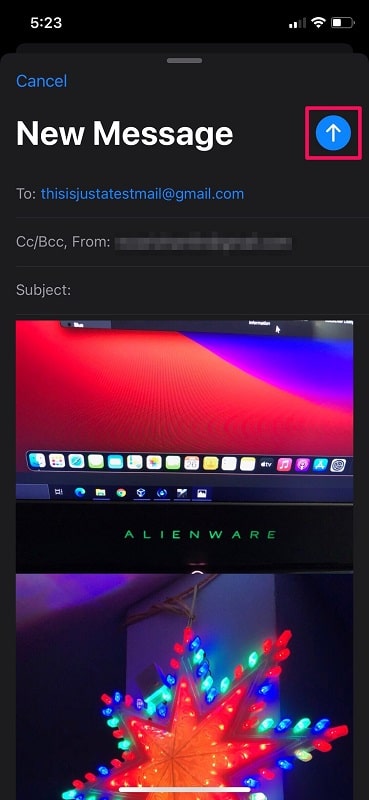
Step 3. Select the photos from your library and attach them to the mail, as shown in the screenshot below. Tap on the blue arrow icon to send the email.
All you need to do right now is simply log in to your email from your computer and save the received attachments to your PC manually.
Note that if you’re using Gmail, you will be limited to 25 MB attachments, which means you’ll only be able to send around 5-6 photos depending on the size. However, if you have an iCloud email address, you can send large attachments up to 5 GB with Mail Drop. The uploaded files aren’t counted against your iCloud storage and are only stored for 30 days.
Summing Up
In the earlier days of iOS, users had to rely on iTunes to transfer photos between their iPhone and computer. But, as you can see, that’s not the case at all anymore. Things have changed, and there are so many different ways that you can use to get photos off iPhone on to a PC without iTunes. Before you ask, you can follow these methods to transfer photos from an iPad to your PC too.
Hopefully, you were able to find one method that you really like, depending on whether you prefer transferring photos wirelessly or using a cable. Which is your favorite method of the bunch to transfer iPhone photos? Do you have any additional methods and tips to share? Feel free to drop your ideas and let us know your thoughts in the comments section down below.