
With the newly launched iPad Air and 8th-generation iPad, Apple’s lineup of tablet PCs is stronger than ever! There is no denying their popularity, either. These devices become the best friend to students, professionals, and media consumers. On most days, these compact devices work without fail as well.
iPadOS offers everything you need in terms of connectivity, smooth performance, and other features. Well, this is not to say that iPad never runs into problems. Some errors can ruin your iPad experience for the most part. The iPad won’t connect to Wi-Fi is one of the most irritating errors in that list.
What Is the iPad Won’t Connect to Wi-Fi Error?
This error means that your iPad, iPad Mini, iPad Air, or iPad Pro won’t connect to the Wi-Fi network. This would leave you far away from the internet because most people purchase the Wi-Fi only model instead of the Wi-Fi-Cellular one.
Of course, an iPad would work without an internet connection but not as good as it should. This error can cause a severe dip in your productivity as well. Therefore, you should try to fix the iPad cannot connect to Wi-Fi error as soon as possible.
In this article, we have explained why your iPad is behaving this way and some methods to solve the issue at the earliest. First, we will check out the reasons for this irregular behavior.
Why Won’t My iPad Connect to Wi-Fi?
There could be a multitude of reasons that are causing the iPad won’t connect to Wi-Fi error. It varies from device to device as well. However, if we have to narrow things down, the common factors will be as follows.
- You are not in an area with coverage. If you have placed your iPad with low or limited range, it won’t connect to the Wi-Fi.
- You have network issues. Problems with your Wi-Fi connection can prevent the iPad from connecting to the network. This may have to do with your ISP or the Wi-Fi router itself.
- You have blacklisted your iPad. Another reason your iPad cannot connect to Wi-Fi may be that the router has blacklisted the device.
- You are connecting to a public Wi-Fi network. Some public Wi-Fi networks require an extra layer of verification before you can use the internet.
- Your iPad has internal issues. Problems with iPadOS and its modules can prevent the device from a successful Wi-Fi connection.
- There are network conflicts. Change in network settings and preferences can create conflicts that ultimately cause the error we talked about.
- You are using a thick protective case. Some iPad cases contain thick layers that can conflict with the Wi-Fi antennae on the iPad, thereby denying the connection.
- Your router has firmware issues. If your Wi-Fi router uses an outdated version of firmware, it may cause conflicts with a newer-generation iPad.
Besides, there are device-specific issues as well. Even then, some solutions can do the job.
Solutions to Fix iPad Not Connecting to Wi-Fi Problem
As you can see, there are endless possibilities for why your iPad doesn’t connect to the Wi-Fi. Surprisingly, though, you can solve any of these issues using a limited number of solutions. And, we have listed all of them in the exact order you should try them.
Besides, we have arranged them in order of their difficulty as well.
Solution 1. Turn Wi-Fi Off And Back On
Sometimes, a simple solution like turning off and turning it back on can make your iPad connect to the Wi-Fi connection without fail. Regardless of the iPad model that you use, you can follow the steps we have given below to do this.
Please keep in mind that you have to turn off the Wi-Fi and not just disconnect them. So, follow these steps exactly as they are shown.
Step 1. Open Settings on your iPad. It should open the pane that you had opened last.
Step 2. Now, from the sidebar, tap on the entry named Wi-Fi.
Step 3. On this page, you can see a Wi-Fi toggle button on the top-right portion.
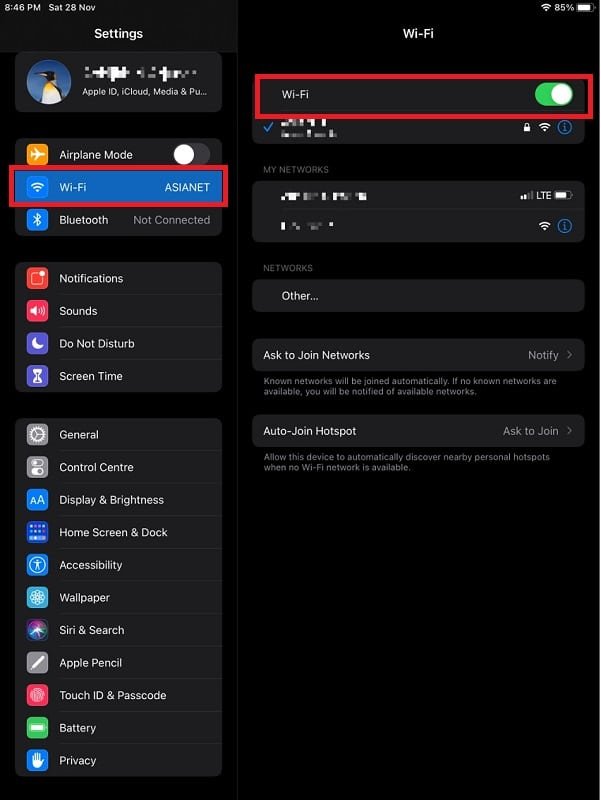
Step 4. Click on that button to turn off Wi-Fi.
Step 5. Wait for a few seconds and tap on the button again to turn the Wi-Fi back on.
Now, if you had saved the password of the network, it should connect automatically. In case it doesn’t, you can tap on the name of the network and provide the passcode again. If you faced the can’t connect to Wi-Fi error for the first time, these steps should restore things to normalcy.
Solution 2. Restart Your Wi-Fi Router and Ensure You Are Within Range
As we said, the problem could be with your Wi-Fi router as well. There are two things to check:
- You should ensure that you have placed your iPad in an area covered by the Wi-Fi network. If you’re using a modern Wi-Fi router, it should give you decent coverage for up to a hundred meters. It will reduce the speed and latency as you move farther from the Wi-Fi router or extender. So, you’ve to place the device as closest as you can to the router when you want to test if your iPad can connect.
- The next problem may be internal and has to do with the Wi-Fi router system itself. To solve this, you can restart the router using the physical button on the back. If you cannot find such a button, merely powering off and powering the device back on would do the trick. Once you have done this, wait till the network is set up and see if your iPad can establish the connection.
- As we mentioned, you/someone may have blacklisted your iPad from the network using MAC filtering. If it’s the reason, you should either reset the router or talk to the network administrator. If you have access to the router admin panel, you can go ahead and remove your iPad from the filtered list. This shouldn’t take more than a few seconds.
Note: If the problem is with the router, your iPad won’t have trouble connecting to other Wi-Fi networks. At the same time, the problem may be a combination of both the network and the device.
If you think the problem has to do with the router coverage, you should try to place your router a little closer to your work area. If you cannot do that, you can even get a Wi-Fi extender, which will improve the coverage across your home/office. Alternatively, you can move to a mesh-based Wi-Fi network.
However, if the problem is with the router, you have other options. However, before you confirm anything, check if other devices can connect to the same Wi-Fi network. If that’s the case, resetting the router firmware or updating to the latest router firmware version will do the job.
The steps for reset/firmware update vary according to the router that you are using. You may have to check out the manufacturer’s official website to confirm these. Resetting your router will also solve other Wi-Fi related issues, if any.
Solution 3. Restart Your iPad
Now that we have ensured Wi-Fi coverage and a functioning router, let’s check out the next option. This has to do with restarting your iPad itself.
Restarting your iPad will clear temporary files and some caches from the device. This would also completely disconnect your iPad from the network. Therefore, when you restart the device and start using it, the device may connect to the network without fail.
The steps to restart your iPad are as follows.
3.1. If you use an iPad without the Home button
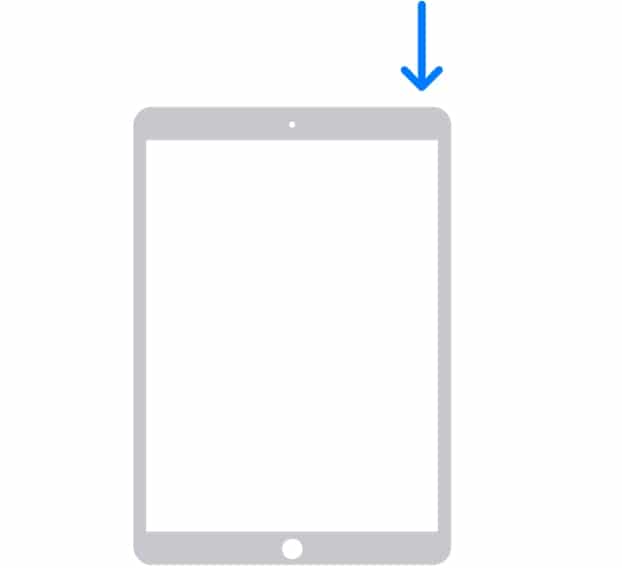
If you have the new-generation iPad Pro and iPad Air, which don’t come with a Home Button, you’ve to press and hold the Volume Up/Down and Power buttons until the Power Slider appears. You can move the slider to the end, and the device would turn off. You can press and hold the Power button to turn the device back on.

3.2. If you use an iPad with the Home button
If you have an iPad device from the classic iPad lineup or an older generation iPad Air, iPad Mini, or iPad Pro, you have to use another method. You just have to press and hold the Power button, which is on top of the device, until the Power Slider appears. Repeat the same process and press and hold the Power button to get back to the device.
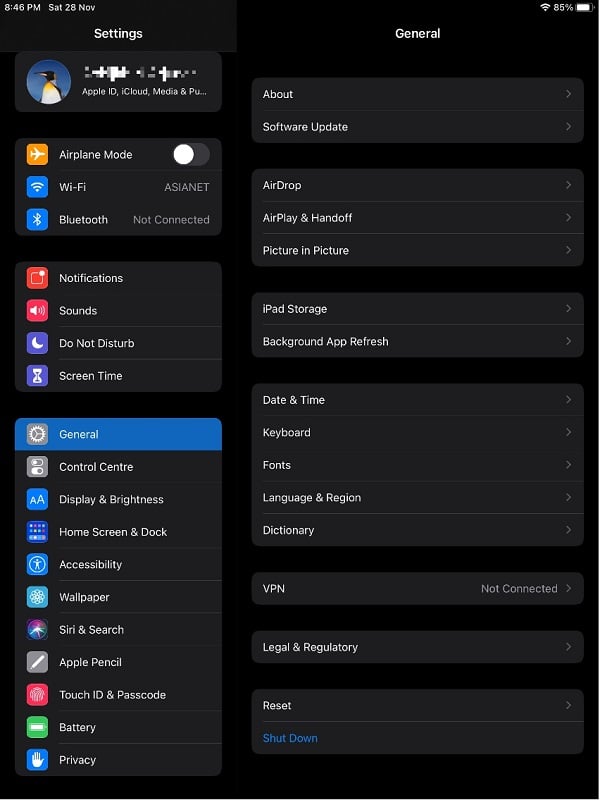
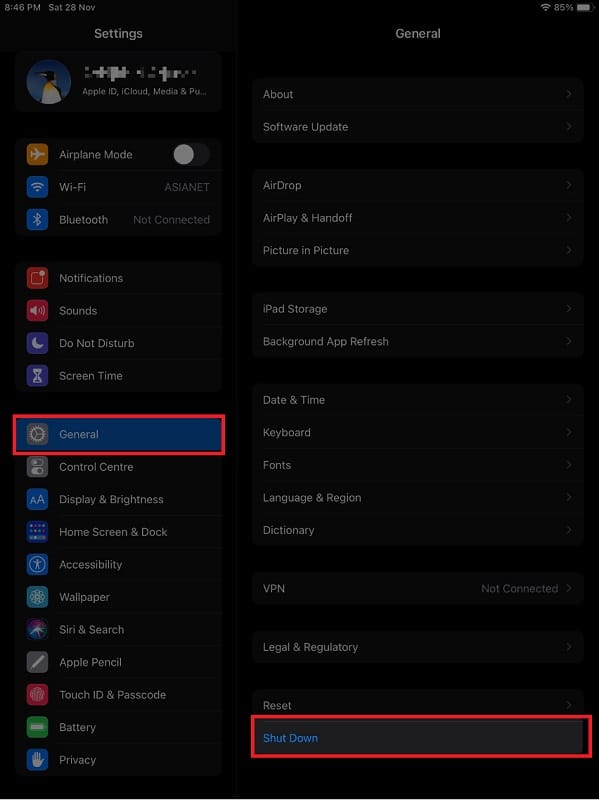
Alternatively, you can go to Settings > General and choose Shut Down. You can press and hold the Power button to turn the device back on. This method works regardless of which iPad model you use.
After this, check if the iPad can connect to Wi-Fi.
Solution 4. Forget Your Wi-Fi Network and Reconnect
iOS and iPadOS have a feature that automatically saves the passcode whenever you log into a Wi-Fi network. So, the next time your device detects the same network, it will connect automatically. However, this feature may not be the best choice for fixing an iPad whose Wi-Fi is not working.
Therefore, we recommend checking out an option to force-forget the Wi-Fi network and reconnect to it later. To do this,
- Open Settings on your iPad
- Go to the Wi-Fi section through the sidebar
- Tap on the (i) icon next to the Wi-Fi network that you want to forget
- On the next page, tap on the button named Forget This Network.
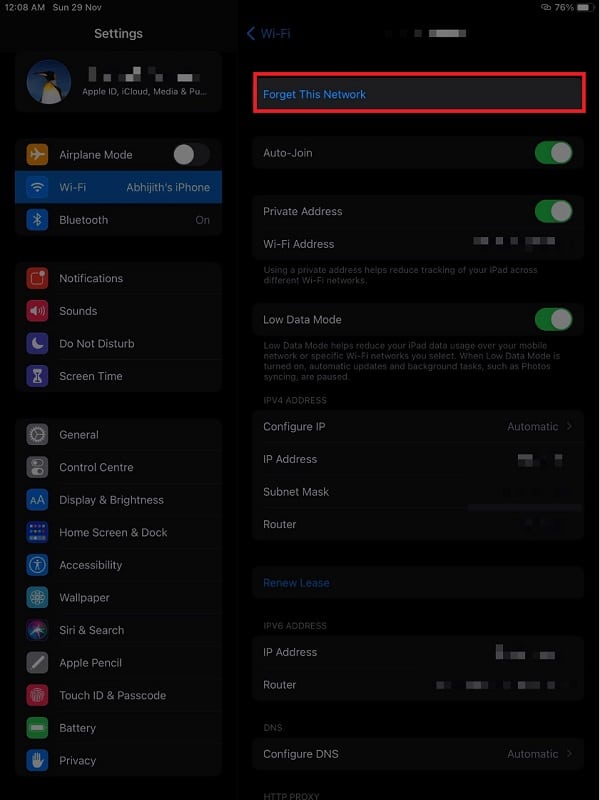
Doing this would remove the saved password and other customizations that you have made for the specific Wi-Fi network. You can try reconnecting to the network by entering the password again. You should be able to connect without trouble.
Solution 5. Turn Airplane Mode On/Off
Did you know that Wi-Fi-only iPads also come with an Airplane Mode? This mode will turn off every type of wireless connection protocol. Turning on the Airplane Mode and turning it off may help you to fix the Wi-Fi connection error.
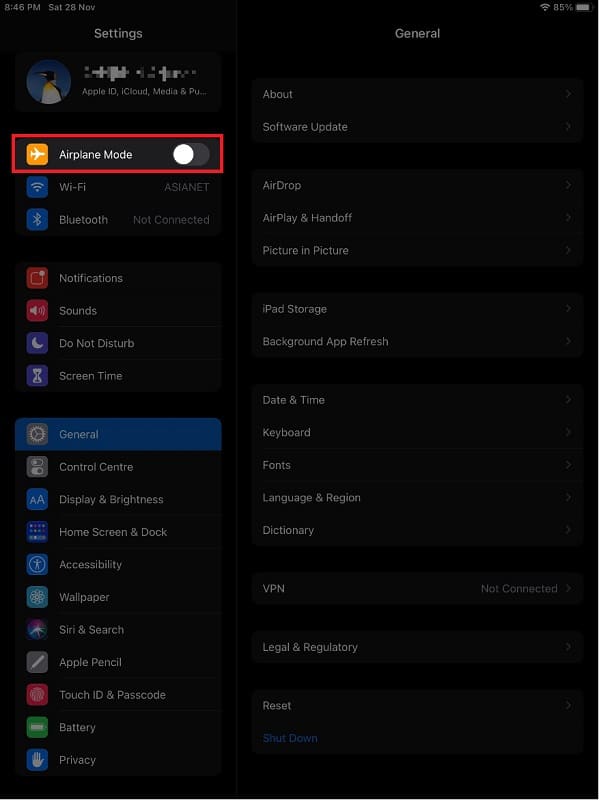
To do this, go to Settings and turn on the Airplane Mode button that you can see on the left sidebar. Wait while all networks go off, and it may take a few seconds to re-enable the network after you have turned off the Airplane Mode.
Solution 6. Reset Your iPad’s Network Settings
Network Settings refer to a bunch of preferences that have to deal with Wi-Fi, Bluetooth, Cellular, etc. Some changes on the iPad or third-party apps may cause conflicts in these preferences. Therefore, simply resetting the Network Settings will take everything to normalcy without causing any data loss.
Please bear in mind that all your network settings will be back to normal. For instance, you will lose all Wi-Fi passwords that you may have stored. Similarly, custom DNS setups and proxies may get removed from your device. You will have to set up everything as though you just bought the iPad home.
At the same time, the probability of making the Wi-Fi connection work on the iPad is very high.
To do this,
Step 1. Open Settings on your iPad.
Step 2. From the sidebar, choose the entry called General.
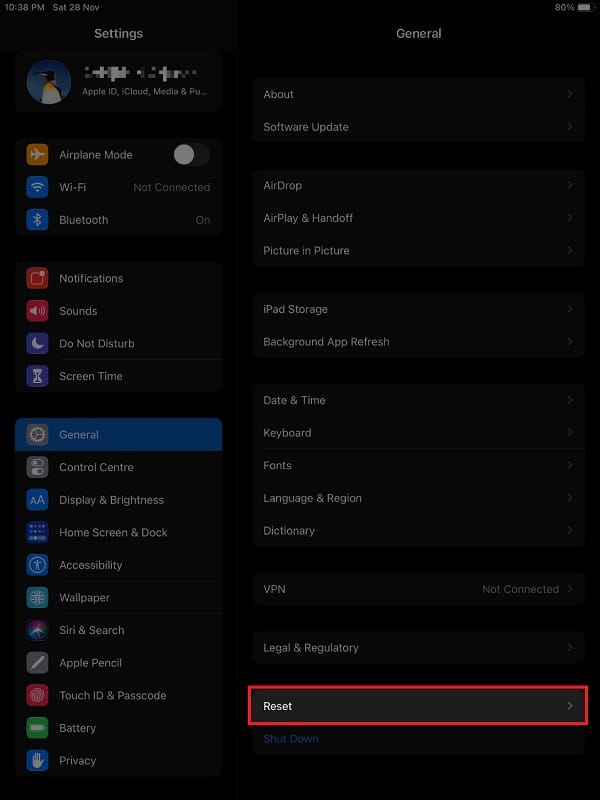
Step 3. Scroll down to the bottom and tap on Reset.
Step 4. From the upcoming menu, choose the option named Reset Network Settings.
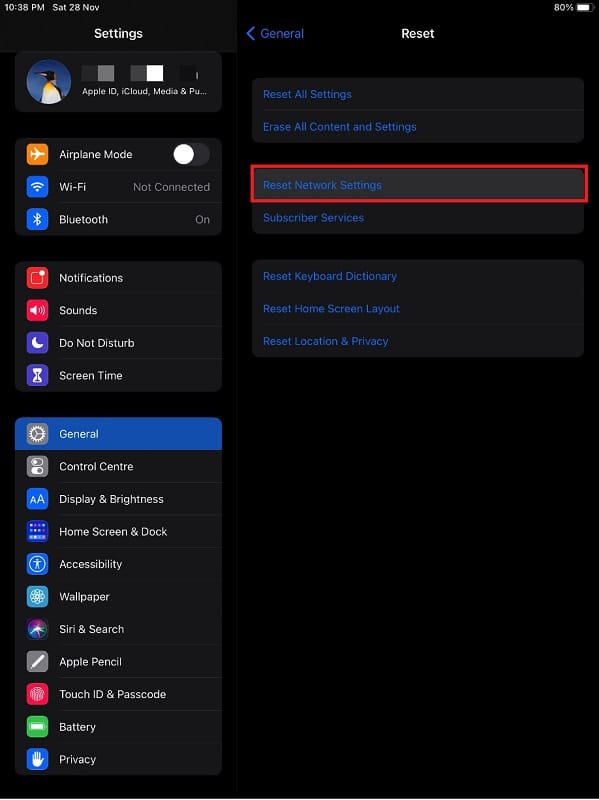
Confirm your action when the iPad asks you to. The reset process may take a few minutes, and your iPad will reboot for once.
Once the device is back in action, you can try to rejoin the Wi-Fi connection. As we said, you will have to give the password this time. It should work without any trouble, though.
Solution 7. Repair the iPad to Fix iPad WiFi Not Working Issue
If you have tried all the methods we have mentioned above without much success, you can conclude that a problem within your iPad is causing the error. This may be specific to the unique device you own or many devices running a particular version of iPadOS or iOS.
In either case, a complete repair of the iPad should fix the issue. Unfortunately, Apple doesn’t offer an official repair suite for iPad or iPhone. Instead, it wants you to take the device to an Apple Service Center, which will charge a considerable amount for the OS repair process.
This is why we have to rely on third-party iPad repair software from the market. And, among the many that we have seen and tried, Tenorshare ReiBoot is the best choice as of now. It proposes the highest chance to get your iPad back to normalcy and without the Wi-Fi connection error.
>> Get Tenorshare ReiBoot Coupon (30% OFF) <<
Tenorshare ReiBoot is available for both Mac and Windows, offering the same great user experience. It can fix more than 150 types of iOS/iPadOS errors using its smart algorithms, and the process won’t take long. To use the app, you have to connect your iPad to the computer and wait while ReiBoot does its job.
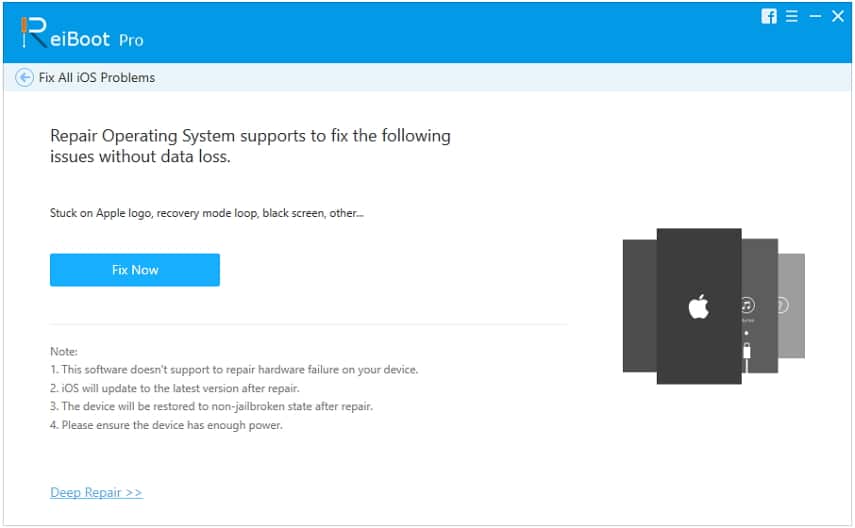
Probably the best part about repairing your iPad using Tenorshare ReiBoot is that you don’t have to worry about security/privacy issues. The entire repair process takes place within your computer, and we cannot say the same about other channels, including Apple.
By the way, keep in mind that Tenorshare ReiBoot can fix virtually any error that you encounter on your iOS or iPadOS devices. You can sit back and relax when the smart algorithm detects the issue and does the next to fix it. In either case, you can expect the highest success rates. Read Tenorshare ReiBoot Review here.
Solution 8. Back up Your iPad and Get it to Apple Repair Shop
If you could not fix the iPad not connecting to Wi-Fi error using the previous method, you are left with only a few right now. And the most suitable one is to take the device to an Apple repair shop. This process costs a considerable amount of money if your iPad is not under warranty coverage. If you have a warranty, Apple should fix the error for free.
Regardless. Of whether you have a warranty for the product, the process might cause data loss.
This is why we recommend taking a full backup of your iPad before you take it to the service center. While there are built-in options like iTunes backup and iCloud backup, both of them don’t provide us a sufficient amount of control. This is why we recommend using an iOS manager tool like Tenorshare iCareFone.
>> Get Tenorshare iCareFone Coupon (30% OFF) <<
Tenorshare iCareFone is a free-to-use iOS backup utility. However, you can use the app to take a complete yet flexible backup of your iPad devices as well. 1-click export of photos and the innovative Backup & Restore option are some of the best features. These features make backing up and restoring your iPad easier than ever. You also get enhanced control when managing contacts, messages, videos, and apps.
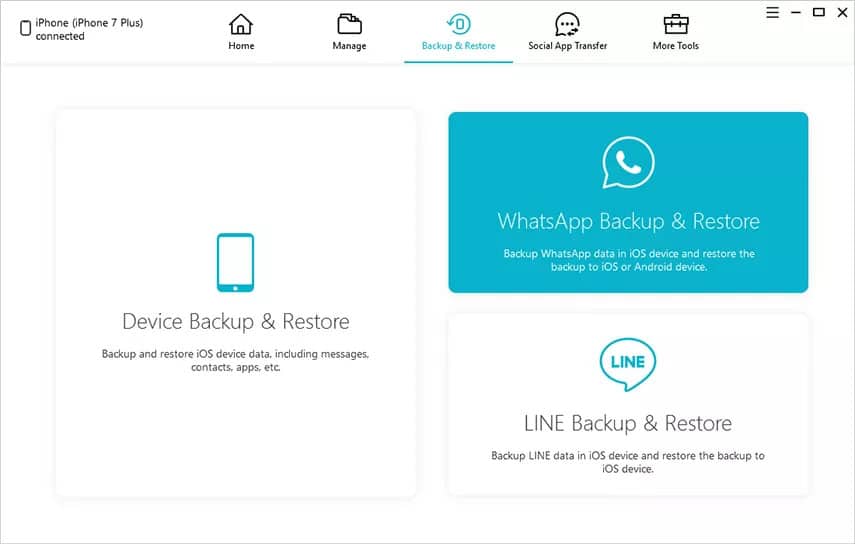
So, once Apple has fixed your iPad, it would probably be reset to factory settings. So, you can use Tenorshare iCareFone to restore the backup as well. Here, too, you get some extra control as you can choose what gets transferred between your computer and the iPad.
In the end, Apple may fix the Wi-Fi not connecting error without losing your data. However, just in case, it’s always good to have a full system backup. This backup utility works fine with almost all versions of iOS and iPadOS, including the iPadOS 14. Read Tenorshare iCareFone Review here.
Extra Tips:
We have two more small yet useful tips to help you solve the iPad not connecting to the Wi-Fi issue. They are:
1. Try Removing the Protective Case
If you cannot connect your iPad to any Wi-Fi network, the protective case may be the one to be blamed. If you are not using a well-built protective case made for the specific model of the iPad, it may end up covering some important antennae.
So, before you try extreme measures like iPad reset and repair, you should try reconnecting to Wi-Fi after removing the protective case. If things seem normal without the case, you may have to get a new protective case. When you do, get a protective case from a trusted brand with positive reviews.
2. Check the Signal Strength
iOS packs a feature that will prioritize Wi-Fi connections based on their signal strength. Therefore, your iPad may refuse to connect to a Wi-Fi network when the network strength is low. This may happen if you use an ancient Wi-Fi router at your office. In the age of Wi-Fi 6, you should make some effort to upgrade at least a little.
If you are not sure about the signal strength, we recommend using an app like NetSpot to create a map of your room/office and get the job done. This is a great step if you want to have more control over how you can improve the signal strength across a building, by the way.
The Bottom Line
We hope these solutions help you to fix an iPad not connecting to Wi-Fi anymore. As we have said, some of these steps may seem ultimately no-brainer, but they surprisingly work. For instance, some people put their devices on the MAC Filtering blacklist and forget about it.
Similarly, many use random protective cases that block iPad antennae. Therefore, make sure that you don’t commit these silly mistakes. Even if you have, the steps we have listed above will help you resolve things. Is there something we missed? Do let us know in the comments.