Imposing certain restrictions using your iPhone’s settings goes a long way in many situations. However, problems may arise when disabling this option, especially if it’s password-protected. So, the question is – how to disable restricted mode on iPhone? Don’t worry; we’re here to tell you all there’s to know.
Before we jump in, know that there are different ways to disable the restricted mode and related settings on iOS. The only difference is whether you’re using iOS 11 and below, or iOS 12 and above – and we’re going to cover all of the possible cases.
What is ‘Restricted Mode’ on iPhone?
Your iPhone’s restricted mode does exactly what it says. It’s designed to restrict access to certain types of content (like movies or music), limit your access to certain apps, prevent someone from downloading iOS App Store apps, and similar.
However, it’s essential to know that this feature has different names on different iOS versions. For example, it’s known as ‘Restrictions’ on iOS 11, which was the first iOS version to introduce this feature officially.
Once iOS 12 came out, what was previously known as ‘Restrictions’ turned into a sub-feature of ‘Screen Time.’ And more importantly, its place moved within the Settings app. No matter if you use iOS 13, or even iOS 14, ‘Screen Time’ is what you’ll want to check out to disable the restricted mode on your phone.
Lastly, an important note. Recent iOS versions may protect content restrictions with a passcode. Therefore, we’re sure that many of you wonder how to turn off restricted mode on iPhone without a passcode? Well, there’s a way, and we’re going to tell you all there’s to know. With that said, make sure to read this article carefully.
How to Turn Off ‘Restricted Mode’ on iPhone?
Finally, let’s jump to what you want to know. Keep on reading to learn how to turn off restricted mode on iPhone – no matter which iOS version you’re using.
1. Disable Restricted Mode on iOS 11 and Below
If you’re using iOS 11, you’ll find content-related restrictions in the Settings app. So, here’s how to remove restricted mode on iPhone running iOS 11 and below.
Step 1: Find the ‘Settings’ app on your iPhone and tap on it.
Step 2: Scroll down until you see ‘General.’ Then, tap on ‘Restrictions.’
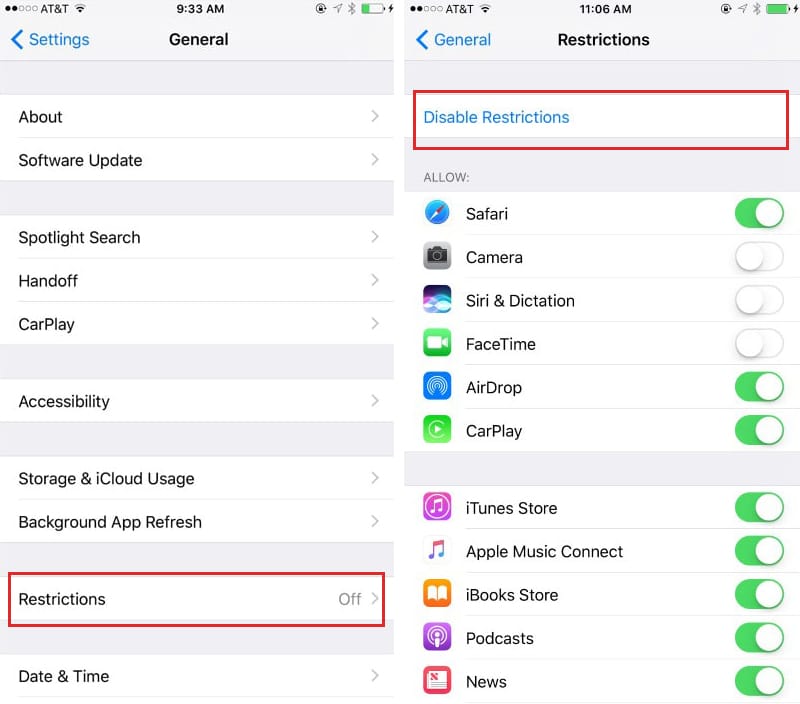
Step 3: Again, scroll down until you see an option called ‘Disable Restrictions.’
Step 4: Tap on that option, and you’ll be asked to provide a restrictions passcode. Input your passcode and wait a couple of moments. That’s it – restrictions should now be deactivated.
2. Disable Restricted Mode on iOS 12 and Above
As noted above, iOS 12 and newer iOS versions have merged restrictions with the Screen Time feature. We’ll use the Settings app for this purpose, so here’s what you need to do.
Step 1: Open the ‘Settings’ app on your iPhone and scroll down. Tap on ‘Screen Time.’
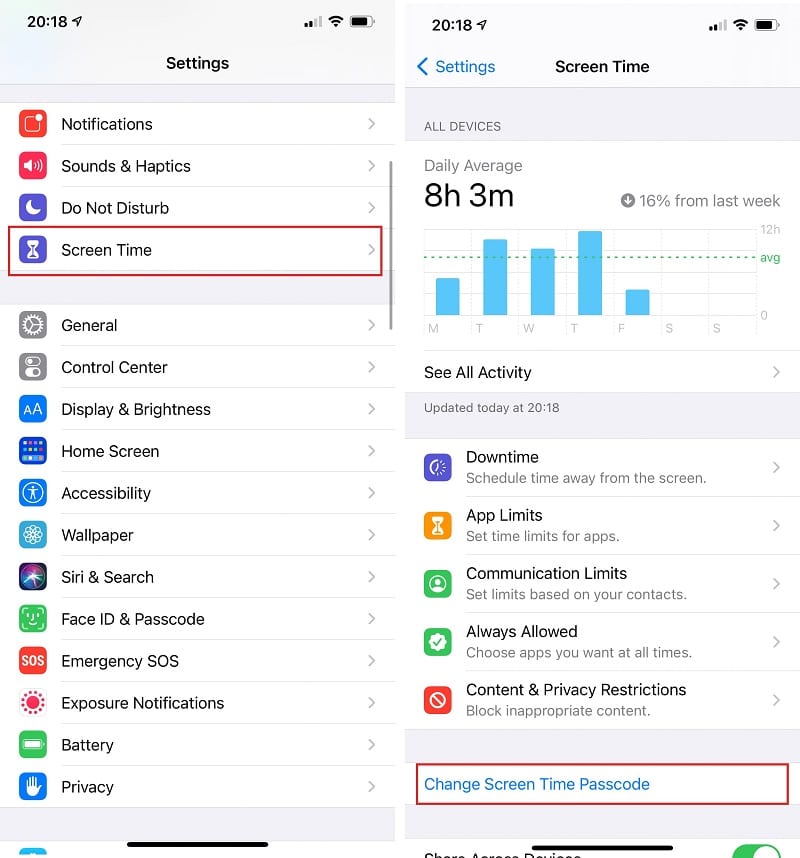
Step 2: Now, this is where you’ll find a selection of restrictions. If you’d like to remove all of them, tap on ‘Change Screen Time Passcode.’ However, make sure to select ‘Turn Off Screen Time Passcode’ if you’d like to completely deactivate this feature.
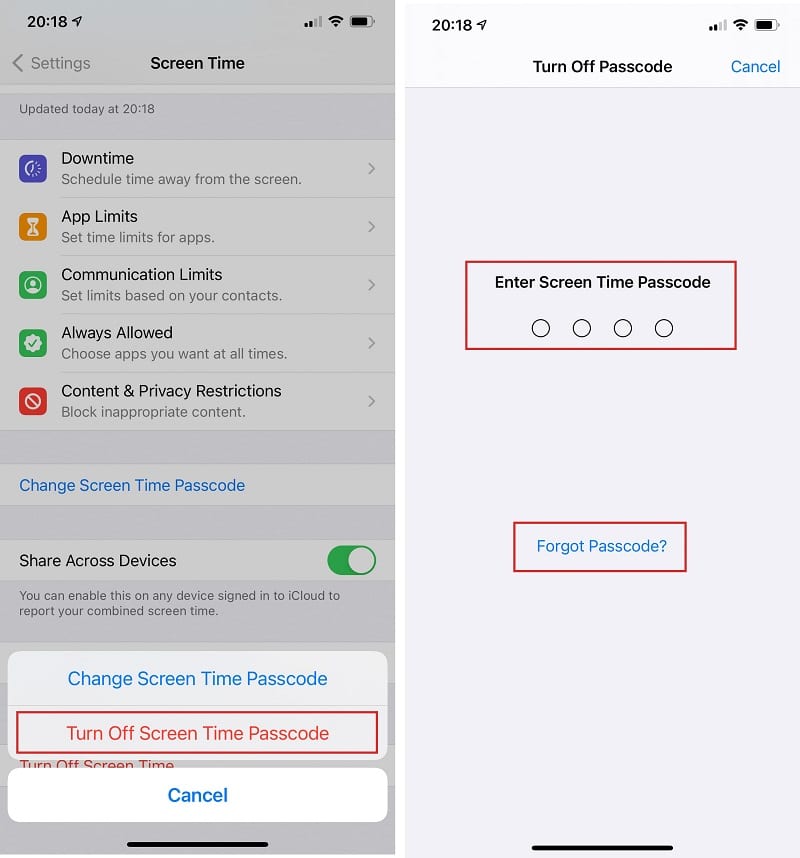
Step 3: Enter your Screen Time passcode when asked. If you don’t remember your passcode, use the ‘Forgot Passcode’ option at the bottom of the screen (just above the keyboard). You’ll be asked for your Apple ID and passcode.
Step 4: Alternatively, you can disable content and privacy restrictions only without having to disable Screen Time. For this purpose, tap on ‘Content & Privacy Restrictions.’
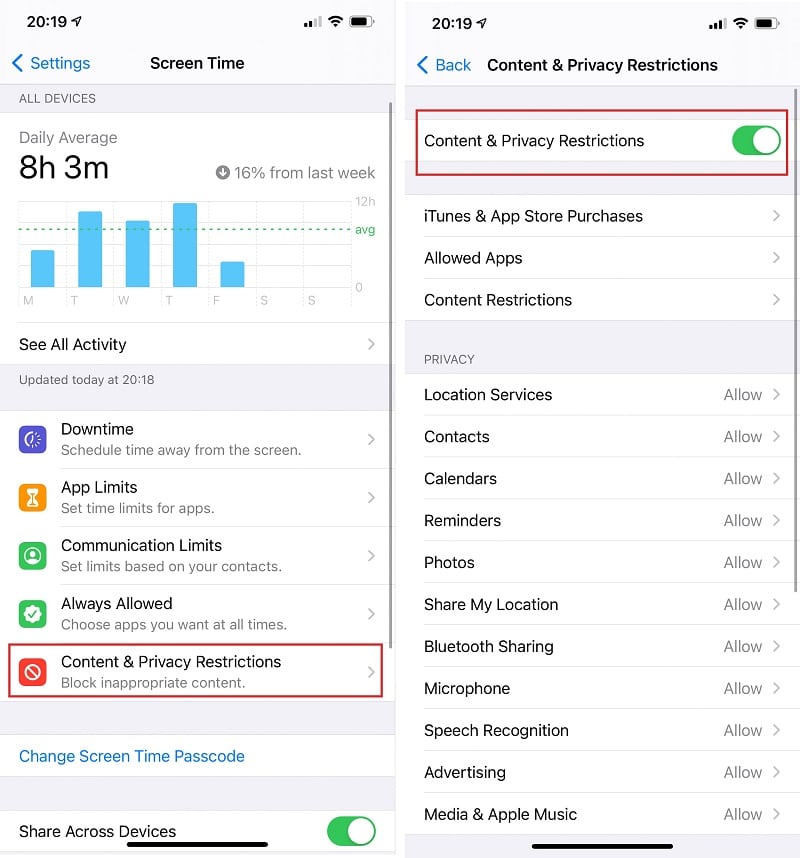
Step 5: At the top, you’ll see a field that reads ‘Content & Privacy Restrictions.’ Tap on the switch on the right side of the screen to disable this option. If a passcode wasn’t set up, you wouldn’t be asked for one. However, if there is a passcode, you’ll need to input it to disable restricted mode.
How to Turn Off Restricted Mode on iPhone Without Passcode?
So, what can be done if you don’t remember your passcode? Well, you’ll be asked for your Apple ID and password. However, even if you can’t supply that information, there’s no need to panic as there’s a way to turn off restricted mode on iPhone without a passcode.
For this purpose, we’ll use a specialized tool called Tenorshare 4uKey – iTunes Backup. This is the easiest way to retrieve lost passwords, and you’ll see that this software could be a lifesaver in many situations. So, here’s what you need to do.
Step 1: First, make sure to download Tenorshare 4uKey – iTunes Backup to your computer. It’s compatible with both macOS and Windows, so installing the software is quite easy.
>> Get Tenorshare 4uKey - iTunes Backup Coupon (30% OFF) <<
Step 2: Now, you need to connect your iPhone to your computer. This is done by using a USB cable. Make sure to tap on ‘Trust’ on your iPhone’s screen so that your computer can read your smartphone’s contents.
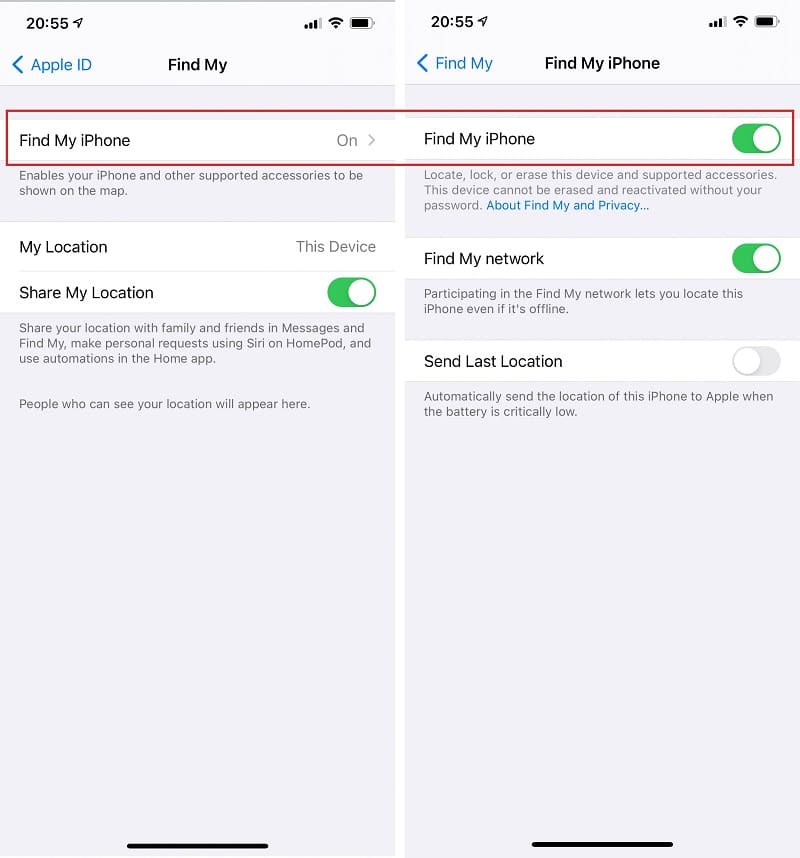
Step 3: It’s also recommended to disable the ‘Find My iPhone’ feature. This is done by going to the Settings app. Tap on your name (at the top of the screen) and go to Find My > Find My iPhone. Make sure to disable this option by clicking on the switch on the right side of the screen.
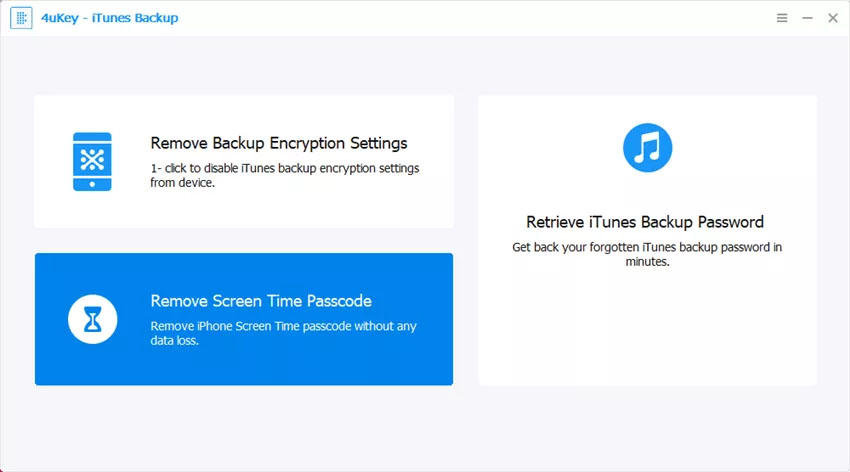
Step 4: Then, launch Tenorshare 4uKey – iTunes Backup and wait until you see its home screen. You need to click on ‘Remove Screen Time Passcode.’
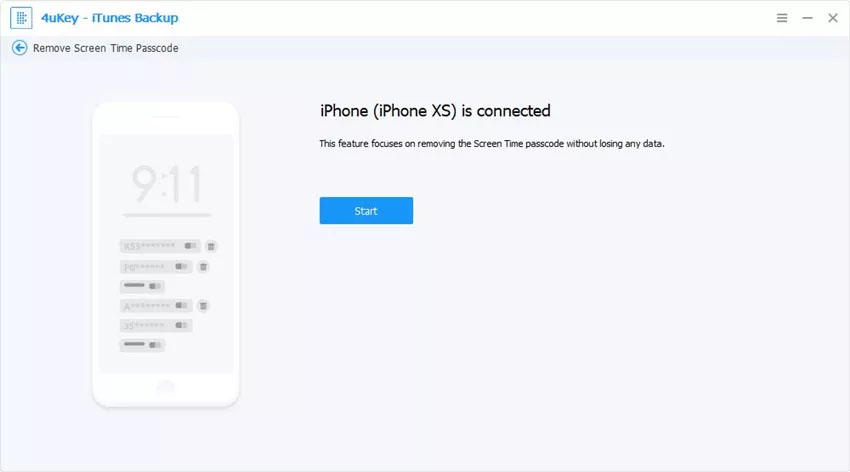
Step 5: The application should now recognize your iPhone, and you’ll see the ‘Start’ button underneath. Feel free to click on that button to initialize the procedure.
Step 6: It shouldn’t take too long for the application to finish the process on its own. Once done, click on the ‘Done’ button, and you’ll return to the application’s home screen. Also, your iPhone’s Screen Time password will be removed.

Step 7: Lastly, go to Settings > Screen Time (on your phone), where you can disable any restrictions. You’ll want to visit the ‘Content & Privacy Restrictions’ to remove most annoying limitations in one go. Learn more from our complete review of Tenorshare 4uKey – iTunes Backup here.
Conclusion
So, that would be all we’ve prepared on how to disable restricted mode on your iPhone. With that said, we hope that this guide will help you bypass iOS content restrictions. If you think other iOS users might find this guide to be helpful, why not share it online? And of course, don’t hesitate to post a comment below if you have any questions.