A ZIP file is a container holding multiple files and folders in a compressed state. You may want to learn how to password-protect a ZIP file when the information it contains is sensitive and you want only authorized people to have access to it.
Usually, you create a password-protected ZIP file to transfer a directory with several classified elements, such as images, documents, subfolders, etc., in it. If you want to learn how to get things done, this guide covers some commonly used methods.
Part 1. Password Protect a ZIP File on Windows 11/10/8/7
Securing a ZIP file is common in almost all the latest Windows variants as long as you have access to the correct tool. For your convenience, the following sections explain how to encrypt ZIP files using a couple of apps easily available online.
1.1. Add a Password to a ZIP File on Windows Using 7-Zip
7-Zip is a free program that offers the highest level of compression ratio while creating archives. Because of this, many home users and professionals prefer using it over any other archiving program. The best part is that 7-Zip is cross-platform, which means it is available for Windows, Mac, and Linux computers. Therefore, regardless of the operating system, you can always have 7-Zip under your sleeves.
You can learn how to use 7-Zip to password-protect a folder while zipping by following the instructions given below:
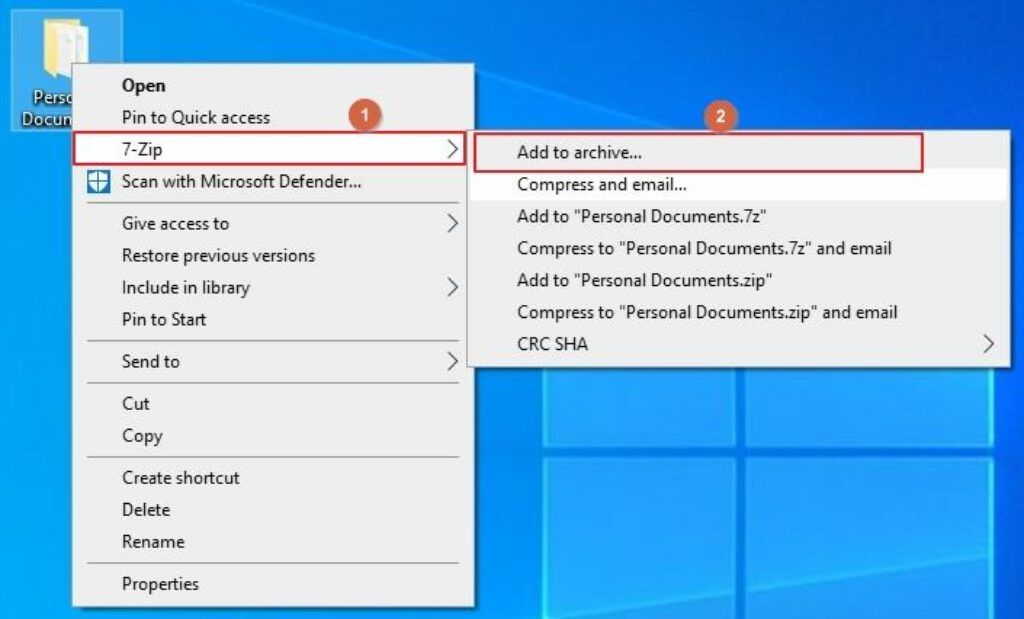
- Right-click the folder you want to password-protect
- Hover the mouse pointer over 7-Zip in the context menu
- Click Add to archive from the submenu
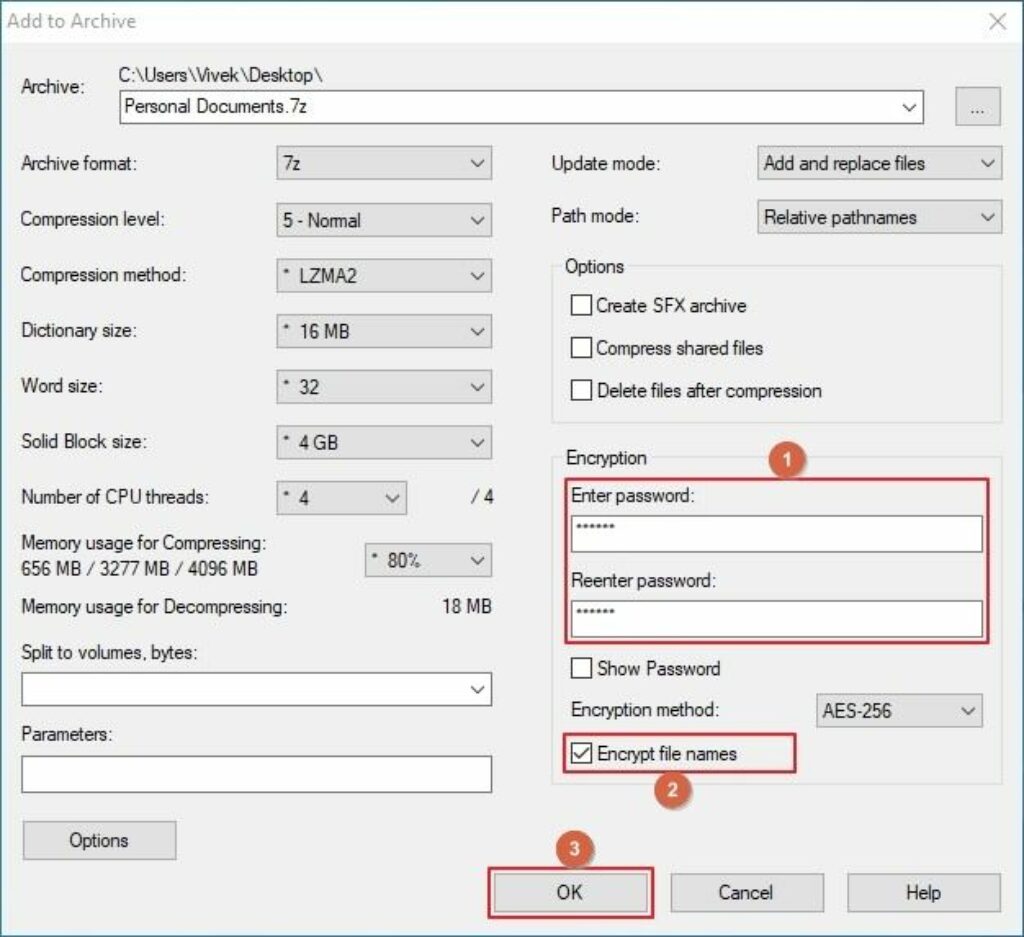
- Choose your compression preferences from the Add to Archive box
- Enter a strong password in the Enter password and Reenter password fields under the Encryption section
- Optionally check the Encrypt file names box to increase security
- Click OK
Tool 2: Encrypt a ZIP File on Windows Using WinZip
WinZip is probably one of the oldest file compressors Windows has seen ever since its GUI version came into existence. While the app still creates files with the *.zip extension (*.zipx in the latest versions), its interface and architecture have remarkably changed. As a result, the latest version of WinZip comes with several security features and file management options.
You can add a password to a ZIP file with WinZip during the compression process using the instructions given below:
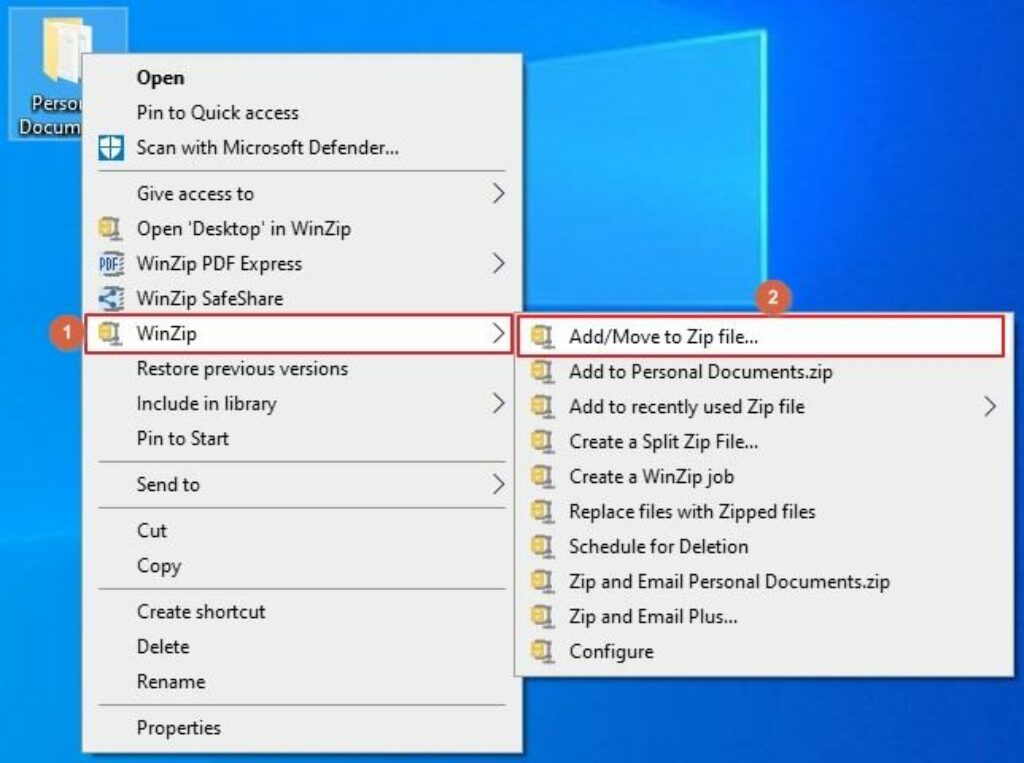
- Right-click the folder you want to encrypt and compress
- Hover the mouse pointer to WinZip in the context menu
- Click Add/Move to Zip file from the submenu that appears
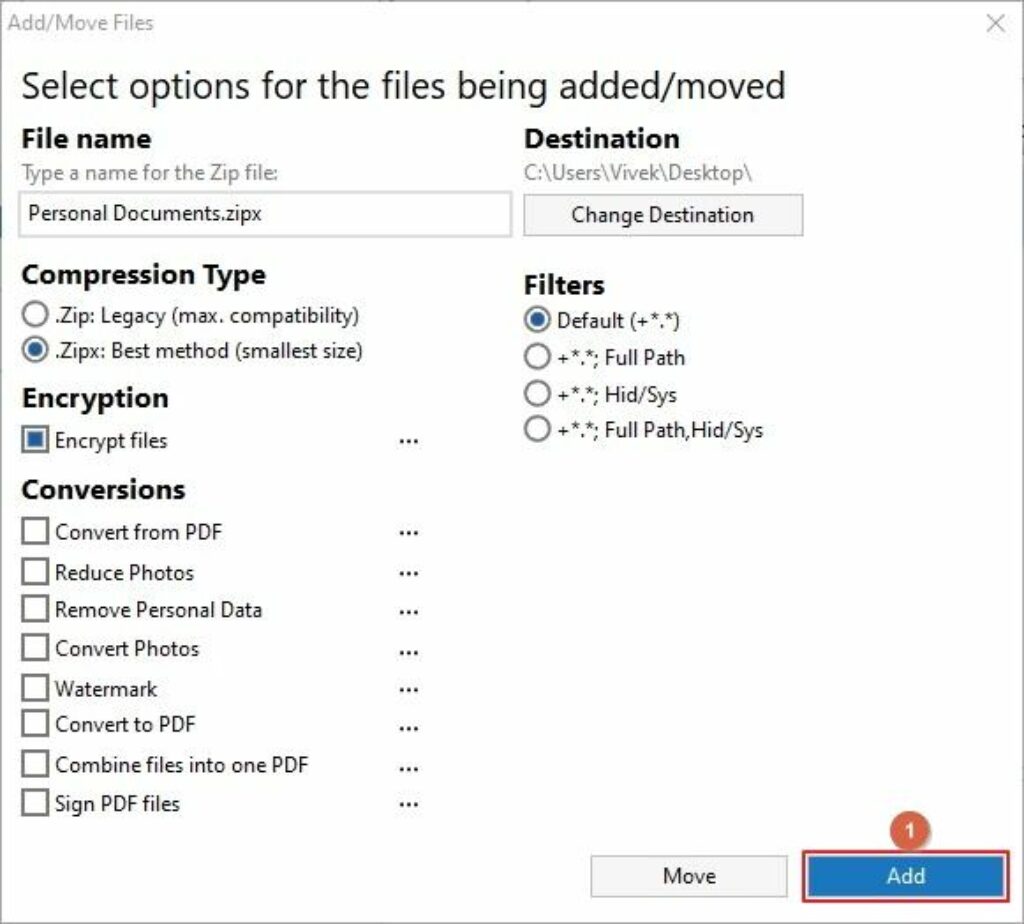
- On the Add/Move Files box, choose your compression preferences
- Check the Encrypt Files box under the Encryption section
- Optionally, click the More button from the right of the Encrypt files label
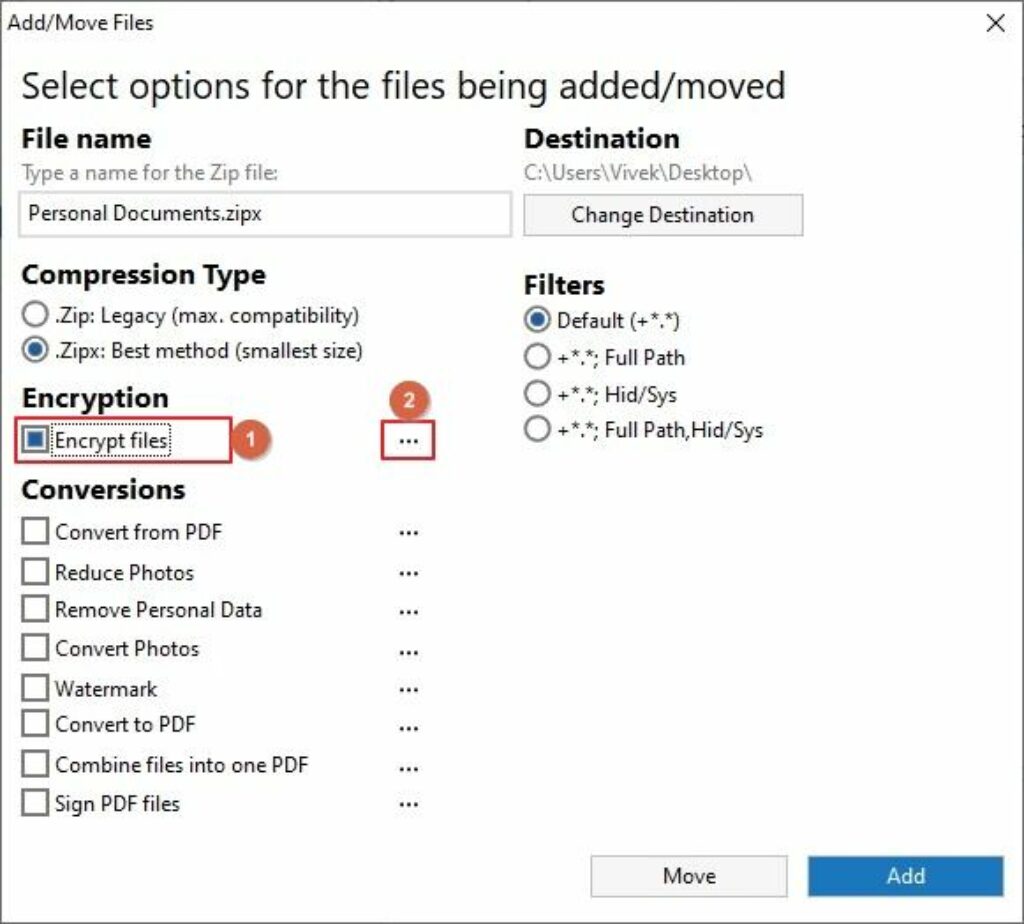
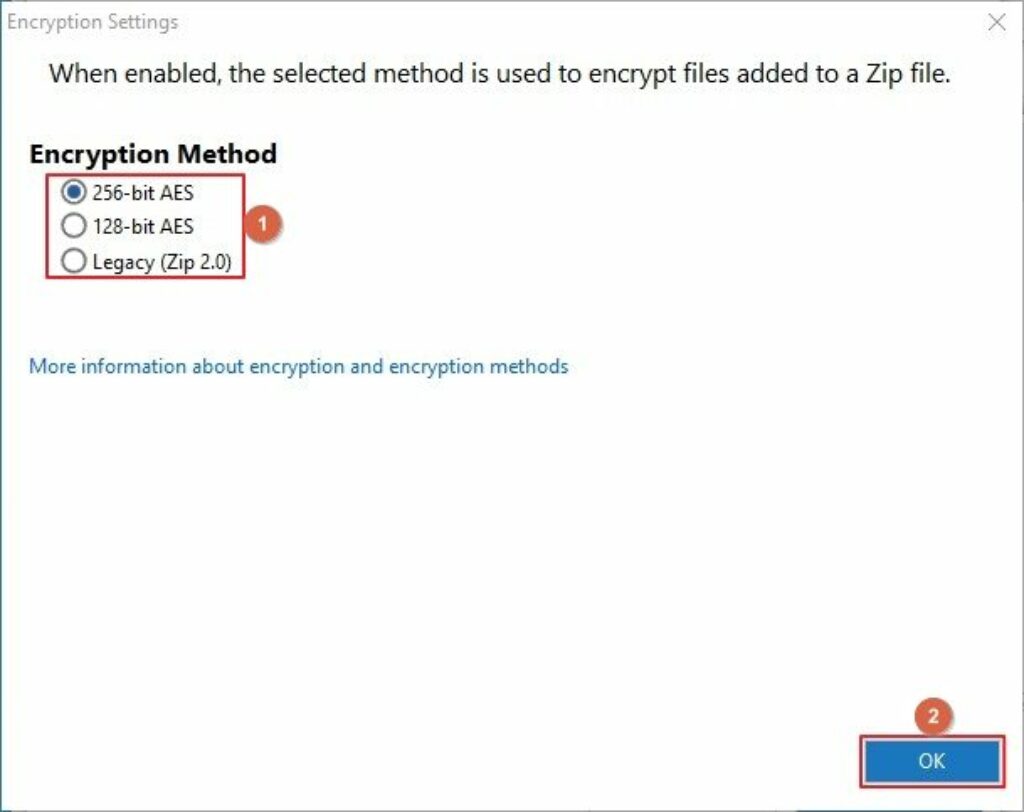
- Choose your preferred encryption method from the Encryption Settings box
- Click OK
- Back on the previous box, click Add to copy the files to the archive (or Move to move the files to the archive)
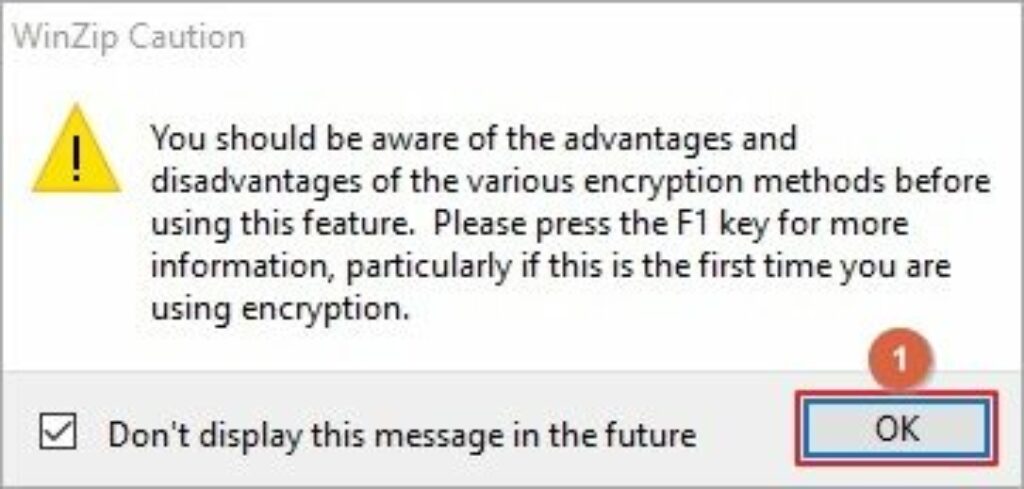
- On the WinZip Caution box, click OK
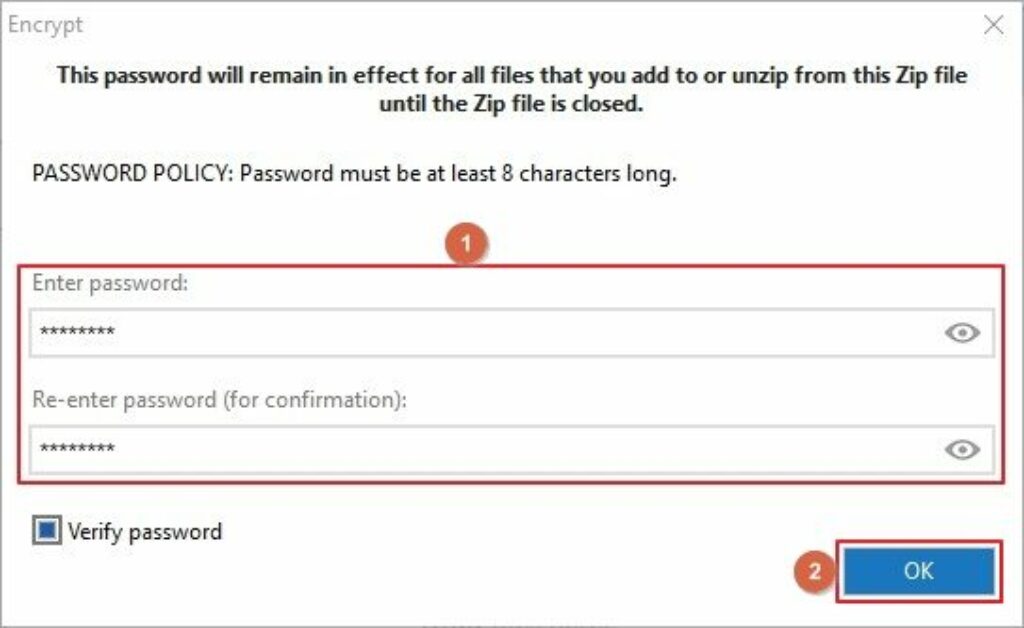
- On the Encrypt box, type and retype an 8-digit password in the Enter password and Re-enter password fields
- Click OK
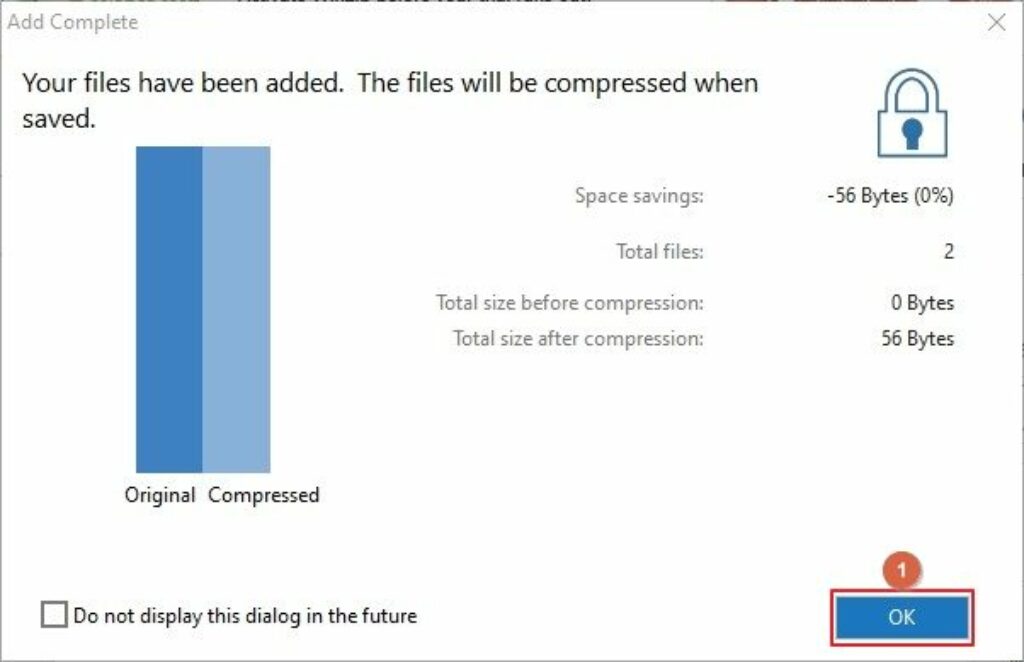
- Click OK on the Add Complete box
Tool 3: Encrypt a ZIP File on Windows Using WinRAR
Quite common among home users, WinRAR is a compressor you will find in almost every PC due to its peculiar Evaluation behavior.
Nevertheless, irrespective of how WinRAR handles its paid and trial versions, the program is quite effective and offers many file management and security options.
You can learn how to password-protect a ZIP file with WinRAR through the step-by-step process explained below:
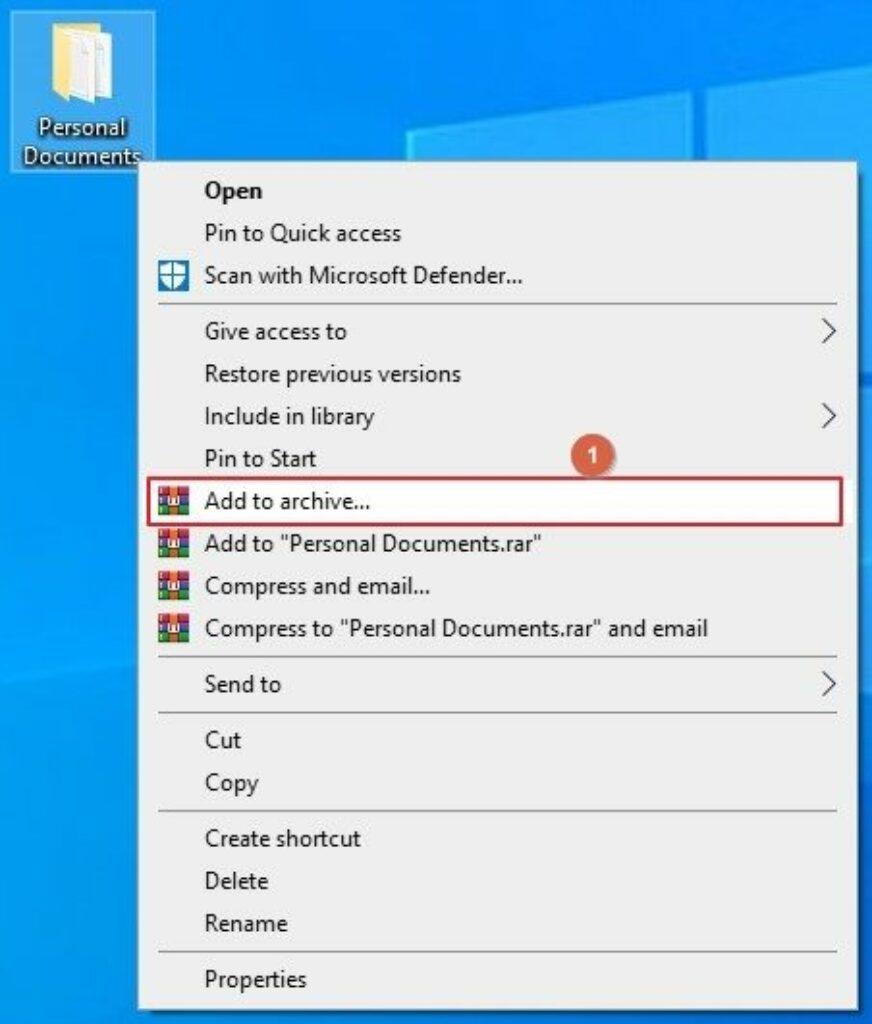
- Right-click the folder you want to compress and password-protect with WinRAR
- Click Add to archive from the context menu
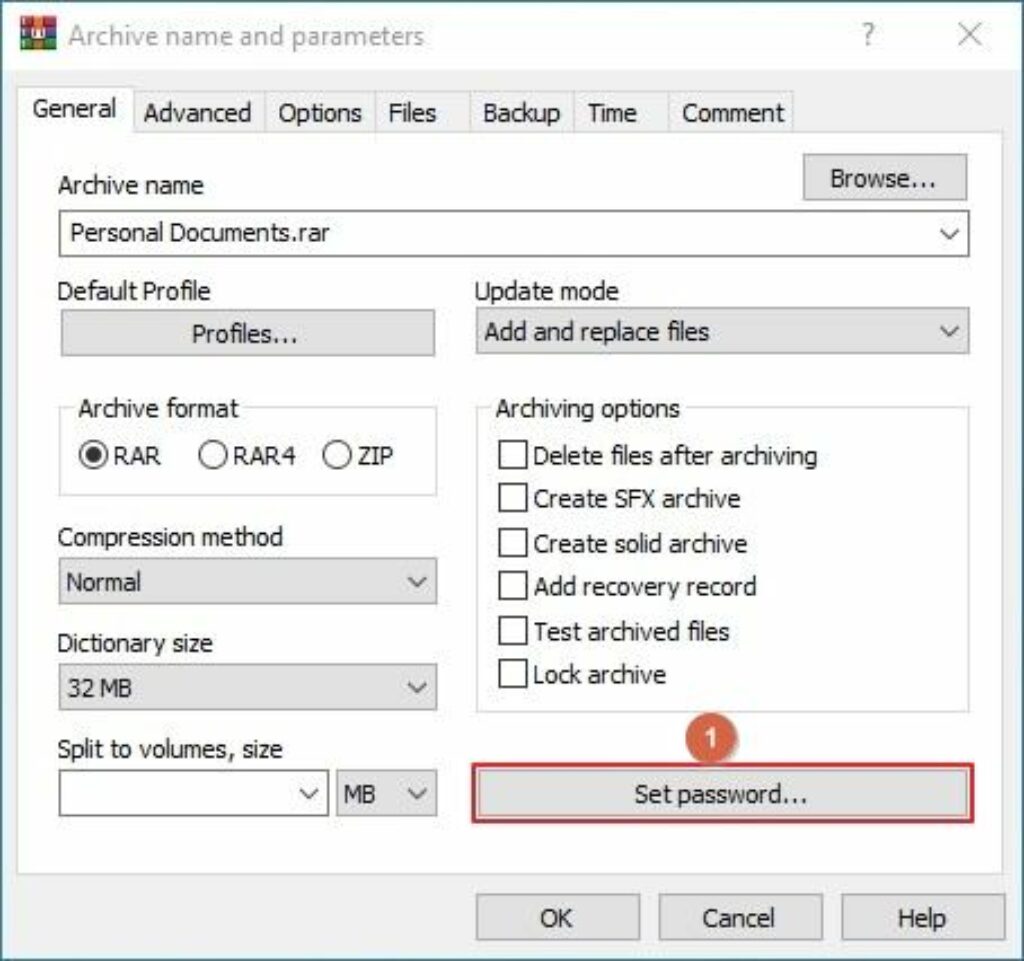
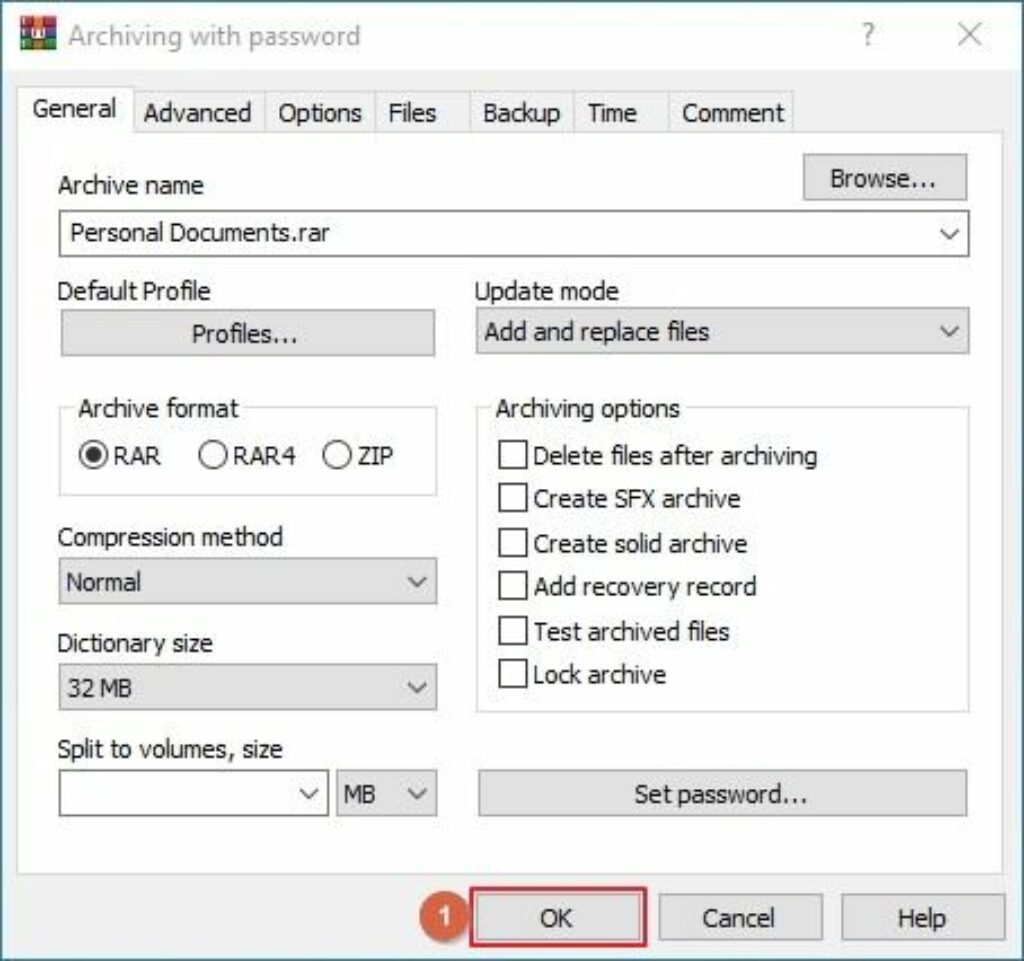
- On the Archive name and parameters box, choose your compression preferences
- Click Set password from the lower-right area
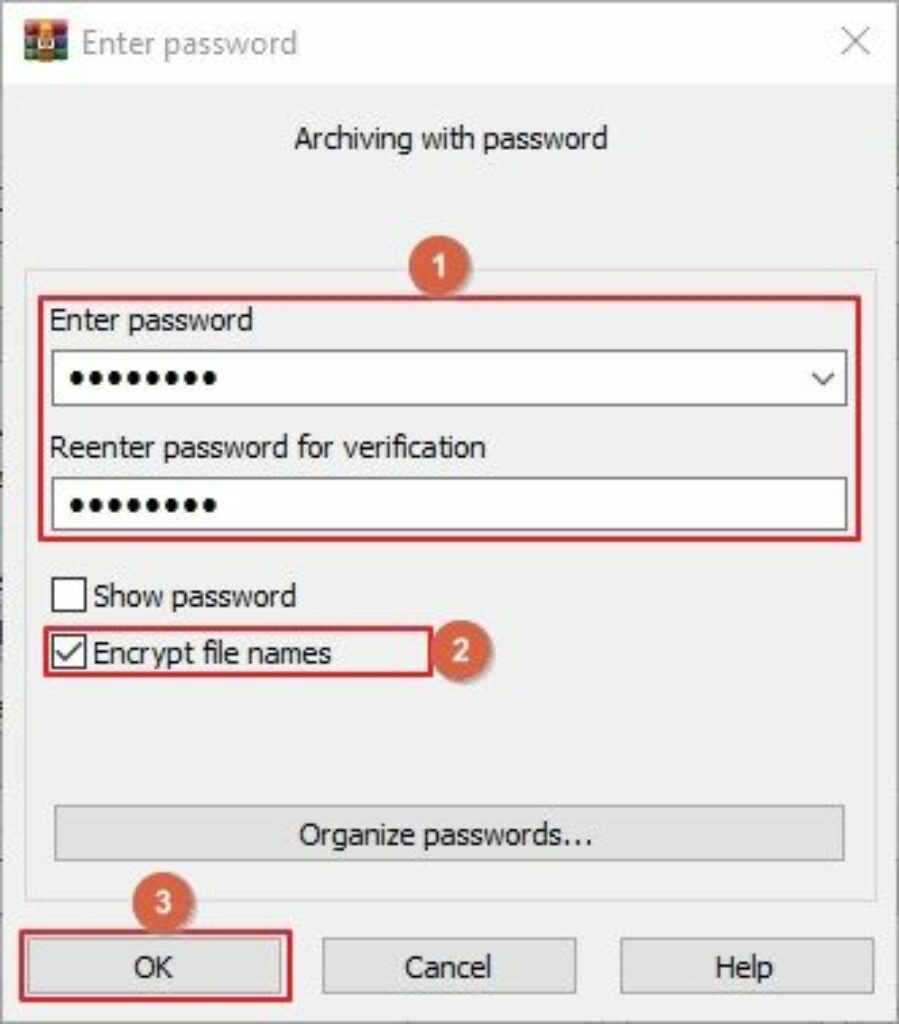
- Type and retype a strong password in the available fields on the Enter password box
- Click OK
- Back on the previous box, click OK to add the password to the ZIP file with WinRAR
Part 2. Password Protect a ZIP File on Mac
Because of the secure and complex macOS architecture, merely a handful of file compression tools are available that also allow encryption for the archives you create. Nevertheless, for your convenience, this section suggests a free and effective zipping program for the purpose. In addition, here you will also learn how to encrypt ZIP files on Mac using Terminal, a built-in app in macOS.
You can continue reading to understand both processes.
2.1. Password-Protect a ZIP File with Terminal
When talking about Terminal, it is a powerful pre-built command-line tool in macOS that allows you to perform most complex tasks, which are otherwise not possible. Because Terminal is free, you don’t have to buy or download any application from the App Store.
You can learn how to encrypt ZIP files on Mac using Terminal by following the procedure given below:
- Place all your sensitive folders and files in a parent folder
- Rename the parent folder so it doesn’t have any spaces in it (PersDocs for this example)
- Open Launchpad from the Dock
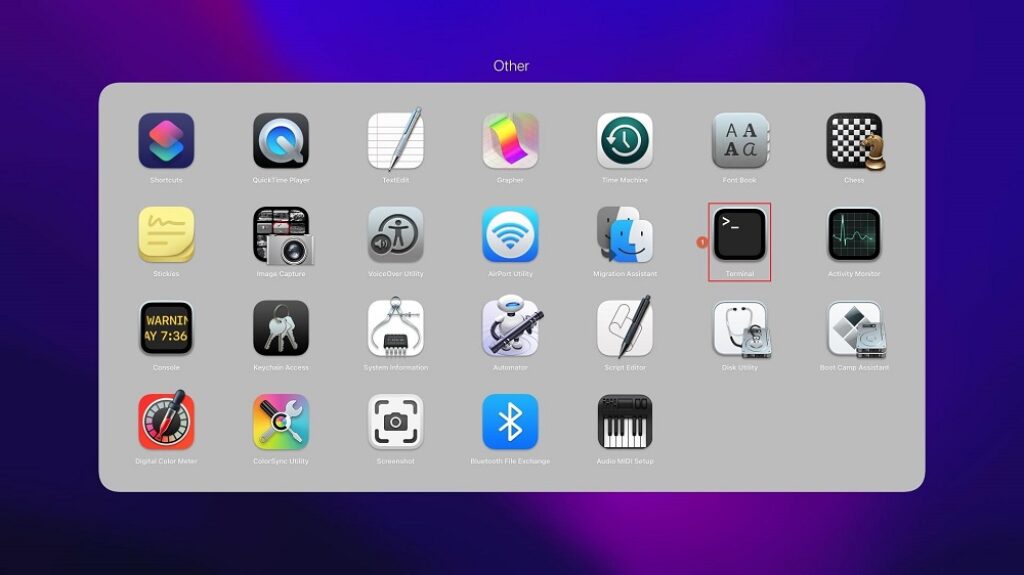
- Go to the Others container
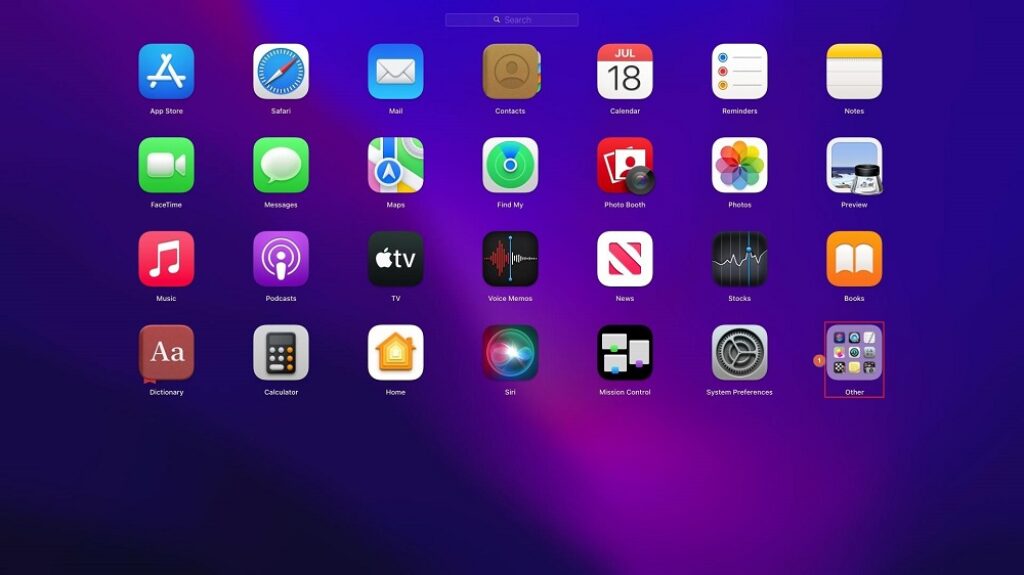
- Click Terminal
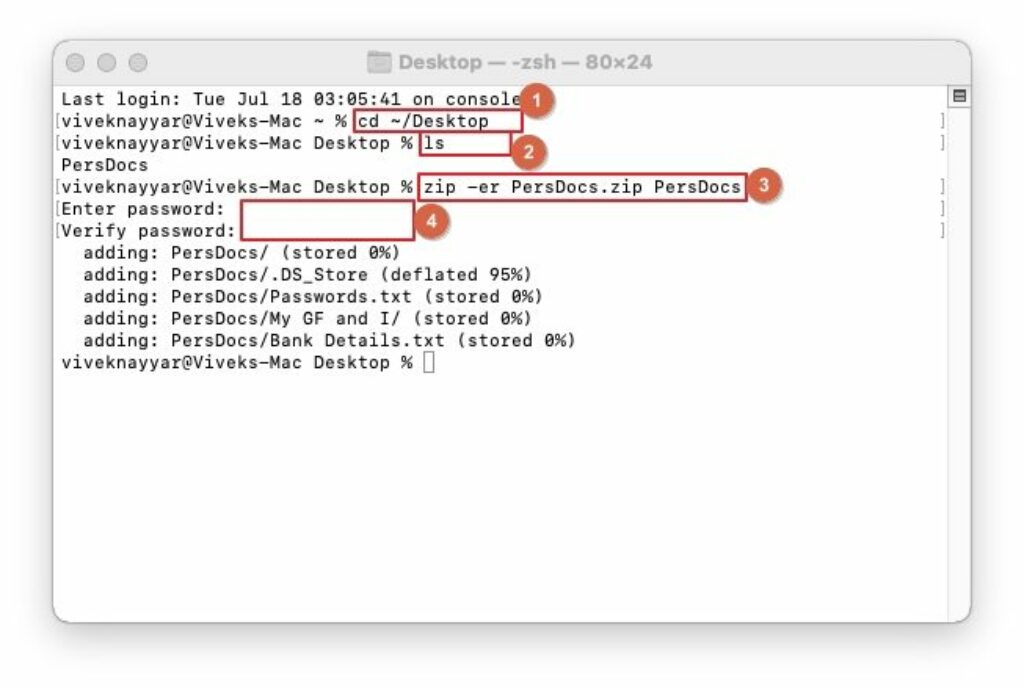
- In the Terminal window, use the CD command followed by a space and the path to the parent directory of the folder you want to password-protect (Desktop for this example). The command should look like this: cd ~/Desktop followed by the Enter key
- Use the ls command to check and confirm if the folder you want to encrypt is present. The command should look like this: ls followed by the Enter key
- Once confirmed, use the ZIP command with ER parameters to encrypt the folder while compressing it. The command should look like this: zip -er PersDocs.zip PersDocs followed by the Enter key
- When the Terminal prompts, enter a strong password followed by the Enter key, reenter the password, and press the Enter key again
- Close the Terminal window when done
Note: The PersDocs folder is used here as an example, and the name of the zip file is the same as the source folder for consistency purposes. In your case, you can choose any name you prefer. However, make sure that the source folder name doesn’t have spaces to avoid inconsistencies during the process.
2.2. Password-Protect a ZIP File with a Third-Party App
While the Terminal method is free and easy, many users find typing commands daunting, especially if they are not from a technical background. If you’re one of those, you can use a free third-party program called Keka by aONe.
This is merely for your information that aONe offers a strange method of obtaining Keka, as in, when you try to get the app from the App Store, you must pay $4.99. On the other hand, if you download it directly from their official website, it’s free.
Anyway, getting back to the point. You can follow the instructions given below to add a password to a ZIP file with Keka:
- On your Mac, use Safari (or any other web browser) to go to https://www.keka.io/en/ and download and install Keka for free. Note: Alternatively, you can go to https://apps.apple.com/app/keka/id470158793 to obtain the app from the App Store (not recommended as you will have to pay for it there).
- Once installed, launch Keka
- In the small window that opens above the bigger one, enter and re-enter a strong password in the Password and Repeat fields
- Optionally check the Use AES-256 encryption box for increased security
- Optionally check the Verify compression integrity box to ensure Keka did the job well
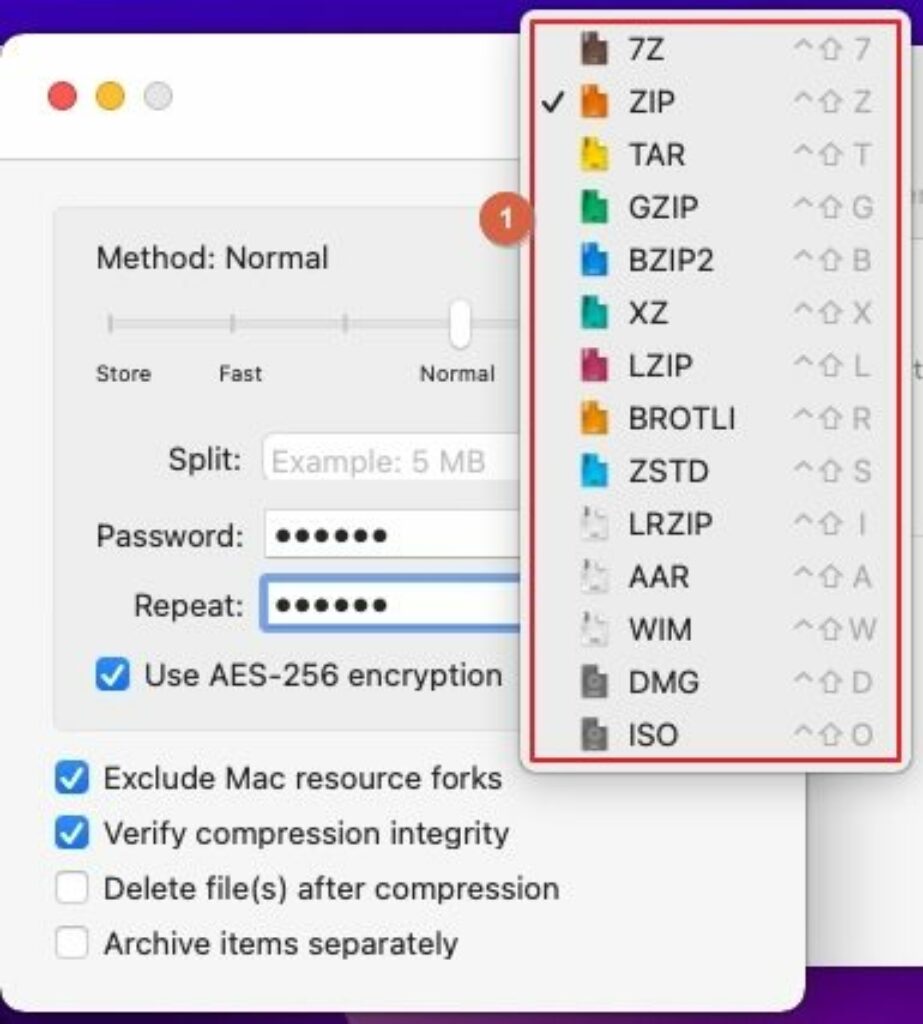
- Optionally click the Formats list from the top-right corner
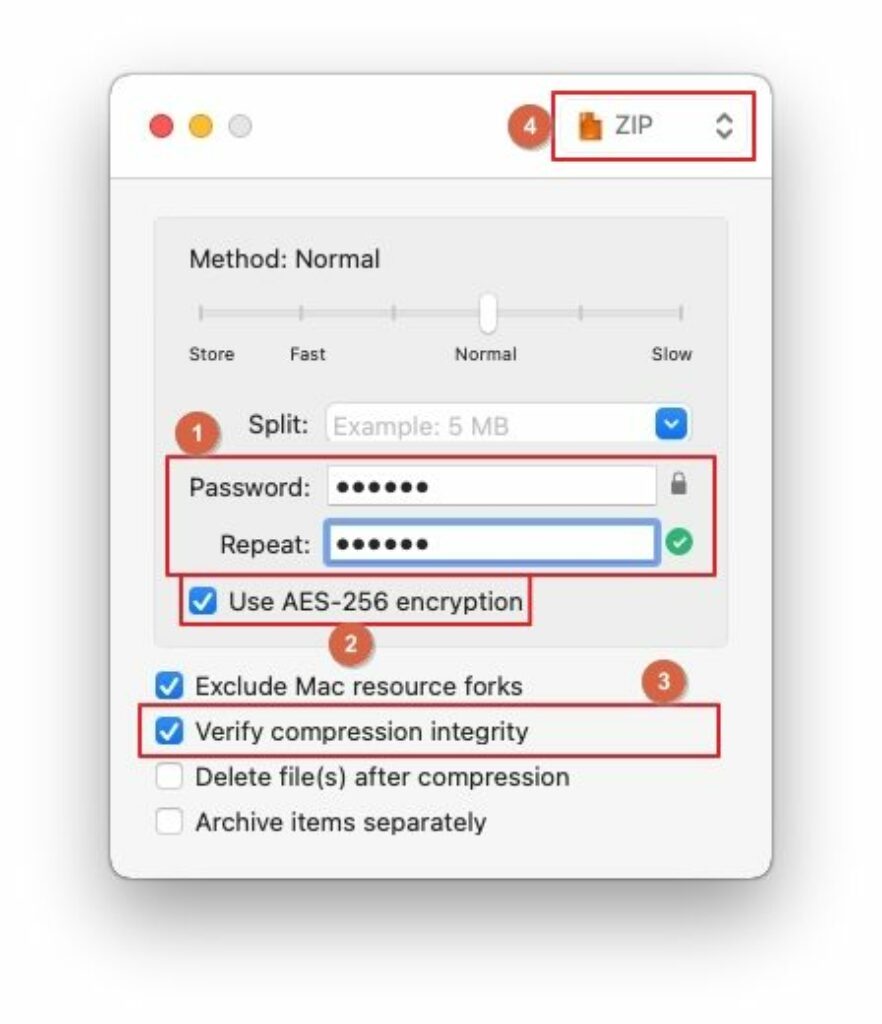
- Choose your preferred file format (ZIP here for reference)
- Drag the source folder into this small window

- On the Using AES-256 encryption in ZIP box, read the warning carefully and click your preferred button from the lower section

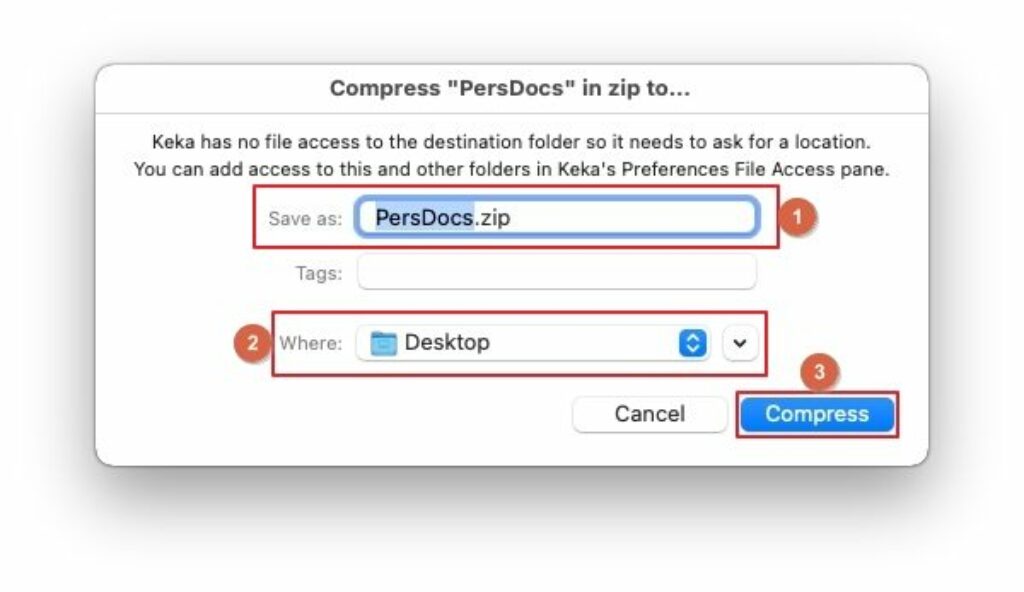
- On the next box, type a file name in the Save as field (or leave the auto-generated name intact)
- Choose a destination folder from the Where field (optional)
- Click Compress to password-protect the contents of the folder during the zipping process
Bonus: How to Open a Password-Protected ZIP File
Be it Windows or Mac, once you have encrypted a ZIP file through an app, you can use the same program to open it. For your convenience, processes for both platforms are covered here.
1. Open A Password Protected ZIP File on Windows
You can follow the steps given below to extract or view the contents of a password-protected zipped file on Windows:
Note: Although 7-Zip is used here for illustration, you can pick any tool of your choice, as the process is identical across all the apps.
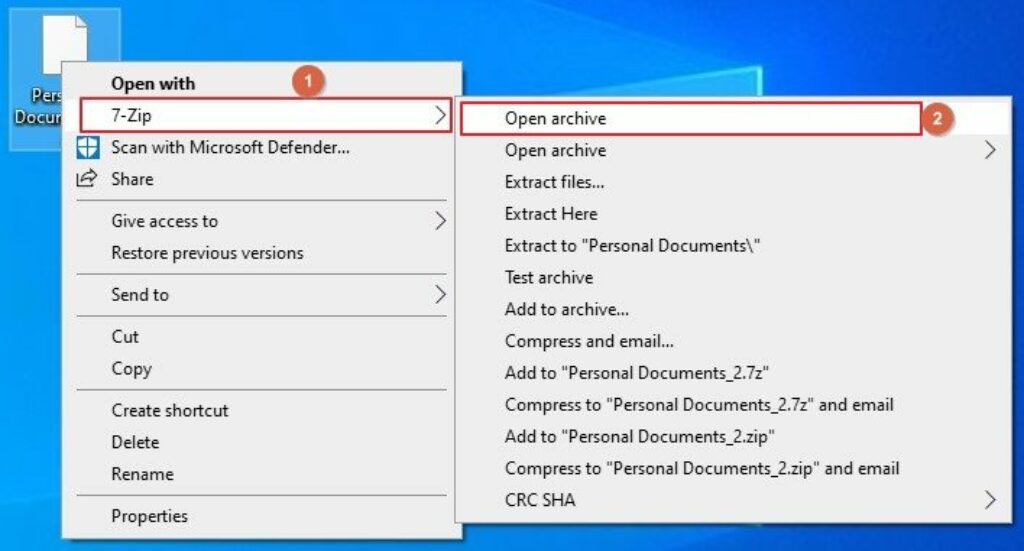
- Right-click the password-protected ZIP file you want to open
- Hover the mouse pointer over 7-Zip from the context menu
- From the submenu, click Open archive
- Type the password
- Click OK
2. Open A Password Protected ZIP File on Mac
You can follow the instructions given below to unzip a password-protected ZIP file on Mac:
Note: Unzipping through the Terminal is explained here for reference.
- Use the method explained above to launch the Terminal app
- Use the CD command to go to the folder where the password-protected ZIP file is present
- Now, type unzip followed by a space
- Drag the password-protected ZIP file from the folder into the Terminal window to copy the file name with its full path
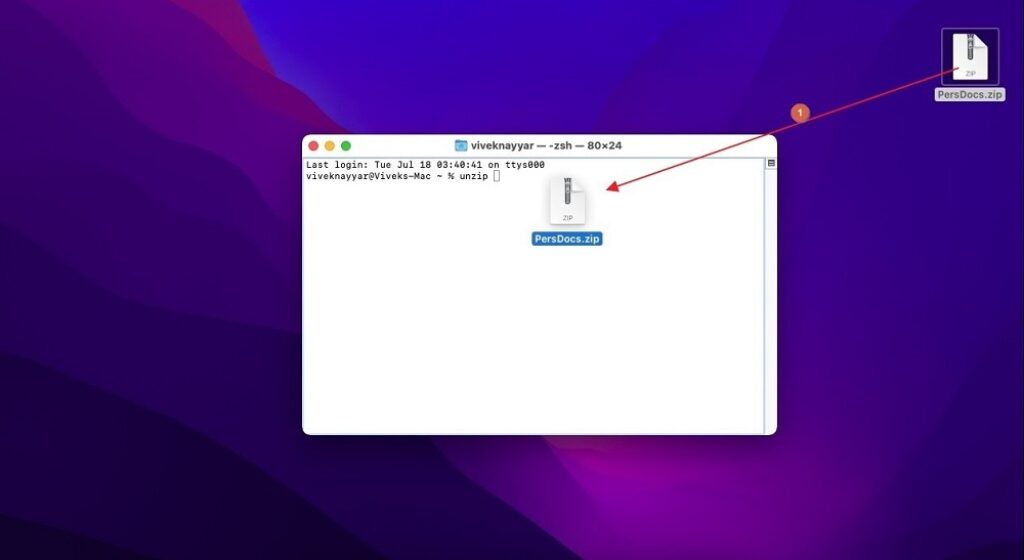
- Press Enter
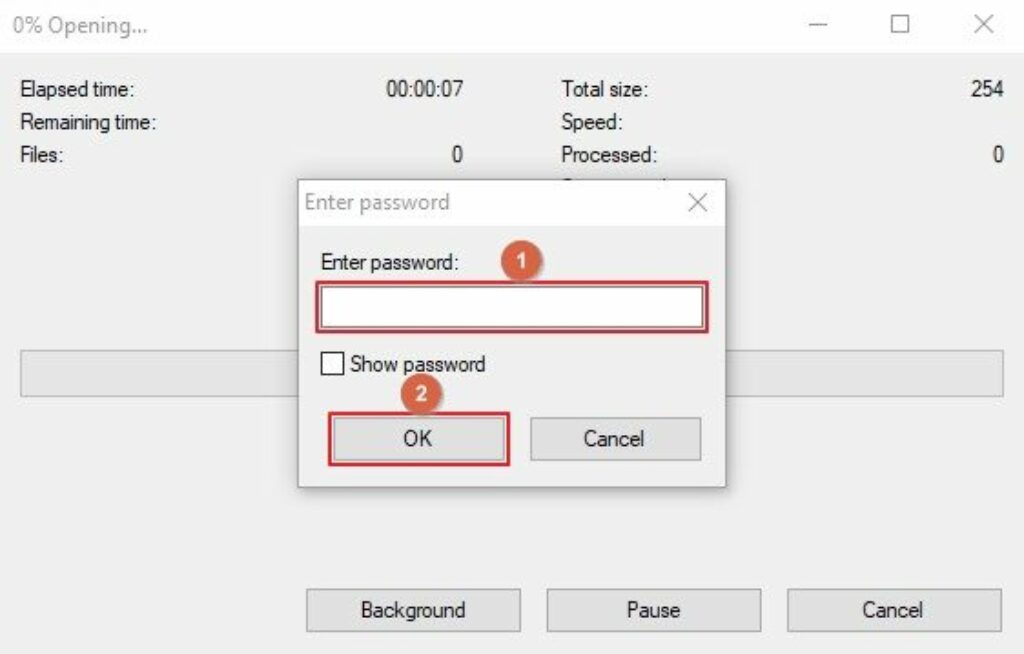
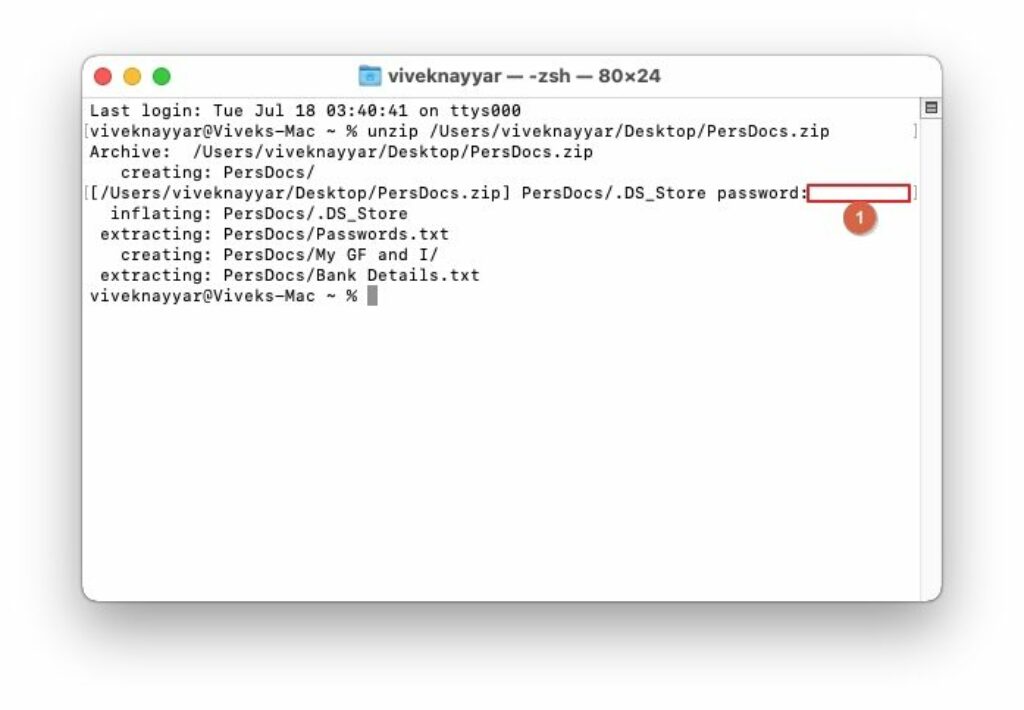
- Type the password when the Terminal prompts
- Wait while macOS unzips the password-protected ZIP file
Also Read: How to Open Password-Protected ZIP File without Password
FAQs
Q1. Can I encrypt a ZIP file using one app and unzip it using a different program?
Answer: Absolutely. In fact, that’s the main point of having encrypted zipped files, as you can send them to the target recipient and share the encryption password with them. The recipient can then use their preferred program to unzip the file and enter the password when the app prompts.
Q2. Can I password-protect a ZIP file on Windows and send it to a Mac user?
Answer: As long as the macOS supports the format of the ZIP file, yes, you can. For example, if you created a ZIP file using WinZip, the extension of the file will be *.zip or *.zipx. Because macOS recognizes these extensions, you can double-click the file or use the Terminal and enter the password when Mac prompts. This will unzip the file on your Mac.
Q3. If I encrypted a ZIP file with an app and uninstalled it after some time, how can I unzip the file?
Answer: In this case, you can re-download the program or use 7-Zip to open the encrypted file. Because 7-Zip is free and supports all platforms, you can use it on both Windows and Mac computers without any restrictions or expiration dates.
Conclusion
Learning how to encrypt a ZIP file is easy, and encrypting a file using any method is even easier. Because archiving tools are freely available on the Internet, you can download any of your choice and use it to secure your files with a password during the zipping process. To extract the contents, you can enter the password when the app prompts while unzipping. If you have gone through this guide and are reading this line, you know how to password-protect a ZIP file on Windows and Mac.