If you’ve tried to fix/restore your iPhone, you might have encountered the term “DFU mode” during your research. The term isn’t very clear, and most people get confused about it.
As you’re reading this post, we know you’ve also found yourself in the same boat and are looking for answers.
Well, your search stops here! This post will tell you exactly what DFU mode is and how to put your iPhone in DFU mode.
Lastly, we will also tell you how to exit DFU mode if stuck in it.
Without any further ado, let’s jump right into it.
Part 1. What is DFU mode?
DFU mode is a special update/restore mode that can be accessed on iPhones.
It lets you access the device’s firmware, which is the software that controls how the device operates. DFU mode can be useful in cases where the device is not functioning correctly, such as when it is stuck in a boot loop or when the device is not responding. It can also be used to install custom firmware or downgrade the iOS version.
To enter DFU mode, you need to follow a specific set of instructions, which involve pressing and holding down certain buttons on the device while it is connected to a computer. We will explain the exact method for each device in the upcoming sections below.
Once in DFU mode, the device’s screen may appear black, indicating that it is in a special state where it is ready to receive firmware updates or other modifications.
DFU mode is different from recovery mode, which is another mode that can be used to fix issues with Apple devices. Recovery mode allows you to restore the device to its original firmware, while DFU mode provides even deeper access to its firmware by bypassing the iBoot bootloader.
It is important to note that using DFU mode incorrectly can cause damage to the device, so it should only be used by users familiar with iOS or other firmware-related tasks. It’s also important to follow instructions carefully and only use DFU mode if you know what you’re doing.
Now that you know what is iPhone DFU mode, it’s time to talk about how to enter it.
Part 2. How to Put iPhone in DFU Mode?
The steps to enter DFU mode aren’t the same for every iPhone model. So, we’ve divided this section into multiple subsections for different iPhone models.
Feel free to jump directly to the section with your iPhone model.
iPhone 14, 13, 12, 11, X, 8, SE (2020 & 2022)
Let’s talk about the recent generations of iPhones first. Shall we?
To enter the DFU mode on your iPhone 14 series, 13 series, 12 series, 11 series, XS, XS Max, X, 8, or SE (2020 or 2022), follow the instructions in this section.
Before getting started, launch iTunes on a Windows computer or Finder on Mac. You will also need your USB-to-Lightning cable to connect your iPhone to the computer.
Then, follow the steps below.
- Quickly press and release the Volume Up button, then quickly press and release the Volume Down button.
- Press and hold the Side button until the screen goes black.
- Hold the Side button and then hold the Volume Down button simultaneously for 5 seconds.
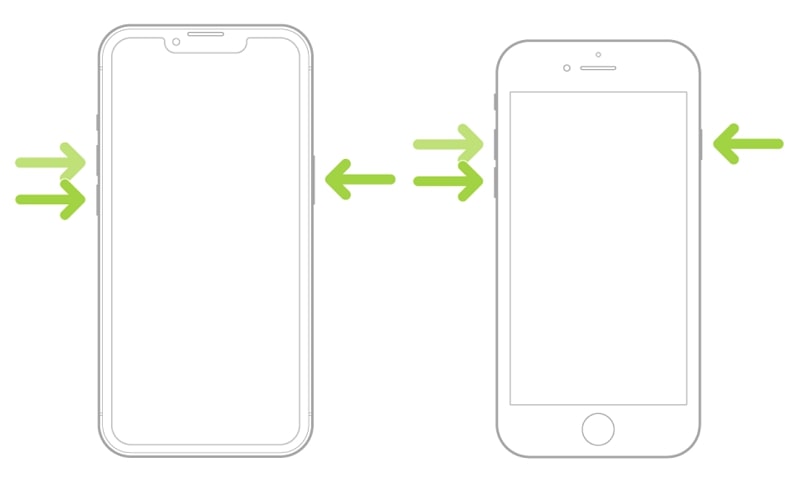
- Release the Side button but hold the Volume Down button for another 10 seconds.
- If the screen remains black, you have successfully entered DFU mode. You will also see a popup in your Finder or iTunes saying that your iPhone has been detected and needs to be restored.
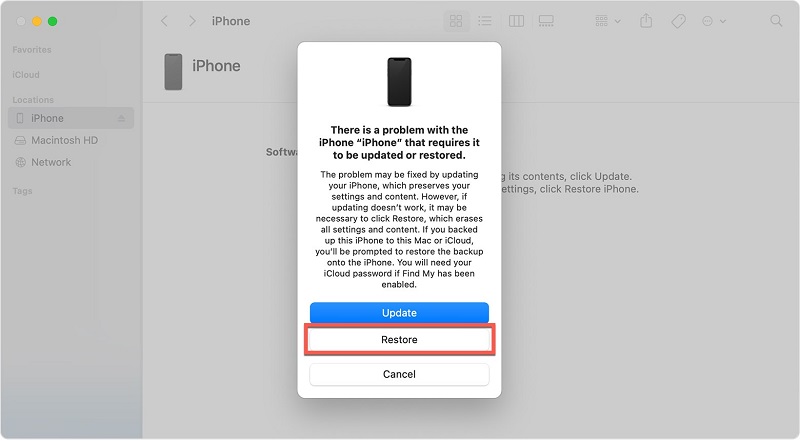
- If the Apple logo appears, it means you have made a mistake and will need to start over.
Be noted that entering the DFU mode can be quite tricky for most new people. It’s okay not to be able to enter it on the first try. Try it a few times, at least.
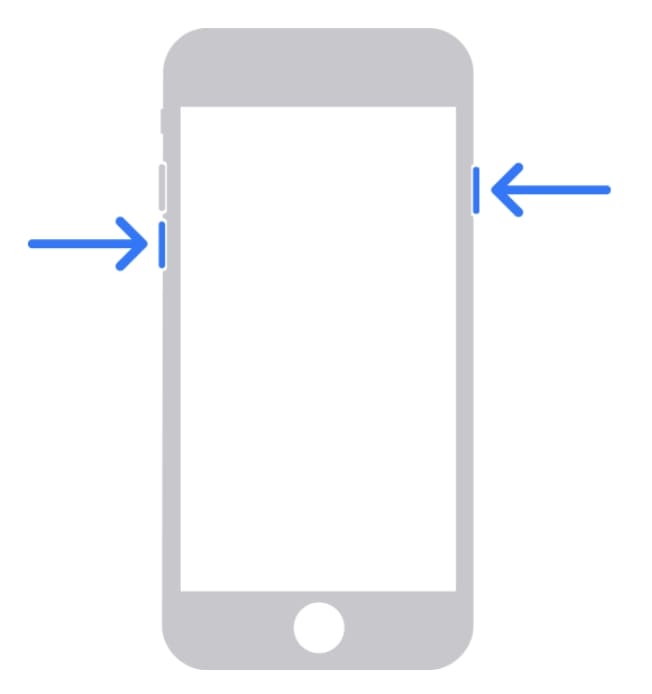
iPhone 7 and 7 Plus
To enter the DFU mode on iPhone 7 and 7 Plus, you have to follow a different set of steps.
Here’s what you need to do.
Connect the iPhone 7 to the computer using a USB cable, then open Finder or iTunes on your computer. Then, follow the steps.
- Hold down the Sleep/Wake button and the Volume Down button simultaneously.
- After 8 seconds, release the Sleep/Wake button, but continue holding the Volume Down button.
- If the screen remains black, you have successfully entered DFU mode. You will see a message on your Finder/iTunes saying your iPhone needs to be restored.
- If the Apple logo appears, it means you have made a mistake. Restart your iPhone and start over.
It might take a few tries before you can get it right.
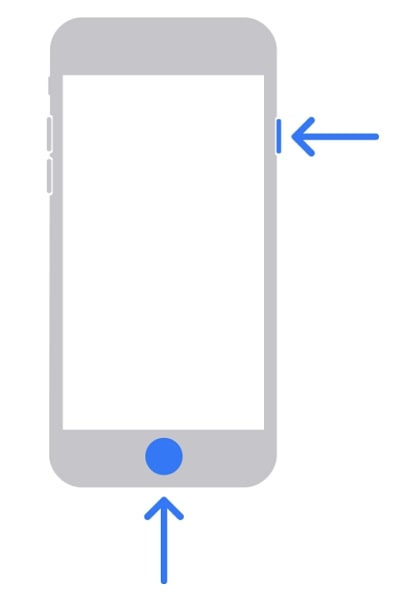
iPhone 6s or earlier
Lastly, if you have an iPhone 6s or earlier, this section explains how to enter the DFU mode.
Connect your iPhone to the computer and open Finder/iTunes based on whether you’re using macOS or Windows.
Then, follow the steps below.
- Hold down the Lock button and the Home button at the same time.
- After 8 seconds, release the Lock button, but continue to hold down the Home button.
- If the screen remains black, you have successfully entered DFU mode. If you’ve done it right, you will see a popup on your iTunes/Finder saying an iPhone has been detected and needs to be restored.
- If the Apple logo appears, you’ve done something wrong and will need to try again.
Again, you may not get it right the first time. So, make sure to give it a few tries.
Part 3. When to Put iPhone in DFU Mode?
DFU mode can be useful in a number of scenarios.
Here are some common cases where you’d need to put your iPhone in the DFU mode.
- If you want to downgrade the iOS version on your iPhone to a previous version.
- If you want to jailbreak your iPhone and install custom firmware. We don’t recommend jailbreaking your iPhone until you know exactly what you’re doing.
- If you are experiencing serious software issues on your iPhone, such as persistent errors during iOS updates, and need to reinstall the firmware from scratch.
- If you are trying to perform advanced tasks on your iPhone that requires the deepest access to the device’s firmware.
Part 4. What to Do If iPhone Stuck in DFU Mode?
Now that you know how to put iPhone in DFU mode, it’s time to see how to get out of it.
Sometimes, people get stuck in the DFU mode and don’t know how to exit it. That’s because when you’re in DFU mode, there’s nothing on the screen — so people get confused.
Luckily, Tenorshare ReiBoot gives you a simple way to get out of DFU and Recovery Mode.
Here’s what you need to do.
>> Get Tenorshare ReiBoot Coupon (30% OFF) <<
- Download and install Tenorshare ReiBoot on your computer, then open it.
- Connect your iPhone to the computer.
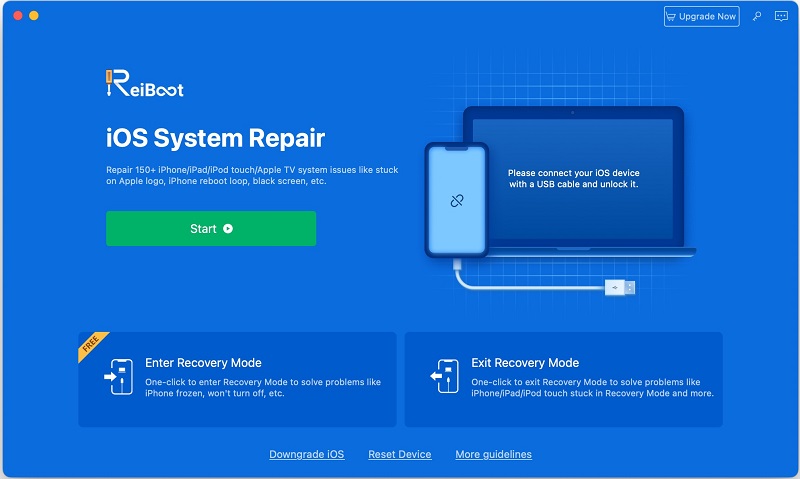
- Hit the “Exit Recovery Mode” button on the bottom right.
And that’s it! You’ve successfully got out of the Recovery/DFU mode.
Frequently Asked Questions About iPhone DFU Mode
Is DFU mode safe?
DFU mode is safe. However, it can be unsafe if you don’t know what you’re doing. So, we recommend using it only when you know what you’re doing.
I can’t enter DFU mode; what to do?
You’re likely doing one of the steps wrong. Most people can’t enter the DFU mode on their first try. We recommend you try again by following the exact steps.
What’s the difference between DFU and recovery mode?
Both modes are used to restore iPhones. However, the DFU mode gives you even deeper access to your iPhone’s software by bypassing the bootloader, so it can be used for things like downgrading your iOS version.
Conclusion
The DFU mode is an incredibly powerful tool, but most people don’t know how to enter it.
After reading this post, now you’re not one of them!
Not only do you know how to enter the DFU mode on all iPhone models, but you also know how to exit it with a click of a button using Tenorshare ReiBoot.