The “iPhone is disabled, try again in 1 hour” alert pops up after you have entered the wrong passcode multiple times. It seems scary, but there is no reason to panic. There are several ways to bypass the disabled iPhone and lift the temporary restrictions.
The quickest and safest way to bypass disabled iPhones is to wait it out and enter the correct passcode. But if you do not remember the original passcode, this guide will teach you how to bypass the disabled iPhone and reset the iPhone. You can then use the iCloud or iTunes backup to restore all or the contents of the previous data.
Read on to find step-by-step instructions on how to bypass a disabled iPhone.
Why Does your iPhone Say, “iPhone is Disabled Try Again in 1 Hour?”
If you see the “iPhone is disabled, try again in 1 hour” message, it means you’ve entered the wrong passcodes consecutively many times.
On iOS 16, the “iPhone is disabled, try again in 1 hour” means you have entered the wrong passcode seven times. The security lockout on different iOS models is different. For instance, on iOS 15.2 and some earlier models, the “iPhone is disabled, try again in 1 hour” message is flashed after the 9th consecutive wrong passcode attempt.
Additionally, iPhones do not escalate messages of 1-hour lock initially. After every wrong attempt, disabled messages will read like this:
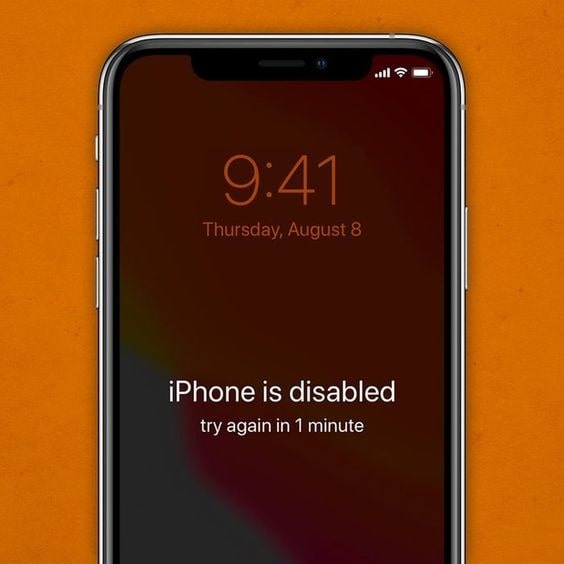
- After five wrong passcode attempts, you will see the “iPhone is disabled, try again in 1 minute” alert.
- After six wrong passcode attempts, you will see the “iPhone is disabled; try again in 15 minutes” alert.
- After seven wrong passcode attempts, you will see the “iPhone is disabled; try again in 15 minutes” alert.
- After eight wrong passcode attempts, you will see the “iPhone is disabled; try again in 1 hour” warning.
After the tenth wrong attempt on iOS 16 versions, Apple will escalate the Security Lockout. And the only way to bypass the disabled iPhone will be via factory reset — all the data on the device will be lost.
It is also important to note that sometimes the iPhone cannot recognize the Face ID and Touch ID.
Nevertheless, if you see the iPhone Unavailable or is disabled, try again in a 1-hour alert, and follow the below methods to bypass the Security Lockout.
Quick Fix “iPhone Unavailable” by Waiting It Out
The obvious and straightforward method to deal with iPhone is disabled; try again in 1-hour alert is to wait it out. Once the 1 hour lock-in is over, you can unlock the iPhone using the correct passcode. Additionally, all the data on the iPhone will be safe.
If you do not remember the password, follow the instructions in the subsequent sections to bypass the disabled iPhone.
Method 1: How to Bypass Disabled iPhone Using iPhone Unlocker?
While there are several native ways to bypass disabled iPhone and restore it to factory settings, they are either hard to follow, come with prerequisites, or don’t support all iOS versions. On the other hand, Tenorshare 4uKey supports all iOS versions and allows you to bypass the “iPhone is disabled” message seamlessly. You can remove all types of passwords using 4uKey without using iCloud or iTunes to bypass disabled iPhones.
>> Get Tenorshare 4uKey Coupon (30% OFF) <<
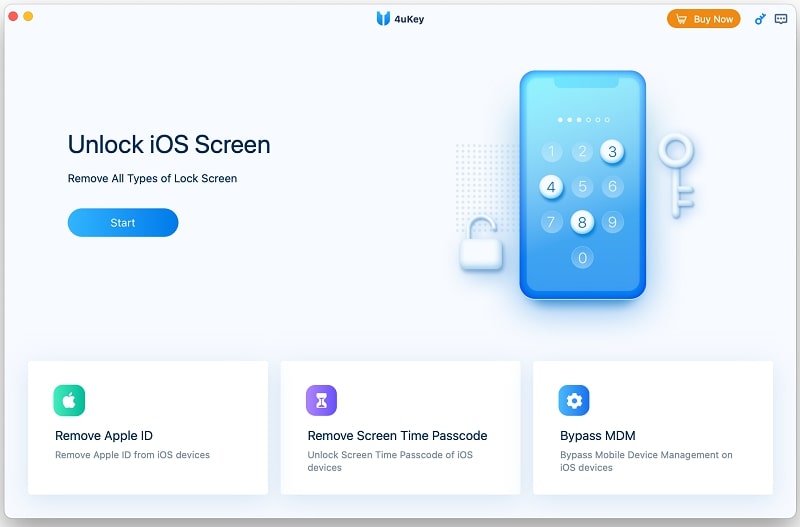
Step 1. Download and Install Tenorshare 4uKey
You can install the 4uKey program on Mac and Windows. Launch the program and click Start to Unlock to bypass the disabled iPhone.
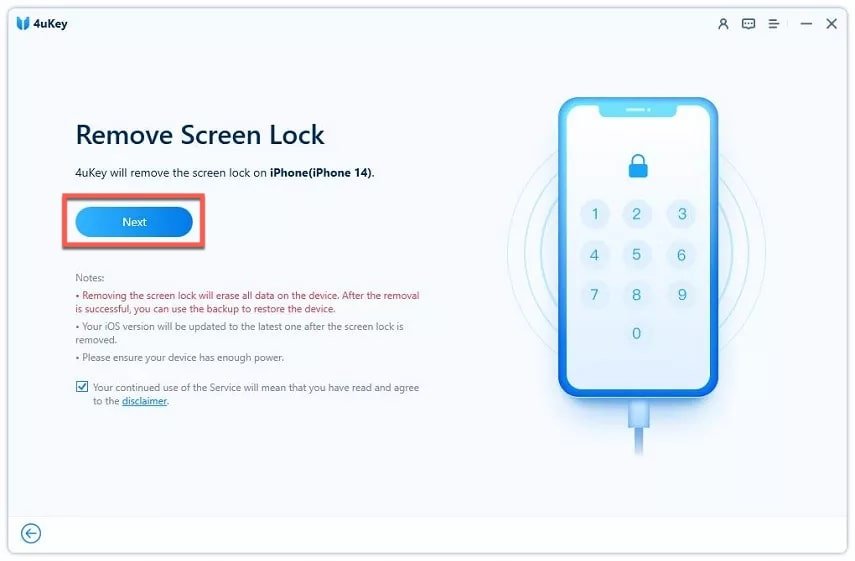
Step 2. Connect the disabled iPhone to the computer.
Once you connect the disabled iPhone to the computer, the program will detect with automatically. Select Next to bypass disabled in iPhone.
Note: In case the computer cannot detect the disabled iPhone, you have to put the device into Recovery Mode. For this, follow the on-screen instructions depending on the iPhone model.
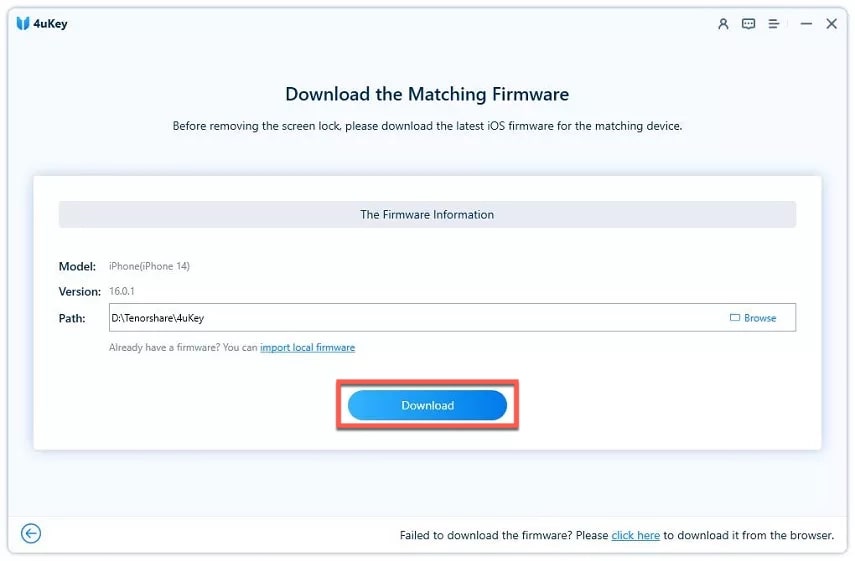
Step 3. After entering the DFU mode (recovery mode), download the firmware package to bypass iPhone’s the disabled message.
Tenorshare 4uKey will download the firmware package depending on the iPhone model. Ensure that the computer has enough storage space (the firmware will occupy over 7GB of space).
Step 4. Bypass the “iPhone Unavailable Try again in 1 hour” message.
Once the firmware is downloaded, click Start to Remove to bypass the passcode from iPhone.
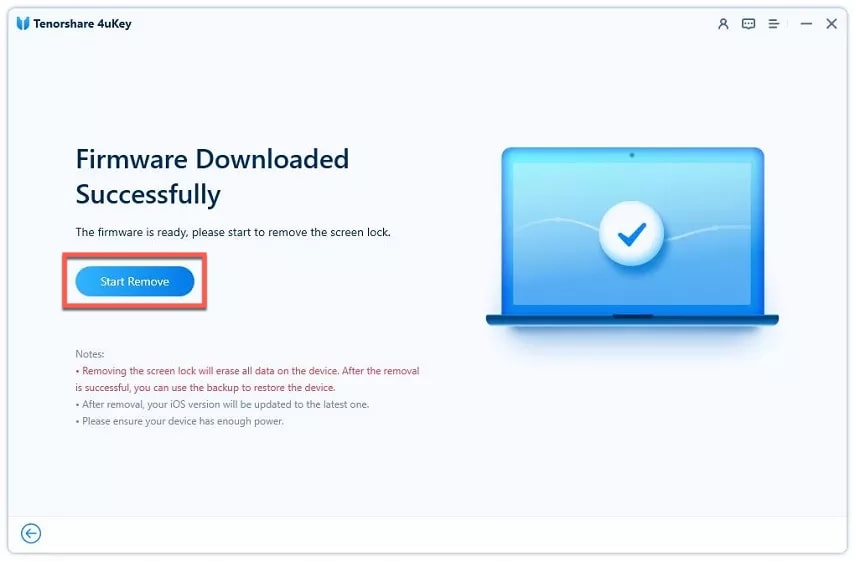
Tenorshare 4uKey will take a few minutes to bypass the disabled iPhone. Ensure that the iPhone is connected to the computer throughout the process. Once the iPhone is unlocked, you can set up new passcode, Touch ID, or Face ID. You can restore the data via iCloud or iTunes backup.
Method 2: How to Bypass Unavailable iPhone Using the Erase iPhone Option?
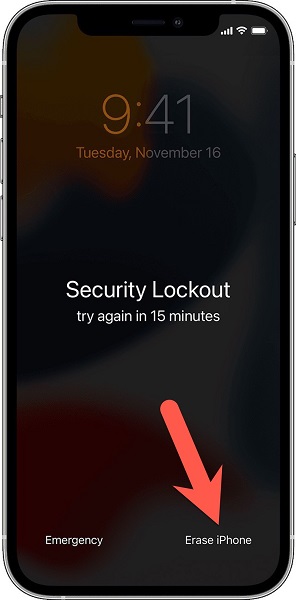
The iOS 15.2 or later versions of the iPhone include a feature (the Security Lockout) to bypass the “iPhone is disabled” message. That is — after entering the multiple wrong passcodes, you will see an “Erase iPhone” message at the bottom-right part of the lock screen.
Once you click on the Erase iPhone message, you can bypass the disabled iPhone. However, all the data in the iPhone will be erased.
Note: Your iPhone must be connected to a WiFi or Cellular network to verify the Apple ID. If it’s not connected, you cannot use the Security Lockout method to erase all the contents and Settings.
Step 1. Enter the passcode up to 5 times to see the iPhone Unavailable message on the Lock Screen. You will see a message saying, “Try again later.”
Step 2. When the iPhone allows you to enter the passcode again, enter the passcode (any characters) until you see the Security Lockout screen, you will see the Erase iPhone message at the bottom-right corner of the Lock Screen.
Step 3. Click on the Erase iPhone message. On the next screen, click on Erase iPhone to confirm.
Step 4. Enter the Apple ID password to sign out of the Apple ID from the iPhone.
Click Erase iPhone to reset the iPhone to Factory Settings.
Once the device restarts, follow the on-screen instructions to set up the iPhone. You can use iCloud or iTunes backup to restore the data.
Note: If you are using iPhone running on iOS 15 or earlier versions, you will have to use a computer to erase all contents and Settings from the iPhone; follow the instructions in the next sections to bypass iPhone is disabled message.
Method 3: How to Bypass iPhone is Disabled Using iTunes Recovery Mode?
Using iTunes or Finder, you can bypass the “iPhone Unavailable, Try again in 1 hour” message. For this, you have to put the iPhone into recovery mode. Once again, all the data on the iPhone will be erased; however, if you have a backup, you can restore the data easily.
Step 1. You can use Windows (10 or later OS versions) or a Mac computer. If you are using a Windows computer, install the latest version of iTunes.
Step 2. Turn off the disabled iPhone depending on the iPhone model; follow the steps:
- For iPhone 8, 8 Plus, iPhone X, and later models: Simultaneously press the Power button and Volume down button until you see the Power off slider. Slide the button to turn off the disabled iPhone.
- For iPhone 7, 7 Plus, iPhone 6s, and iPhone 6 models: Press and hold the side button till you see the Power off slider.
- For iPhone SE (1st gen), iPhone 5s, and earlier models: Press the top button. Once you see the Power off slider, drag the slider to turn off the disabled iPhone.
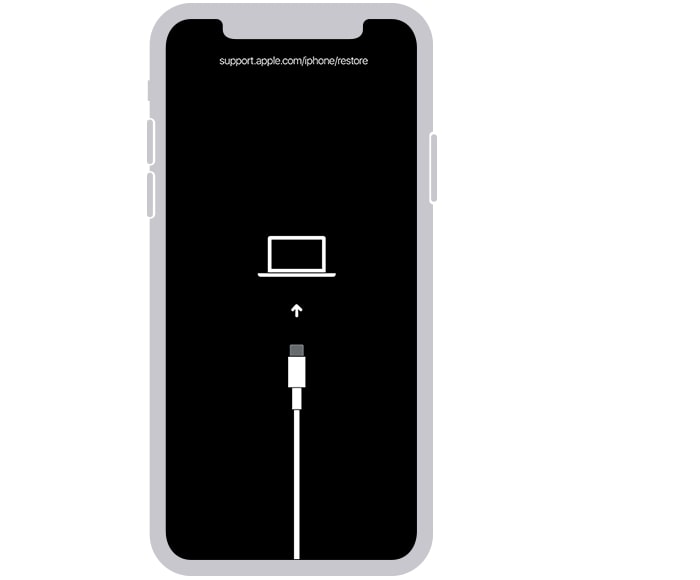
Step 3. After turning off the disabled iPhone, you have to put the iPhone in recovery mode. Follow these steps — depending on the iPhone model to put your iPhone into recovery mode:
- For iPhone 8, 8 Plus, iPhone X and later models: Press and hold the Power button. While holding, connect the iPhone to the computer on which iTunes is installed.
- For iPhone 7, 7 Plus models: Press and hold the Volume down button and connect the iPhone to the computer.
- For iPhone SE (1st generation), iPhone 6s, and earlier models: Press and hold the Home button while connecting the iPhone to the computer.
Ensure to keep holding the Power button, Volume down button, or Home Button (depending on the iPhone model) until you see the Recovery mode screen on the iPhone.
Note: If you do not enter Recovery mode, you will see the Lock screen. If that is the case, repeat the above steps carefully.
Step 4. Bypass the “iPhone is disabled” message by restoring the Settings and erasing the data using iTunes or Finder.
Find the iPhone in the Finder (under Locations) or iTunes (iPhone icon in the main menu) applications on the computer.
Click the Restore option. On the pop-up, click on Restore to confirm.
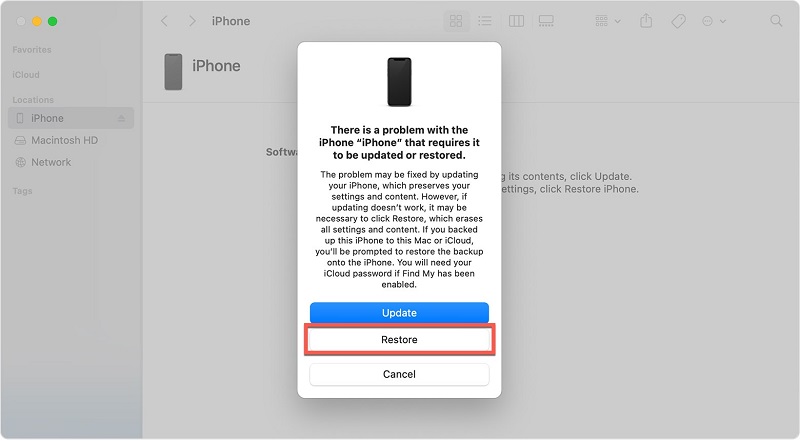
Once you click the Restore option, iTunes or Finder will verify the iPhone’s software and download the required firmware.
- Once the download is complete and the Restore process is completed, the iPhone will exit the Recovery mode.
- Turn off the iPhone and Turn it on.
- Disconnect the iPhone and set up the iPhone.
That’s how to bypass disabled iPhones using iTunes. Restore the data from a backup on iTunes or iCloud.
Method 4: How to Bypass iPhone is Disabled Using Find My iPhone?
Find My iPhone is a built-in feature by Apple to locate lost or stolen devices. The good thing is it also allows you to erase all Settings and contents of the iPhone remotely. Plus, it is available on all iOS versions.
This means you can restore the iPhone to factory settings and bypass the “iPhone Unavailable, Try again in 1 hour” message. However, for this method to work — you must have turned on the Find My iPhone feature beforehand.
Here’s How to Bypass iPhone is Disabled Using Find My iPhone:
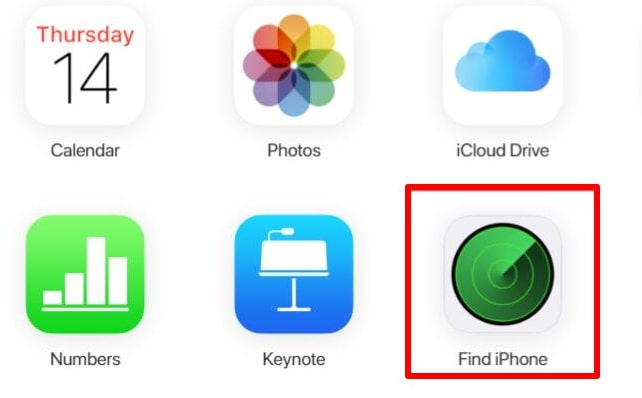
Step 1. Go to iCloud.com and sign in via the Apple ID registered on the disabled iPhone.
Select the Find iPhone icon to log in to the iCloud Find My iPhone page.
Step 2. Select All Devices and choose the disabled iPhone name.
On the iPhone page, click Erase iPhone.
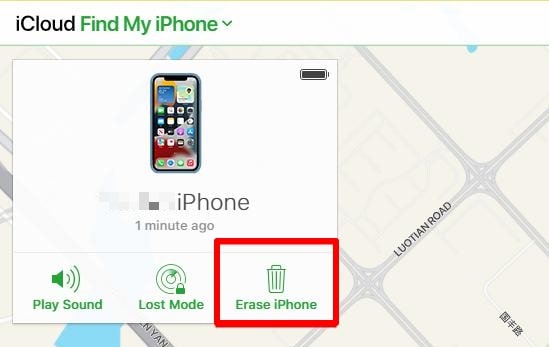
Follow the on-screen instructions to delete all Settings and restore the iPhone to factory settings. Use the iCloud backup to restore data.
Method 5: How to Bypass iPhone is Disabled Using iTunes without Data Loss?
You can also bypass the disabled iPhone without losing data using iTunes. However, this method works only if you have previously synced the iPhone with iTunes on your computer. Follow these simple steps:
Step 1. Connect the disabled iPhone to the computer that you previously used to sync your iPhone with iTunes.
Open iTunes and wait for the program to recognize the connected iPhone.
Note: If iTunes asks for a passcode, it means that the computer does not recognize the connected iPhone. And you cannot use this method to bypass the disabled iPhone. Follow the above-mentioned method, i.e., bypass the disabled iPhone using iTunes (Recovery Mode) option.
Step 2. Click on the Summary Tab and click on Restore iPhone.
Choose the Restore option when prompted. And ensure to choose Restore from backup instead of Set up as new iPhone option.
Select the desired backup that you want to restore from the list of available iTunes backups.
Wait for iTunes to restore iPhone, and the process is completed; iPhone will not be disabled. You can use it like previously without any data loss.
Frequently Asked Questions About iPhone is Disabled Try Again in 1 Hour
1. How to restore your device from a backup on your computer?
After bypassing the disabled iPhone and unlocking the iPhone, follow the steps to restore your device from a backup:
- Open iTunes or Finder.
- Connect the iPhone to the computer using a lightning cable. You will see a “Trust This Computer” alert on the iPhone. Click on Trust to proceed.
- Select the inserted iPhone.
- Choose Restore Backup. You will find different backups; choose the most recent one. And click on Restore. If prompted to enter a password, use the one you created to encrypt the backup.
- Wait for the process to complete and eject the iPhone after the restore is complete.
2. How to Avoid a disabled iPhone message?
You can avoid getting the disabled alters by changing the Numeric passcode to Touch ID or Face ID. Additionally, there are other tricks to avoid “iPhone is disabled” messages. Follow these tips to avoid disabled iPhone alerts:
#Tip 1. Set an easy numeric passcode and write it down. So, you will never forget and can avoid wrong attempts in the future.
#Tip 2. Use Touch ID and Face ID (depending on the iPhone model) to avoid using a passcode altogether.
#Tip 3. Customize the Auto Lock Time.
- Go to Settings.
- Choose Display & brightness.
- And select Auto Lock.
- Choose a desired time and increase it from 30 seconds to 1 Minute, 2 Minutes, 3 Minutes, or something else.
3. What does error 9, 4005, 4013, or 4014 mean on an iPhone?
You might encounter these errors while trying to restore a backup from your iPhone. These errors prevent you from using your device as you will only see the “ iPhone could not be restored. An unknown error occurred (4013)” message.
To fix 9, 4005, 4013, or 4014 errors:
- Ensure to use the latest version of iTunes for backup.
- Update the system OS to the latest iOS version.
- Force restart the iPhone.
- Restore the iPhone using a different computer.
Conclusion
These are the safest and quickest ways to bypass the disabled iPhone. One of these methods must have worked, and you must be back on your device. You can also restore the data using your iTunes or iCloud backup.
To avoid this situation again in the future, ensure to create a memorable passcode. Or at least write it down on a note for future reference. Additionally, back up the iPhone regularly to restore data if you have to reset it again.