Read Only in Excel Files is a protective feature that prevents others from modifying the file’s content. You can always tell if an Excel file is Read Only, given that you will see an alert message while opening the file. With a Read Only status, the Excel file will prevent you from editing content or even saving the file in a different format. Nevertheless, it is simple to remove Read Only in Excel.
In this guide, we will show you how to remove Read Only in Excel in different ways. The instructions in this tutorial guide for removing Read Only in Excel are straightforward and include images, so even tech novices can follow them conveniently.
Note: Instructions in this article apply to Excel 2021, 2019, 2016, and 2013, as well as Excel for Office 365 and Excel for Mac.
What Is Read Only in Excel?
Read Only means the original author does not want you to modify the contents of the Excel file.
There are several reasons for an Excel file to have Read Only restrictions. Some of the common ones are:
a. Location of the Excel file
- If you have downloaded the Excel file from the internet, by default, the Excel file will have Read Only status.
- If the Excel file is stored in the Network folder and you do not have Network permissions (like from the Admin on the Network), the Excel file will have Read Only restrictions.
- If the file is stored on an external device, like a USB flash drive, CD, or DVD, the Excel file will have Read Only restrictions.
When you open an Excel file with Read Only restrictions imposed because of Network location, you must click on the “Edit Anyway” option at the top to remove Read Only from Excel.
b. Current being Edited by Another User
- The online versions of Excel have options to restrict editing to one user at a time.
- Even in the offline versions (from Excel 2010 onwards), there is an option to Share Workbook, which also has similar restrictions.
So, if the document is being edited by someone else, you will have to wait before being able to edit the contents. You can use the “Notify” function to get informed when you can edit the Excel file.
c. Spreadsheet Settings
- There are Settings within Excel to protect a file or restrict the editing features.
We will discuss bypassing Settings and removing Read Only from the Excel file.
d. File Corruption
- Some Excel files are corrupted, and you might be able to remove Read Only from Excel.
You can use the “Save as” function to make a copy of the corrupted file and remove Read Only from Excel.
There are other possible reasons, like the Reduced Functionality Mode (which means your Office license is expired). In some cases, your Antivirus might be trying to prevent you from removing Read Only restrictions from the Excel file.
Whatever the reason, scroll down to learn how to remove Read Only from Excel.
Solution 1: Remove Read Only on Excel File Protected by “Mark As Final”
The most fundamental method to make an Excel Read Only is by marking it as final. The original author might have marked the Excel file as final to discourage editing or modification of content in the Excel file.
And the obvious tell-tale sign to confirm whether the Excel file is Marked As Final or not is the yellow ribbon on the top with a message saying: ‘Marked as Final: An author has marked this workbook as final to discourage editing.’
You can remove this Marked as the Final stamp in two ways:
a. Via Edit Anyway
The Excel workbook Marked As Final has an option of Edit Anyway. Click on the Edit Anyway option to remove the Read Only status of the Excel workbook.

Once you click on the Edit Anyway option, Excel will allow you to edit the contents of the Excel file.
b. Via Protect Workbook
You can also navigate to Settings and alter the Protect Workbook settings to remove Read Only from the Excel file. For this:
- Go to File.
- From the left pane, choose Info.
- Click on the drop-down button in the Protect Workbook option.
- From the list of options, select Mark as Final.
This would remove the Read Only from the Excel workbook if it were enabled beforehand.

Solution 2: Remove Read Only on Excel File By Save As A New File
The File>Save As option in Excel allows you to make a copy of the file and save it in a different location. However, when you save the file in a different location, you can remove the Read Only settings from the properties. This method to remove Read Only in Excel only works for files that are not password-protected and only have editing restrictions.
Remove Read Only on Excel File By Save As A New File
- Open the Excel file with Read Only restrictions.

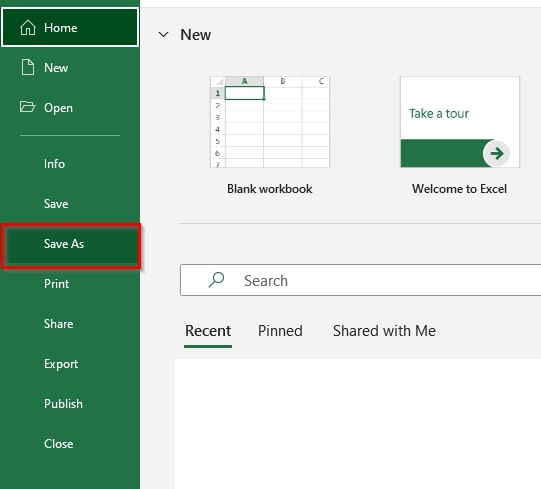
- Select File. Then, choose the Save As option.
- Choose a folder to save the new Excel file that you will create.
- Also, click on Tools. And from the drop-down list, choose General Options.
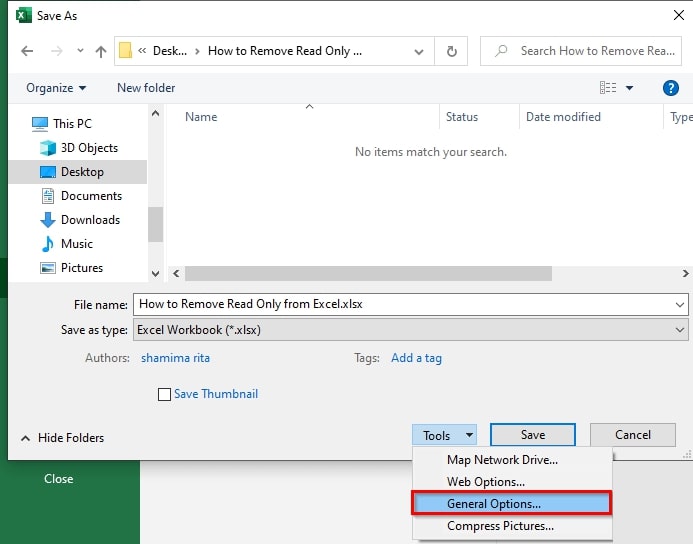
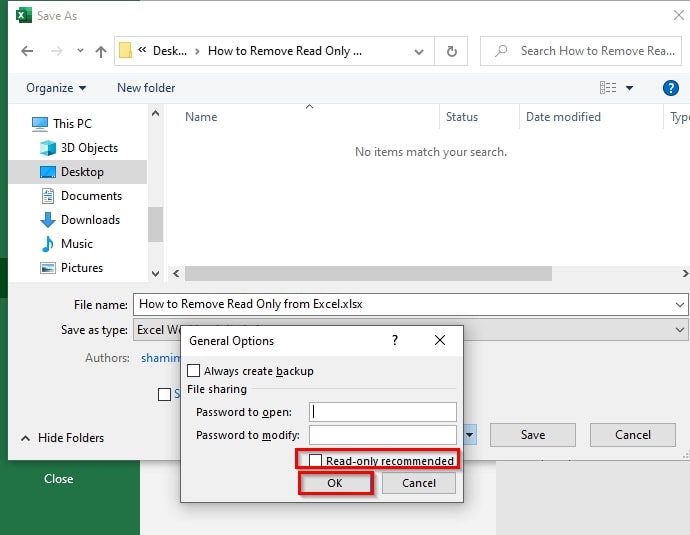
- When you select General Options, you will see a new dialog box on the screen.
- Uncheck the box assigned to Read Only recommended.
- And select OK.
- And click Save to save the Excel file in a different location.
Now open the new Excel file. And you will not find any editing restrictions. You can change the structure of the content conveniently.
Remove Read Only from Excel Using Google Sheets
Another way to Read Only from Excel is via Google Sheets. That is to say — you can open the Excel file with Read Only restrictions with Google Spreadsheets and then save it as a .xlsx file to remove Read Only.
- Navigate to the browser and open the Google Spreadsheet page.
- Click Create to open a new spreadsheet.
Choose File>Open>Select a file from your computer. - Upload the Excel file with Read Only restrictions.
- After uploading the Excel file, click on Download.
- Choose Microsoft Excel (.xlsx) to download the file in the same format but without Read Only restrictions.
Solution 3: Remove Read Only from Excel Worksheet and Workbook Structure
If the Excel workbook is protected, you will need the password to remove Read Only restrictions from it. (If you do not know the password, skip to the next section that discusses how to remove Read Only from Excel without a password).
Coming to the password-protected Excel files, there can be protection at
- File level: you cannot open or view the contents of the Excel workbook without the password.
- Workbook level: you cannot change any worksheet in the Excel workbook. You cannot alter the workbook’s structure, like add, move, delete, hide, or rename worksheets. However, you can alter the cell’s contents and the unprotected worksheet tables.
- Worksheet level: you cannot change the contents of a single or more locked worksheet in the Excel workbook. For instance, when Worksheet-level Read Only protection is enabled, you cannot change the cell, column, formulas, or Form Controls.
That said, let’s learn how to remove Read Only from Excel at a workbook or worksheet level.
a. Remove Read Only from Excel Workbook
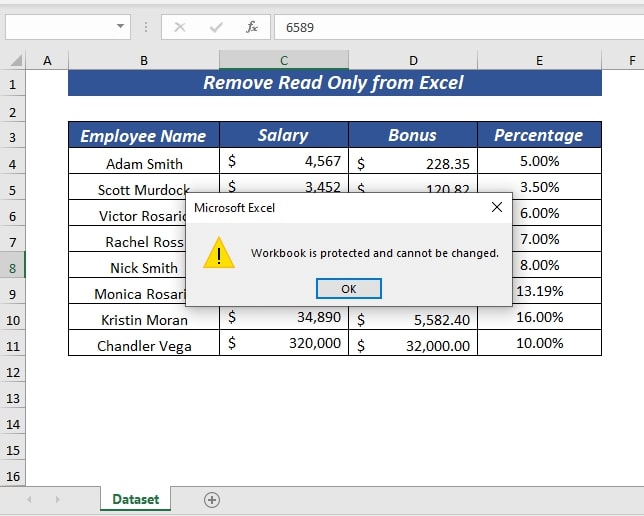
By trying to change the workbook name, you can confirm whether the Excel file is protected at a workbook level. If the workbook is protected, you will see a warning message: “Workbook is protected and cannot be changed.”
- Open the protected Excel Workbook.
- Choose the Review tab from the ribbon.
- Select Protect, and then select Protect Workbook.
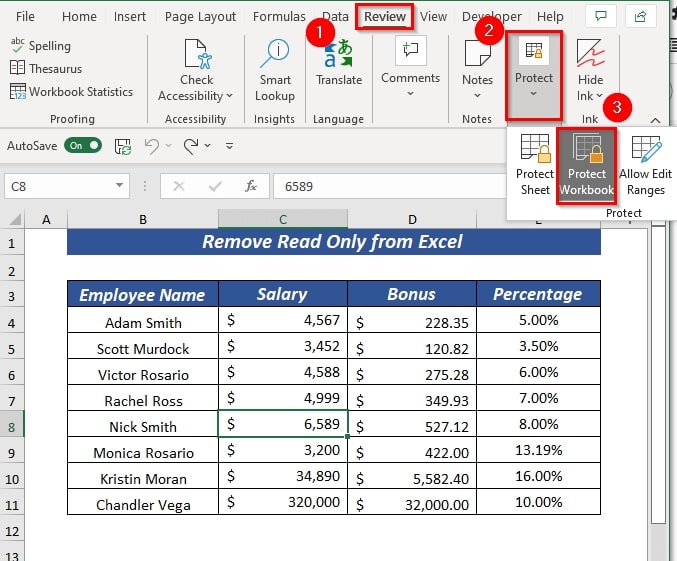
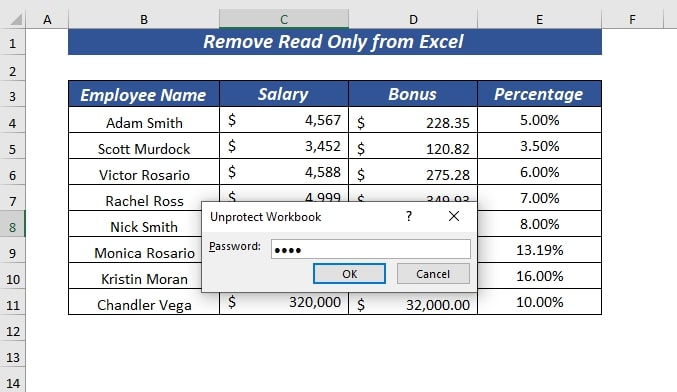
- You will see a pop-up dialog box, the Unprotect Workbook.
- Enter the password.
- Select OK.

Once you enter the password, your Excel workbook will be unprotected. In other words, you have removed the Read Only status from the workbook level.
b. Remove Read Only from Excel Protected Worksheet
If the Excel workbook is protected with a password, then you can use the password to remove the Read Only status. You can easily identify if an Excel workbook is protected with a password by simply reviewing the padlock icon. Or when you try to make a change to a cell, you will see a warning message saying, “The cell or chart that you’re trying to change is on a protected sheet. To make a change, unprotect the sheet.”

To unprotect the Excel worksheet and remove the Read Only status:
- Click Review from the ribbon.
- Choose Protect, and then select Unprotect sheet.
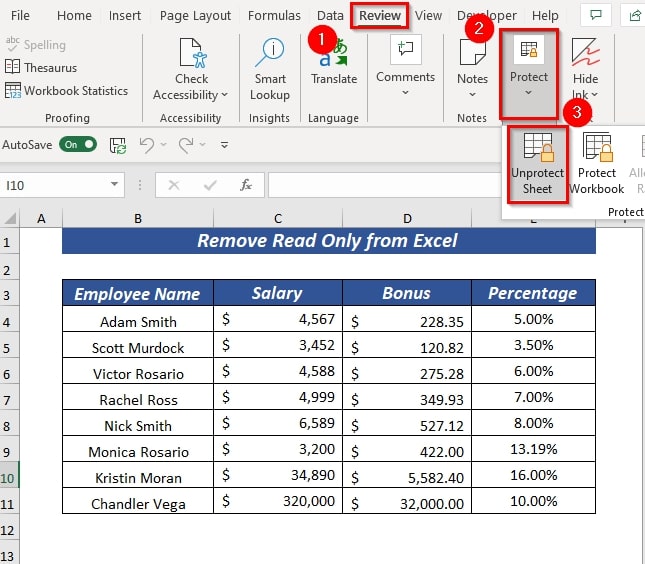
- You will see a pop-up dialog box of Unprotect Sheet.
- Type in the password.
- Select OK.
Once you enter the password, the Read Only status from the worksheet will be removed, and you will make changes to the worksheet (cell, charts, formulas, and more).
Solution 4: Remove Read Only from Excel without Password
To remove Read Only from Excel without a password, you will have to take the help of a third-party Excel password recovery tool. These Tools are designed with an advanced algorithm that decodes the password and removes the Read Only restrictions. One such tool is PassFab for Excel.
PassFab for Excel
PassFab for Excel is an unlocker tool that can unprotect Excel files and restrictions at a workbook and worksheet level. It works on all versions of Excel, including 2019, 2016, 2000, 2013, 2010, 2007, 2003, 97, etc. Additionally, it is simplistic to use, so even though you are a tech novice, you can conveniently remove the Read Only from the Excel workbook and worksheet.
>> Get PassFab for Excel Coupon (30% OFF) <<
Here’s How to Remove Read Only from Excel Using PassFab for Excel:
- Download and Install PassFab for Excel.
- Open the tool.
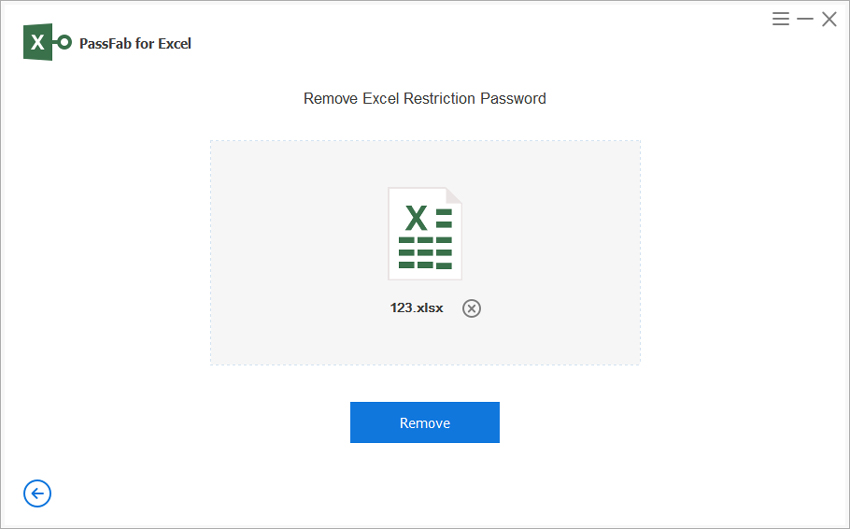
- On the main interface, choose Remove Excel Restriction Password.
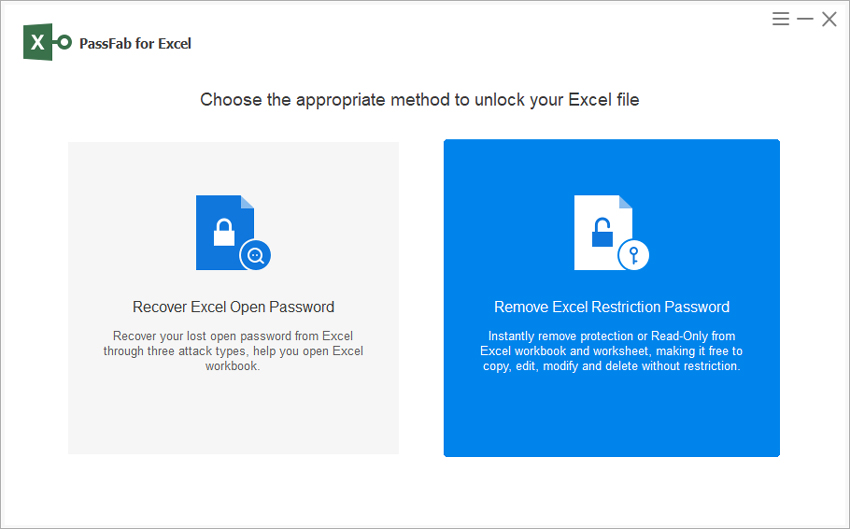
- Choose the Please import the Excel file option and add the protected Excel file.

- Select “Remove” to remove Read Only from the Excel file.
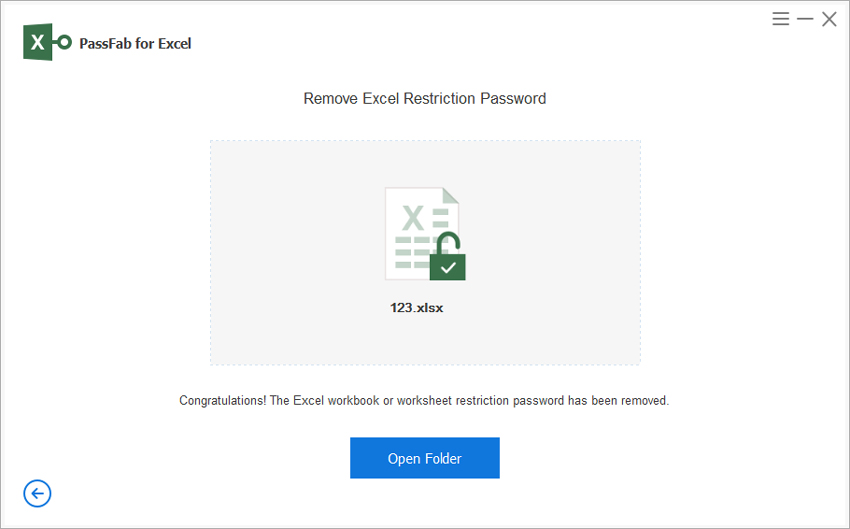
- Once you click on Remove, PassFab for Excel will remove the restrictions from the Excel file.
Frequently Asked Questions About Read Only in Excel
1. How to Protect an Excel Workbook?
You can prevent unwanted changes to the workbook structure by following these simple steps:
- Open the Excel document.
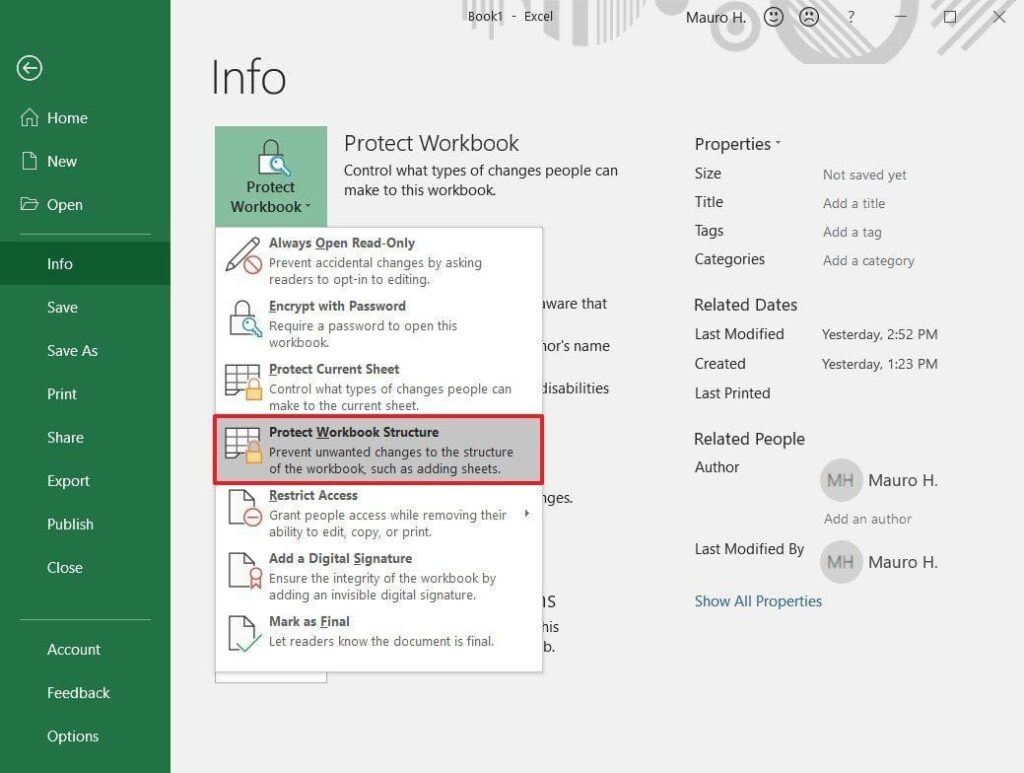
- Select File>Info.
- From the right pane, choose the Protect Workbook menu.
- Choose the Protect Workbook Structure option.
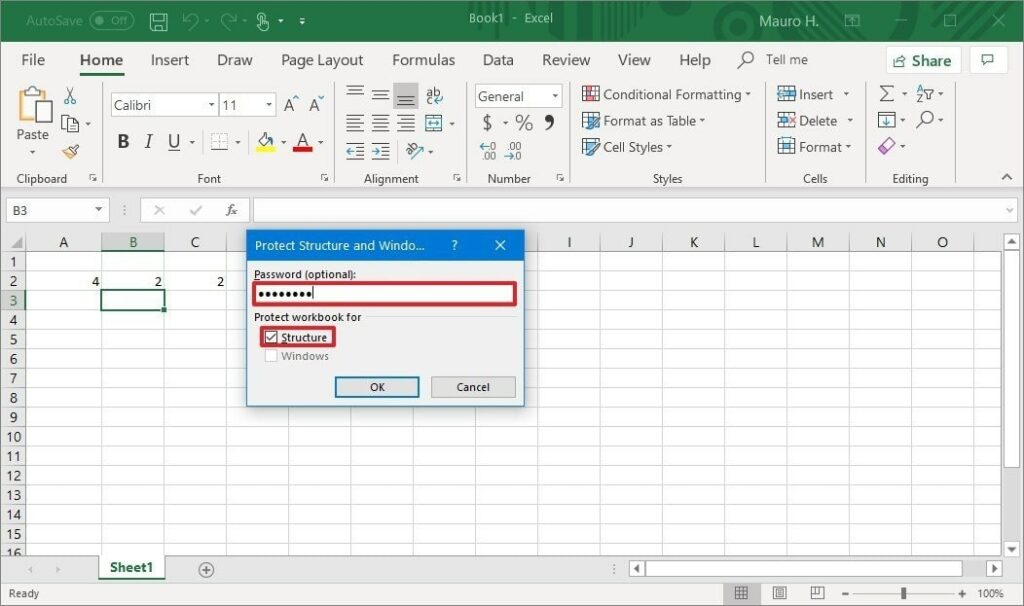
- Use a password to protect the workbook. (Remember this to unlock the Excel file later).
- Under the “Protect workbook for” section, check the Structure option.
- Click OK.
- Confirm the password.
- Select OK to protect the workbook with a password.
2. How to Protect an Excel Worksheet?
You can protect an Excel file at the worksheet level by
- Open the Excel file.
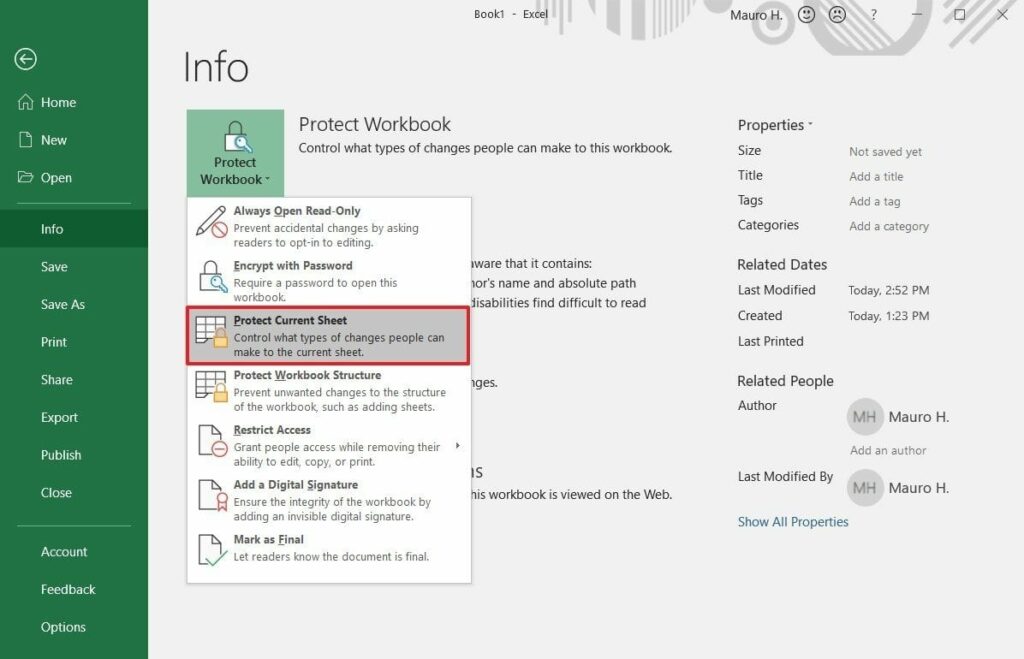
- Choose File>Info.
- Choose Protect Workbook.
- Select the Protect current sheet option.
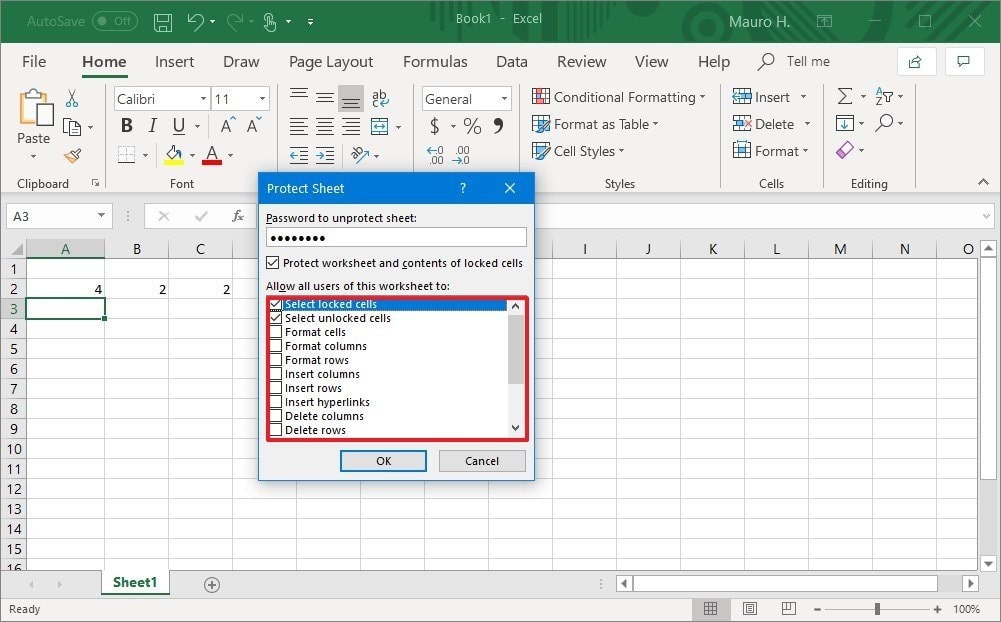
- Use a password to protect the worksheet.
- Select the edits users are allowed to make.
- Click OK.
- Confirm the password.
- Select OK to protect the worksheet.
3. How Should I Choose Whether to Exit the Protected View (read-only) mode in Excel documents?
It depends on you to choose whether to Exit the Read Only mode or not. For instance, if the Excel file came from someone you trust, you can remove the Read Only restrictions.
Similarly, if it came from an unknown source or seems suspicious, you can avoid exiting the Read Only mode.
In conclusion
That’s how to disable Read Only in Excel.
The method to remove Read Only in Excel depends on how the restrictions were imposed in the first place. That is why we have explained all the signs of different types of restrictions and provided a solution to deal with them. Other solutions, like Turning your Antivirus off or Updating the Office license, are rarely the cause, but they can be a reason for an Excel file to have Read-only restrictions.
Of course, if the normal solution does not work, you can always use third-party tools like PassFab for Excel to remove the Read Only from Excel with a single click.